
I once stood on a job site in 1994, watching a lad try to smooth out a fresh slab while the ground underneath was still nothing but loose, uncompacted topsoil. He was so proud of that smooth finish, but I knew right then that within two years, that driveway would look like a jigsaw puzzle of cracks. Most people think learning how to lay a concrete driveway is all about the screeding, the bull float, and getting that surface looking pretty for the neighbors. They’re dead wrong. If you spend all your energy on the surface and none on the guts of the job, you aren’t building a driveway; you’re just building a future headache.
In this guide, I’m going to skip the fluff and tell you how it’s actually done on a proper site. We aren’t going to talk about fancy decorative finishes or expensive tools you don’t need. Instead, I’m going to walk you through the heavy lifting: getting the sub-base compacted until it’s rock solid, managing your moisture, and understanding why the hour before the truck arrives is the most important part of the whole process. If you want a driveway that actually stays put, listen up.
Table of Contents
Guide Overview
Tools & Supplies
- Shovel for digging and leveling the subgrade
- Plate compactor to stabilize the base material
- Screed board for leveling the wet concrete
- Bull float to smooth the surface
- Edger to create finished perimeter edges
- Trowel for fine finishing
- Concrete mix (volume based on driveway dimensions)
- Crushed stone or gravel for the base layer
- Rebar or wire mesh for reinforcement
- Wooden forms for shaping the perimeter
- Form release agent or oil to prevent sticking
Step-by-Step Instructions
- 1. First thing you do—and I mean the absolute first thing—is get your hands in the dirt. You don’t just dig a hole and hope for the best. You need to excavate down to a solid, undisturbed stratum. If you’ve got soft topsoil or organic muck sitting in there, you might as well be pouring your concrete on a sponge. Dig it out until you hit something that doesn’t budge, and then you start building your foundation from the bottom up.
- 2. Now, we talk about the sub-base, because if you skip this, don’t bother calling me when it cracks in six months. You need a good, thick layer of MOT Type 1—not the cheap rubbish, the proper crushed stone. Spread it out in layers, maybe 50mm to 75mm at a time, and you better have a heavy-duty vibrating plate compactor. If you don’t compact that sub-base until it’s rock hard, you’re just setting a timer on a structural failure.
- 3. Once your base is solid, it’s time for the formwork. Get your timber shuttering in place and make sure it’s braced like your life depends on it. Concrete is heavy, and it’s got a nasty habit of pushing timber out of alignment if you haven’t pinned it down right. While you’re at it, check your levels. You need a slight fall—maybe a 1 in 60 gradient—so the rain actually runs off the driveway instead of sitting in a puddle in the middle of it.
- 4. Before the truck pulls up, get your reinforcement in. I don’t care what the “quick fix” crowd tells you; you want steel mesh. Lay your A142 or A193 mesh on some plastic spacers. If that steel is sitting on the ground, it’s useless. It needs to be suspended in the middle of the slab so it can actually do its job of holding the tension. If the mesh is at the bottom, it’s just expensive decoration.
- 5. When the concrete arrives, keep the water away from it. I’ve seen too many lads add a hose to the mix because it was “too stiff” to spread. That’s how you kill the strength. Pour it, spread it, and use a poker vibrator to get the air bubbles out, but don’t overdo it or you’ll sink the aggregate to the bottom. You want a consistent, workable mix that hasn’t been watered down into soup.
- 6. Once you’ve leveled it off with a screed board, you’ve got to manage the finish. Don’t go in too early with the float or you’ll bring all the “fines” and water to the surface, which makes the top layer weak and prone to dusting. Wait until the bleed water has disappeared, then start your bull floating. You’re looking for a surface that’s smooth but still has enough grip for a car tyre.
- 7. The job isn’t done when the surface looks pretty. You have to plan your joints. If you don’t cut control joints at the right intervals, the concrete will decide where it wants to crack, and it won’t be where you want it. Use a saw to cut deep, clean lines into the slab once it’s set. It’s better to control the crack with a saw than to let the ground dictate a jagged mess across your hard work.
The Invisible Battle Mastering Subgrade Preparation for Concrete
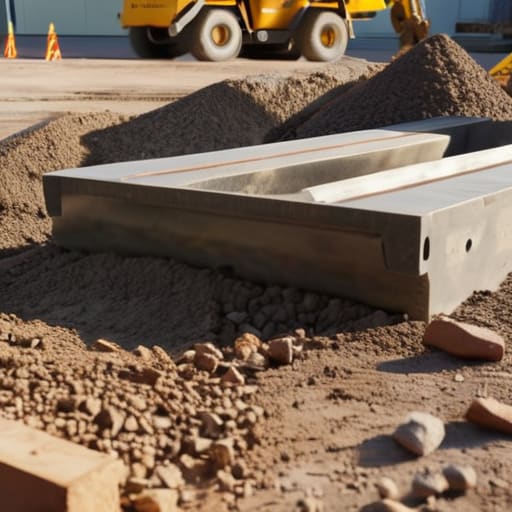
Listen, you can spend all day picking out the best concrete mix ratio for driveways and obsessing over the finish, but if you ignore what’s happening under the surface, you’re just building a disaster. I’ve seen lads spend a fortune on high-spec mixes only to watch the whole slab tilt two years later because they were lazy with the dirt. Proper subgrade preparation for concrete isn’t about making it look tidy; it’s about ensuring there isn’t a single soft spot or a pocket of organic matter waiting to settle. You need to dig out the topsoil, get down to the firm stuff, and compact it until it doesn’t budge.
If I see a guy trying to pour over loose sand or uncompacted clay, I’ll walk off the job myself. You need a solid, well-compacted layer of MOT Type 1—and I mean actually compacted in layers, not just dumped in a heap and driven over once. If that base isn’t uniform, you’re essentially inviting the ground to swallow your investment. Get the subgrade right, or don’t bother calling the truck at all.
Why Your Concrete Mix Ratio for Driveways Matters More Than the Finish
Listen, I’ve seen plenty of lads get so obsessed with whether the surface looks like a mirror that they completely ignore what’s actually inside the mix. You can have the best concrete finishing tools in the world, but if you’re working with a weak, watery soup, you’re just polishing a disaster. A driveway isn’t a garden path; it’s taking the weight of a two-ton vehicle every single day. If your concrete mix ratio for driveways is off—too much water to make it “workable” or too much sand and not enough stone—you aren’t building a driveway, you’re building a future pothole.
The temptation to add a splash of water from the hose when the mix looks a bit stiff is where most people ruin their lives. It makes the pour easier for you, sure, but it destroys the strength of the slab once it sets. You’re essentially diluting the glue that holds the whole thing together. If you want to avoid the nightmare of preventing concrete cracks later on, you have to respect the chemistry. Stick to the specified strength, keep the water to a minimum, and don’t let anyone on your site tell you otherwise.
Five Things That’ll Save Your Back and Your Reputation
- Stop obsessing over the screed and start looking at the weather; if you see a heatwave coming or a sudden frost in the forecast, don’t even think about calling the plant, because no amount of curing compound can fix concrete that’s been cooked or frozen before it’s set.
- Watch the driver like a hawk when the truck arrives—if you see him reaching for the hose to add water to the drum because the mix looks “stiff,” stop him right there, because that extra water is just a shortcut to a weak, shrinking mess that’ll crack within a year.
- Don’t get stingy with your expansion joints; I’ve seen too many lads try to save a bit of time by spacing them too wide, only to spend the next decade watching the driveway buckle and heave because the slab had nowhere to breathe.
- If you’re working on a slope, your sub-base needs to be more than just “level”—it needs to be stepped and compacted in layers, or you’ll end up with a slab that’s thick in one corner and paper-thin in the other, which is a recipe for a structural nightmare.
- Learn the difference between “wet” and “workable”—you want a mix that holds its shape when you poke it, not one that slumps like porridge, because if it’s too runny, you’re basically just pouring liquid sand that’ll settle and crack the moment a car drives over it.
Don't Let the Easy Way Out Cost You Double
Look, if you’ve followed what I’ve said here, you know a driveway isn’t just about spreading grey sludge and smoothing it over. It’s about the hours you spent compacting that sub-base until your back ached, getting the mix ratio exactly right so it isn’t watered down by some lad trying to make it easier to spread, and actually caring about the curing process once the screed is done. If you skip the prep or try to cheat the chemistry by adding extra water on-site, you aren’t saving time; you’re just scheduling a headache for yourself two years down the line. A driveway is only as good as the invisible work you did before the first shovel hit the ground.
At the end of the day, you can buy the most expensive tools and the fanciest finishing trowels, but they won’t fix a foundation built on laziness. I’ve spent forty-three years watching people try to rush the process, and I’ve seen the cracks they leave behind. Do it properly the first time. Take the extra hour to check your levels, respect the weather, and treat your sub-base like it’s the most important part of the job—because it is. Build it with the pride of a craftsman, and I promise you, that concrete will still be sitting there, solid and true, long after the cheap jobs have crumbled into the dirt.
Frequently Asked Questions
How do I know if I've compacted the sub-base enough, or am I just guessing?
If you’re guessing, you’ve already lost. I don’t care how much you’ve run that plate over; if you can still leave a visible indentation with your boot or a heavy screwdriver, it’s not ready. You want to see the material “lock.” When you hit it with the compactor, the ground shouldn’t dance or bounce—it should feel dead and solid under the machine. If it moves, keep compacting. If it doesn’t budge, move on.
What’s the right way to handle the joints so they don't end up cracking in the wrong places?
Listen, if you don’t tell the concrete where it’s allowed to crack, it’ll find its own way—and it won’t be pretty. You need control joints, and you need them planned before you even think about the screed. Don’t just eyeball it; use a saw or a jointing tool to create a weak point. Space them right—usually about two and a half to three times the slab thickness. If you skip the joints, you’re just building a ticking time bomb.
If the weather turns and it starts pouring rain right after we finish, am I completely stuffed?
Not necessarily, but you’re in a tight spot. If the rain hits while the surface is still wet and plastic, it’ll wash out your cement and leave you with a surface like sandpaper—weak and pitted. If it’s already set, you might breathe a sigh of relief. The real danger is heavy rain hitting a fresh pour before it’s cured; it can scour the paste right off. Get some plastic sheeting over it immediately. Don’t wait.



