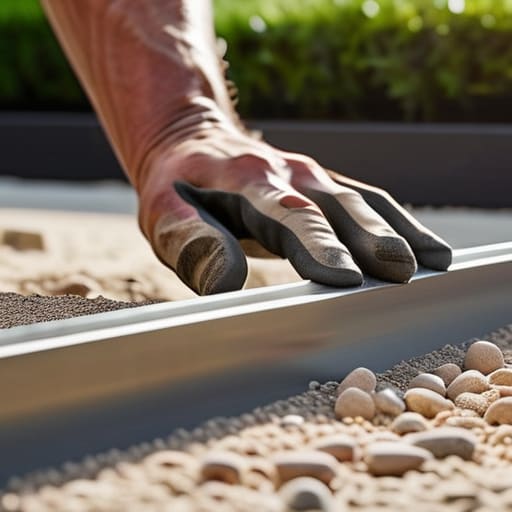
I’ve lost count of how many times I’ve walked past a “professional” driveway only to see the blocks dipping like a row of bad teeth after the first frost. Most people think the secret to a good driveway is picking the right colour or a fancy pattern, but that’s nonsense. If you want to understand how block paving is laid properly, you need to stop looking at the stones and start looking at the dirt. I remember a job back in ’98 where a lad tried to save a few quid by skipping the heavy compaction on the MOT Type 1; six months later, I was standing there watching a customer’s expensive granite blocks sink into the mud like they were nothing more than pebbles in a stream.
In this guide, I’m not going to give you any of that glossy, showroom rubbish. I’m going to show you the grit and the actual sequence that keeps a patio level for twenty years instead of two. We’ll go through the proper way to prep the sub-base, how to get your bedding sand dead-on, and why your jointing sand matters more than you think. If you’re looking for a shortcut, move along, but if you want to do it right the first time, let’s get to work.
Table of Contents
Guide Overview
Tools & Supplies
- Plate Compactor for settling sub-base and sand
- Rubber Mallet for setting blocks without cracking
- Spirit Level for ensuring a flat, even surface
- Edging Restraints to prevent lateral movement
- Block Paving Stones based on total square footage
- Sub-base Material (MOT Type 1) for structural strength
- Sharp Sand for the bedding layer
- Jointing Sand for filling gaps between blocks
Step-by-Step Instructions
- 1. First thing you do is dig out. You don’t just scrape the grass off; you need to get down to a depth that actually accounts for your sub-base, your bedding layer, and the thickness of the block itself. If you’re doing a driveway, you’re looking at a deep excavation. Don’t be tempted to skimp here—if you don’t dig deep enough, you’ll end up with a wavy, sinking mess before the first frost even hits.
- 2. Now, you need to get that sub-base down and, more importantly, get it tight. I’m talking about a heavy-duty MOT Type 1, laid in layers. You can’t just dump six inches of stone in and hope for the best. You lay it in thin lifts—maybe two or three inches at a time—and you run a heavy vibrating plate over it until it’s solid as a rock. If you can walk across it and leave a footprint, you haven’t done your job, and you’ll be back here fixing it in two years.
- 3. Once the sub-base is sorted, it’s time for your edge restraints. You can’t just let the blocks run off into the garden. You need a concrete haunch or a solid kerb to lock everything in place. If the edges aren’t properly restrained, the whole pattern will start to spread and drift outward like a slow-motion landslide. I’ve seen more paving failures caused by bad edges than almost anything else.
- 4. Next, you lay your bedding sand. This isn’t your average play sand from the garden centre; you need sharp, coarse sand that’s clean and free of fines. You spread it out to a consistent depth—usually around 30mm to 50mm—and you screed it level using straight edges. The trick here is to not walk on it once it’s screeded. You want a flat, even surface that’s ready to take the weight, not a trampled mess of sand ridges.
- 5. Now comes the actual laying. You start from your most stable edge and work your way out, clicking the blocks into place. Don’t just throw them down; you need to lay them firmly into the sand to ensure there are no gaps. Keep your lines straight and your patterns consistent. It’s easy to get carried away with the aesthetics, but remember: accuracy now saves you a headache when you’re trying to finish the last corner.
- 6. Once the blocks are all down, you need to compact them into the bedding layer. You take that vibrating plate—and for the love of god, make sure you have a rubber mat on the bottom so you don’t crack your new blocks—and you run it over the entire surface. This settles the blocks into the sand and pulls the bedding layer up into the joints. This is the step that turns a pile of stones into a single, structural unit.
- 7. Finally, you finish with the kiln-dried sand. You sweep it liberally into all the joints until they are completely full. You don’t want any hollow spots under those blocks. Once the joints are packed, give it one last light sweep and a quick compaction to settle the sand. If you skip the jointing sand, the blocks will move, the sand will wash away in the first heavy rain, and you’ll be back to square one with a loose, rattling patio.
Why Sub Base Preparation for Paving Dictates Your Entire Future
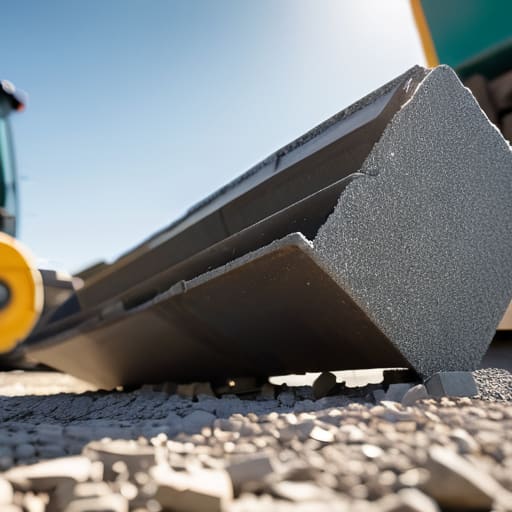
Listen, I’ve seen it a thousand times: a lad spends a fortune on high-end granite or fancy clay blocks, spends three days meticulously cleaning them, and then treats the ground underneath like an afterthought. He’ll throw down a thin layer of MOT Type 1, give it a half-hearted whack with a plate compactor, and call it a day. That’s a recipe for disaster. You can buy the most expensive stone on the market, but if your sub-base preparation for paving is lazy, you aren’t building a driveway; you’re building a future headache.
The sub-base is the skeleton of the whole job. If that layer isn’t deep enough or, more importantly, if it isn’t properly compacted in layers, the weight of a single car will find the soft spots. Once those blocks start to dip, you’re chasing your tail for years. I always tell my lads: if you wouldn’t trust your own house to sit on that ground, don’t put a single block on top of it. You have to be obsessed with the foundation, because preventing block paving subsidence isn’t about what happens when you’re sweeping the sand in—it’s about what you did two days before the first stone even touched the grit.
The Truth About Preventing Block Paving Subsidence Before It Starts
Listen, I’ve seen enough driveways turn into a wavy mess of stone to know that people treat the edges like an afterthought. They think once the bulk of the ground is leveled, they’re home free. That’s a mistake. If you don’t get your edge restraint installation spot on, the whole perimeter starts to migrate outward the first time a heavy vehicle rolls over it. You can have the best stone in the world, but if those edges aren’t locked in tight with a proper concrete haunch or a solid kerb, the blocks will eventually wander, and your neat pattern will look like a spilled bag of marbles.
And don’t even get me started on the bedding. I see lads trying to save time by thinning out the sand, but that sand bedding layer thickness is non-negotiable. It needs to be consistent and, most importantly, it needs to be screeded perfectly level before a single block touches it. If you’re fighting uneven sand, you’re going to end up with hollow spots. Once those gaps exist, the blocks will shift under weight, and that’s exactly how you end up preventing block paving subsidence in name only while the actual ground settles into a sinkhole.
Five things that separate a proper job from a disaster waiting to happen
- Stop obsessing over the pattern and start obsessing over the compaction. I’ve seen lads spend three days picking out the perfect colour of block, only to spend twenty minutes on the sub-base with a plate compactor that isn’t even heavy enough for the job. If you don’t compact that MOT Type 1 in layers—and I mean actual layers, not one big heap—you’re just building a very expensive sandcastle.
- Watch your haunching like a hawk. People think the paving is just the blocks and the sand, but if you don’t get a solid concrete haunching around the edges to lock everything in, those blocks are going to migrate outward the first time a heavy SUV drives over them. A perimeter without a proper edge restraint is just a pile of loose stones.
- Don’t let the “sand trick” fool you. Some of these younger lads think they can just pour a thick layer of sharp sand down and call it a day. You need a consistent, even bed of grit sand, and it needs to be laid to the right depth. If your bed is too thick, it’ll shift; if it’s too thin, you’ll be feeling every single pebble underneath your feet within a month.
- The weather isn’t your friend, so stop pretending it is. If you’re laying in the pouring rain, you’re asking for trouble. You’ll wash out your bedding sand before you’ve even got the blocks down, and you’ll end up with a hollow mess. If the sky looks angry, leave the pallets in the wrap and come back when the ground is actually workable.
- Jointing sand isn’t just for tidying up; it’s the glue. Once the blocks are down and you’ve run the compactor over them, you need to make sure that kiln-dried sand is swept into every single gap until it’s packed tight. If you leave those joints hungry, the rain will get in, wash the sand out, and then the whole lot will start moving like a deck of cards.
The Last Word Before the Sand Goes In
Look, if you’ve followed what I’ve said here, you know that laying block paving isn’t about the pretty patterns or the brand of stone you buy. It’s about the grit, the compaction, and the patience you show before the first block even touches the bedding sand. You’ve sorted your sub-base, you’ve checked your levels, and you haven’t been tempted to cut corners when the sun went down. If you’ve done the heavy lifting correctly, the actual laying is just the victory lap. Just remember: the sub-base is your foundation, and if you skimp on the compaction or the MOT Type 1, no amount of expensive jointing sand is going to save you from a sunken mess come next spring.
At the end of the day, there’s a massive difference between someone who just “does a job” and someone who builds something that lasts. I’ve seen too many lads rush through a driveway just to get to the pub, only to be called back six months later to fix the cracks they caused. Don’t be that guy. Take the extra hour, hit that sub-base until it’s solid as a rock, and do it right the first time. There is a quiet satisfaction in walking across a finished patio knowing it’s not going anywhere. Do it properly, and you won’t just have a driveway; you’ll have a job you’re actually proud of.
Frequently Asked Questions
How much grit or sand should I actually be using for the bedding layer, and does it matter if it's not perfectly level?
Listen, if you’re asking me how much sand to use, you’re already looking at the wrong thing. You shouldn’t be using sand for your bedding layer; you use sharp sand or grit, and you use enough to create a consistent, compacted bed—usually about 30-50mm. And if it isn’t level? Forget it. If that bed is wonky, your blocks will be wonky, and you’ll be chasing dips and hollows for the rest of your life.
If I'm working on a slope, how do I stop the whole lot of blocks from sliding downhill after the first heavy rain?
Listen, if you’re working on a slope, you can’t just treat it like a flat driveway and hope for the best. Gravity doesn’t care about your tidy pattern. You need to build in substantial containment—think heavy-duty concrete haunching or deep, solid kerbing at the bottom to act as a retaining wall. And for heaven’s sake, don’t skimp on the grit; use a coarse, angular sub-base that locks together so the whole mass doesn’t migrate like a slow-motion landslide.
Once the blocks are down and the joints are filled, how long do I really have to wait before I can drive a car over it?
Look, if you’re asking me, you’re already nervous, and you should be. Don’t even think about rolling a car onto that driveway the moment the sand is swept in. Even if it feels solid, those blocks need time to settle into the bed and let the jointing sand lock everything down. Give it at least a full week—two if you’ve had heavy rain. If you rush it, you’ll just be watching those blocks shift under your tyres.



