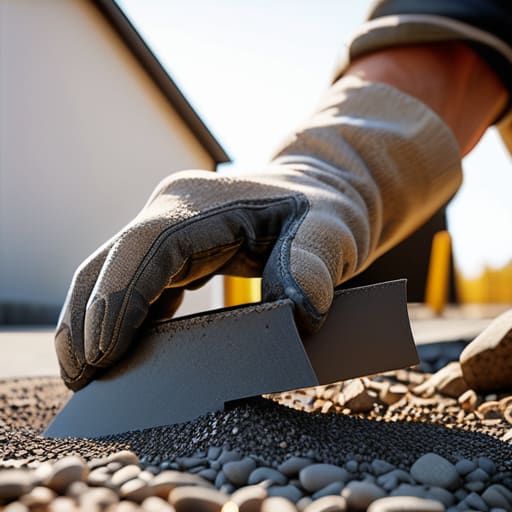
I’ve spent forty-three years watching men chase after the “perfect finish” while completely ignoring the mess they left underneath. I remember a lad on a job back in the nineties—bright enough, but rushed—who spent all his time worrying about the colour of the aggregate and none of his time on the compaction. He thought he knew how resin bound surfacing works, but he forgot that resin doesn’t have a magic wand to fix a soft, uneven sub-base. He ended up with a surface that looked like a biscuit cracker after just one winter, and I was the one who had to stand there and watch it delaminate while he looked at his boots.
I’m not here to sell you on the glossy brochures or the fancy marketing fluff that makes these surfaces sound like they’ll last a century without a bit of care. What I’m going to give you is the truth from someone who’s seen it all go wrong. We’re going to strip away the nonsense and look at the actual mechanics of the build—the grit, the moisture, and the prep work. If you want to understand how resin bound surfacing works without the sales pitch, you need to focus on the unseen layers that actually hold the whole thing together.
Table of Contents
The Truth About Resin Bound Aggregate Composition
Now, once you’ve actually sorted your sub-base—and I mean properly compacted, not just raked flat—you have to talk about what’s actually going into the mix. People tend to get blinded by the colour of the stones, but the real magic is in the resin bound aggregate composition. You aren’t just throwing pebbles into a bucket of glue. You’re looking for a specific grade of stone, usually between 2mm and 6mm, that’s clean and free of dust. If that aggregate is dirty, the resin won’t bite, and you’ll end up with a surface that feels like it’s peeling off a scab.
You’ll also hear folks tossing around terms like resin bound vs resin bonded, and frankly, it’s a distinction that matters more than most installers care to admit. With a proper bound system, the resin coats every single grain, creating those SUDS compliant driveway solutions that actually let the water pass through instead of pooling like a pond. If you skimp on the quality of the resin or use stones that haven’t been washed properly, you’re just building a very expensive, very pretty failure.
Why Uv Stable Resin Technology Actually Matters
Now, listen, you can spend a fortune on the finest decorative stone you can find, but if you’re using cheap, rubbish resin, you’re just throwing money down the drain. I’ve seen it a dozen times: a driveway looks brilliant for six months, and then the sun gets a hold of it. Suddenly, you’re looking at a surface that’s turned a sickly shade of yellow or, worse, started peeling away like old wallpaper. That’s the difference between the real deal and the cut-price stuff. You need UV stable resin technology if you want that finish to actually stay the colour you paid for.
The big mistake people make is getting caught up in the “resin bound vs resin bonded” debate without understanding why the chemistry matters. Bonded stuff is just glue sitting on top of the stone—it’s a surface coating, nothing more. But with a proper bound system, the resin penetrates through the whole lot. If that resin isn’t UV stable, the sun will break those chemical bonds faster than a bad mix in a heatwave. You aren’t just buying a look; you’re buying the chemical integrity that keeps the whole thing from turning into a gravel pit.
Five Things Most Lads Get Wrong Before the Resin Even Touches the Ground
- Stop obsessing over the colour and start obsessing over the sub-base. You can buy the most expensive, UV-stable aggregate on the market, but if you’re laying it over a soft patch of dirt or a poorly compacted MOT Type 1, that surface is going to move. And when the ground moves, the resin snaps. Period.
- Watch the moisture like a hawk. I’ve seen too many jobs where the ground was still damp from a morning drizzle, and someone thought, “Eh, it’ll be fine.” It won’t. If you trap moisture under that resin, you’re just building a ticking time bomb of steam and delamination. The base has to be bone-dry.
- Don’t let them thin it out with water. I know the temptation when the mix feels a bit stiff—somebody will try to “loosen it up” to make it spread easier. That’s a shortcut to disaster. You mess with the resin-to-aggregate ratio to save ten minutes of elbow grease, and you’ll be back there in two years picking loose stones out of the driveway.
- Respect the drainage. Resin bound is supposed to be permeable, but that only works if the water has somewhere to go once it passes through the stones. If your sub-base is a solid, non-porous slab of old concrete with no drainage plan, you’re essentially creating a very expensive, very pretty swimming pool.
- Check the weather forecast, not just the temperature. It’s not just about the heat making the resin set too fast; it’s about the sudden downpour that washes your hard work into the gutter before it’s even cured. If the sky looks even slightly dodgy, you put the tools down and wait. The concrete—or the resin—isn’t going anywhere, but your reputation might.
The Bottom Line on Resin Bound
At the end of the day, resin bound surfacing isn’t some magic trick that fixes a bad job. We’ve talked about why you can’t skimp on the UV stability of the resin and why the aggregate needs to be clean and consistent, but none of that matters if you ignore the fundamentals. You can buy the most expensive, high-spec resin on the market, but if the installer is cutting corners on the mix or—heaven forbid—trying to lay it on a sub-base that hasn’t been properly compacted and dried, you’re just throwing money down a drain. It all comes down to the chemistry of the resin meeting the integrity of the ground. If those two aren’t in sync, you aren’t building a driveway; you’re building a future headache.
I’ve spent forty-three years watching people try to rush the process, thinking they can skip the prep work and still get a decent finish. They can’t. But if you do it right—if you respect the sub-base, get the right UV-stable resin, and don’t let anyone add water to the mix to make it “easier”—you’ll end up with a surface that looks as good in ten years as it did the day the trowel left it. Do the hard work upfront. It’s the only way to ensure that when you look out your window, you’re seeing a professional finish rather than a series of expensive cracks.
Frequently Asked Questions
If the resin is UV stable, why do I still see some driveways turning yellow or looking dull after a few years?
Look, if the resin is truly UV stable, it shouldn’t be yellowing. If it is, you’re likely looking at one of two things: cheap, substandard resin that someone tried to save a few quid on, or a bad mix. But more often than not, it’s just dirt and organic matter trapped in the pores. It isn’t the sun turning it yellow; it’s a lack of maintenance letting grime settle in and dull the finish.
Can I just pour this stuff straight over my old cracked concrete, or do I actually have to rip it all up first?
If you think you can just slap resin over a cracked slab and call it a day, you’re asking for a headache. You might get a nice finish for a month, but those cracks aren’t going anywhere—they’ll telegraph straight through your new surface like they were never hidden. If the concrete is structurally unsound or moving, rip it out. If it’s solid but just surface-worn, you might get away with it, provided you prep it right.
How much water can the surface actually handle before it starts pooling or, worse, lifting away from the base?
Look, if you’re asking about water, you’re already thinking about the wrong thing. A properly installed resin surface is porous; the water should be heading straight through the aggregate and into your sub-base. If it’s pooling, your fall is wrong or your base is saturated. If it’s lifting, you’ve got a moisture problem underneath. It’s not the resin failing; it’s the ground underneath holding onto water like a sponge. Fix the drainage, or don’t bother pouring.



