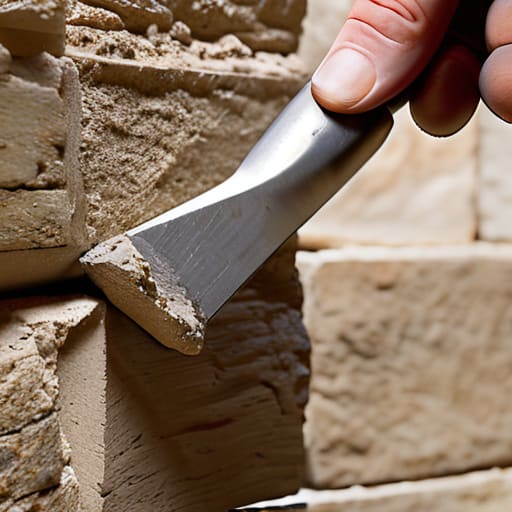
I’ve spent forty-three years watching men sweat over a trowel, thinking that if they just kept their lines straight, they were doing a proper job. But let me tell you something: you can have the straightest line of bricks in the world, but if you haven’t sorted your footing or your mortar consistency, you’re just building a future headache. Most lads think learning how to lay bricks accurately is all about the wrist and the eye, but they’re looking at the wrong end of the tool. I remember a job back in the nineties—a beautiful garden wall that looked perfect on day one, only to start leaning like a drunk before the mortar had even fully cured because the man before me hadn’t even bothered to check the foundation’s stability.
In this guide, I’m stripping away the textbook nonsense and giving you the real-world sequence that actually works when the weather turns or the site gets messy. I’m not here to teach you how to make it look pretty for a photograph; I’m going to show you how to build it so it stays put. We’ll cover the prep work that actually matters, the exact way to manage your mortar, and the little tricks I used to ensure every course was dead level.
Table of Contents
Guide Overview
Tools & Supplies
- Spirit level for checking horizontal and vertical alignment
- Trowel for spreading mortar
- Line pins and string line for maintaining straight courses
- Brick hammer or bolster for cutting bricks
- Bricks (quantity based on project area)
- Mortar mix (quantity based on brick volume)
- Water (for mixing and wetting bricks)
Step-by-Step Instructions
- 1. Before you even touch a trowel, you need to sort your footings and the damp proof course. I’ve seen lads try to build a beautiful face on a wall that’s sitting on nothing but loose muck and prayer. If your footing isn’t level and solid, your bricks will never be straight, no matter how much you squint at your line. Get your DPC laid true and make sure it’s dead level across the whole run, because once that first course is down, the ground has already made its decision.
- 2. Get your first course laid with absolute precision. This is the most important bit of work you’ll do all day. Don’t just start slapping mortar down; you need to mark out your corners and use a tape measure to ensure your lengths are spot on. I always tell my boys: if the first course is a fraction off, the top of the wall will be a mile off. Use a spirit level on every single brick in this first row—not just the ones you think matter.
- 3. Set your profiles and string lines so they’re tight and true. You aren’t building a wall by eye; you’re building it by the line. Drive your timber profiles into the ground outside the wall’s footprint and pull a line between them. This line shouldn’t touch the bricks—it should sit just above the top edge of the course. If that line is sagging or twisted, your whole wall is going to look like a wave in the ocean.
- 4. Mix your mortar to the right consistency, and for heaven’s sake, don’t add too much water. I’ve seen too many youngsters turn their mix into soup because they think it’ll spread easier. If it’s too wet, the weight of the bricks will just squash the joints out of shape, and you’ll spend the rest of the afternoon trying to fix a mess that shouldn’t have happened. You want a mix that holds its shape when you lift the trowel.
- 5. Work in “leads” or corners first. Don’t try to lay a long straight line all at once. Build up your corners about four or five courses high first. This gives you two solid, stable points to pull your string line between. Once those corners are set and checked with a plumb bob, you can fill in the middle. This way, you’re always measuring against something solid rather than just guessing where the middle of the run is.
- 6. Check your perpendicularity and level constantly. Every time you lay a new course, don’t just move on to the next one. Stop. Pick up the level. Check the bed, check the face, and check that you aren’t leaning. If you’re building a corner, check that it’s exactly 90 degrees using the 3-4-5 rule. If you wait until the wall is six feet high to realize it’s leaning, you aren’t building a wall—you’re building a future demolition job.
- 7. Manage your joint thickness like your life depends on it. A consistent 10mm joint is the standard for a reason. If your joints are getting thicker as you go up, it means your wall is drifting, and you need to stop and reset. A wall with uneven joints looks amateurish, but more importantly, it creates weak spots where moisture can sit and do its damage. Keep that trowel moving steady and keep those joints uniform.
Why Your Foundation Prep and String Line Dictate the Truth

You can have the straightest line of bricks in the world, but if your foundation isn’t set right, that wall is nothing more than a slow-motion disaster. I’ve seen lads spend all day obsessing over the face of the wall, only for the whole thing to start leaning because they didn’t respect the footing. Before you even think about picking up a trowel, you need to be checking wall verticality against a solid, level base. If your foundation is wonky, your string line is lying to you, and no amount of skill is going to fix a wall that’s fighting gravity from the bottom up.
Once you’ve got the base sorted, your string line becomes your only source of truth. I always tell the young lads that how to use a string line in masonry is the difference between a professional job and a DIY mess. Don’t just pull it tight and hope for the best; make sure it’s anchored so it doesn’t sag in the middle. If that line isn’t dead-on, your courses will drift, your bond patterns will look like a staircase, and you’ll be spending more time correcting mistakes than actually building.
Maintaining Mortar Joint Consistency Before the First Course Sets
Now, listen. You can have the best bricks and the straightest string line in the world, but if your mortar is behaving like soup one minute and stiff clay the next, you’re finished. I’ve seen lads try to rush a wall, constantly adding water to the tub because they’re tired of working a heavy mix. That’s a mistake. When you mess with the moisture, you lose your ability to maintain mortar joint consistency, and once those joints start varying in thickness, your bond pattern is shot. A thick joint here and a thin one there might look fine for ten minutes, but it’ll throw your entire verticality off before you’ve even reached the halfway mark.
You need to treat your mortar like it’s part of the structure, not just glue. Keep your mix stable and don’t be afraid of a bit of muscle; if it’s too wet, it’ll squeeze out of the joint under the weight of the next course, leaving you with a mess and a hollow bed. I always tell the young ones on a bricklaying course for beginners that you should be checking your work constantly. Don’t wait until the end of the day to see if you’ve drifted. Use your tools, watch your consistency, and respect the mix or the mix will disrespect your hard work.
Five Things That’ll Save Your Wall Before You’ve Even Finished the Second Course
- Stop treating your level like a suggestion. If your spirit bubble isn’t dead centre on every single brick, you’re just building a very expensive, very crooked staircase. Check your verticals constantly; a tiny error at the base becomes a massive, unfixable gap by the time you hit the lintel.
- Watch your mortar consistency like a hawk. If it’s too wet, the weight of the next course will squeeze the joints out like toothpaste, ruining your level; if it’s too dry, it won’t bond, and you’ll be staring at a structural nightmare in five years. It should be like stiff peanut butter, not soup.
- Respect the gauge. Don’t just eyeball the height of your courses. Use a gauge rod or a marked story pole to make sure every single course is identical. I’ve seen lads try to “make up” a few millimetres here and there to hide a mistake, and all they’ve done is ensure the top of the wall is a joke.
- Don’t let the sun bake the life out of your work. If you’re laying in high heat or a biting wind, that mortar is going to dry too fast and lose its grip. If it’s drying before it’s actually set, you’re not building a wall, you’re just stacking dry mud.
- Keep your corners tight and your eyes on the string. Your corners are your anchors; if they aren’t perfectly plumb and square, the rest of the wall is just a decorative mess. Once those corner bricks are set, the string line is your only truth—don’t ignore it just because it’s a bit of a headache to keep tension on.
The Truth is in the Foundation
At the end of the day, laying bricks accurately isn’t about having a steady hand or a fancy new trowel; it’s about respect for the sequence. You can spend all day obsessing over the perfect bond pattern, but if you’ve ignored a shifting sub-base or let your mortar get too wet because you were in a hurry, you’re just building a future headache. Accuracy starts in the dirt, lives in the tension of your string line, and is maintained by the discipline of your joints. If you don’t get the preparation and the consistency right before the first course even goes up, you aren’t building a wall—you’re just stacking stones and praying they stay put.
I’ve seen too many young lads try to make up for poor groundwork by working faster, and it never ends well. They think they can hide a bad foundation with a clean finish, but the ground always wins in the end. Take your time, check your levels twice, and never, ever be tempted to cut corners on the prep just to get the job finished before tea. There is a real, quiet pride in looking at a finished structure and knowing it’s straight because you did the hard, invisible work right the first time. Build it so you don’t have to fix it later.
Frequently Asked Questions
What do I do if the weather turns and the mortar starts drying out too fast before I can get the next course up?
Stop what you’re doing and get some shade or a windbreak over that work immediately. If the sun or a gust is sucking the moisture out of your joints before you’ve even laid the next course, you aren’t building a wall; you’re making a pile of sand. Don’t try to “save” it by splashing water on it—that’ll just ruin your mix. If it’s drying too fast, you stop, cover it, and wait for a better window.
How do I know if my sub-base is actually solid enough to support the weight of the wall without it settling and cracking my work later?
You don’t “know” by looking at it; you know by testing it. If you can drive a heavy screwdriver into it with ease, or if your boot sinks an inch when you step on it, it’s rubbish. I always used a heavy tamper or a sledgehammer on a piece of timber. If it bounces or feels “spongy,” you aren’t ready to lay a single brick. Dig deeper, add more MOT Type 1, and compact it until it rings.
If I notice my corners are starting to drift even with a string line, is it better to pull it apart and start again or try to correct it as I go?
If you’ve noticed the corners drifting, stop. Right there. Don’t try to “nudge” it back into place while the mortar is setting; you’ll just end up with a wall that looks straight but is structurally leaning like a drunk. If the string line says you’re off, you’re off. Pull the line, tear out the bad course, and reset. I’ve seen too many lads try to save ten minutes by “correcting” a drift, only to spend ten hours fixing a crooked wall later.