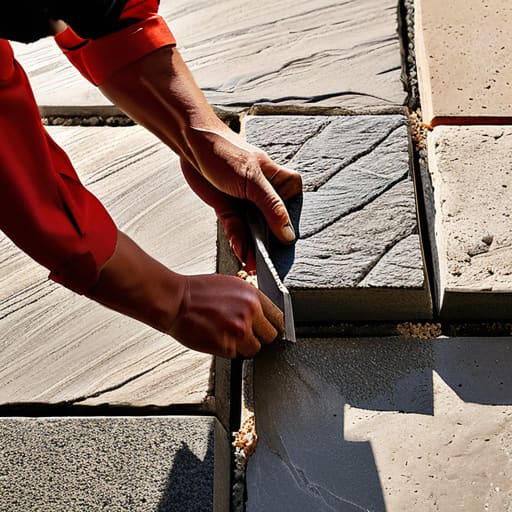
I’ve lost count of how many times I’ve stood on a driveway, looking at a beautiful set of slabs that are already starting to heave or sink because the person who did the job thought they could skip the fundamentals. Most people think that learning how to point paving joints is just about shoving some mortar or sand into the gaps to make it look pretty for the neighbors. That’s a load of rubbish. If you haven’t checked that the sub-base is compacted and the joints are clean and bone-dry, you aren’t “pointing”—you’re just masking a disaster that’s going to blow out the first time the frost hits.
I’m not here to give you a fancy, polished manual that looks good in a magazine; I’m here to tell you how to do it so you don’t have to do it again in twelve months. I’ll walk you through the actual sequence, from the cleaning stage to getting the mix right, and why the weather is your biggest enemy during the process. We’re going to cover the grit and the reality of the job, ensuring your joints stay tight and your paving stays put.
Table of Contents
Guide Overview
Tools & Supplies
- Jointing tool or pointing trowel for smoothing
- Rubber mallet for setting pavers
- Stiff broom for sweeping material
- Jointing sand or polymeric sand (enough to fill gaps)
- Water spray bottle or hose for activation
Step-by-Step Instructions
- 1. Before you even think about touching a bag of pointing mortar, you need to get those joints clean. I’ve seen lads try to point over old, crumbling grit or even moss, and it’s a bloody waste of time. You need to rake out the existing material to a depth of at least two-thirds the thickness of the paving stone itself. If you don’t get deep enough into the gap, your new pointing is just a thin skin that’ll pop out the first time the ground shifts or the frost hits.
- 2. Once you’ve raked it out, grab a leaf blower or a stiff brush and get every single speck of dust out of those gaps. If there’s dust sitting in the bottom of the joint, your new mortar won’t actually bond to the edges of the stone; it’ll just be sitting on top of a layer of dirt. I’ve spent more time than I care to admit watching people redo jobs because they were too lazy to blow out the debris.
- 3. Now, you’ve got to decide what you’re using, and for most decent paving, I’d tell you to stick to a brush-in polymeric sand or a proper lime-based mortar depending on the stone. If you’re using mortar, mix it until it’s just right—not too wet. If you make it like soup, it’ll shrink and crack as it dries, and you’ll be back where you started. You want a consistency that holds its shape, something that feels like damp sand when you squeeze it in your hand.
- 4. Start filling the joints, working from one end to the other. Don’t just dump it in; you need to pack it in there. If you’re using sand, sweep it in and then use a stiff brush to work it deep into the crevices. If you’re using mortar, use a pointing tool or a small trowel to firmly compress the material. You aren’t just decorating the cracks; you are filling a structural void, and that requires pressure.
- 5. Once the joints are full, you need to “strike” them. This is where the finish happens. Use a jointing tool to smooth the surface so it’s flush with the paving. You want to make sure there’s a slight indentation or a specific profile that helps with water runoff. If you leave it too proud (sticking up higher than the stone), it’ll catch the light and look messy, and more importantly, it’ll flake off within a season.
- 6. The final, and most important, bit is the curing. You can’t just finish a job and walk away to the pub. If it’s a hot day, you need to keep that moisture in. If the sun bakes the water out of your pointing too fast, it’ll turn to powder. I always tell my apprentices to mist the joints lightly with water or cover them with damp hessian if the weather is being temperamental. You’re teaching the material to settle, not forcing it to dry.
Cleaning Paving Joints Before Pointing the Foundation of Success
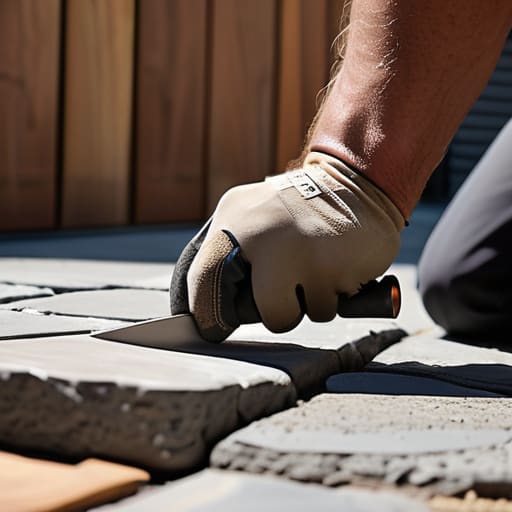
Listen, you can buy the most expensive mortar or the fanciest polymer sand on the market, but if you’re just slapping it on top of old grit and dirt, you’re wasting your damn time. I’ve seen plenty of lads try to save an afternoon by skipping the scrub, only to have the new material pop out within a single season. Cleaning paving joints before pointing isn’t just about making it look tidy; it’s about mechanical bond. If there’s a layer of silt or old, crumbling material in that gap, your new pointing is only sticking to the rubbish, not the stone.
Get in there with a narrow chisel or a dedicated jointing tool and clear it out to a decent depth. You need to see the actual edges of the pavers. If you’re deciding between sand vs mortar pointing, remember that both require a clean, stable cavity to work. I always tell my apprentices: if you can’t see the sides of the stone, you aren’t finished cleaning. Once it’s cleared, blow it out with a leaf blower or a brush until it’s spotless. If you leave the dust in there, you’re just building a failure from the inside out.
Sand vs Mortar Pointing Choosing What Actually Lasts
Now, this is where I see people trip up more than anywhere else. They look at a gap between stones and think any filler will do, but you need to decide if you’re looking for flexibility or sheer strength. If you go the sand vs mortar pointing route, you’re choosing between a soft joint that lets the ground breathe or a hard joint that locks everything in place. I’ve seen plenty of lads go for a stiff mortar on a patio that’s sitting on even a bit of movement, only to watch it crack and pop out within a single season. If your ground isn’t as solid as a bank vault, you’re better off with something that can move with the earth.
If you’re dead set on mortar, you’d better make sure your joint width for paving stones is consistent and wide enough to actually hold the material; if it’s too tight, that mortar won’t even seat properly. For those who want to avoid the headache of constant maintenance, a proper paving joint sealant application is often the smarter play. It’s about preventing weeds in paving joints before they take root and start prying your stones apart from the inside out. Don’t just pick what looks easiest on a Sunday afternoon; pick what’ll still be there in five years.
Five Things Most People Get Wrong (And How Not to Join the List)
- Watch the weather like a hawk. If you’re pointing on a day when the sun is beating down or there’s a stiff wind blowing, you’re asking for trouble. That moisture needs to leave the joint slowly; if it evaporates too fast, the pointing will shrink, crack, and eventually just pop right out of the gap.
- Don’t be stingy with the depth. I see lads trying to skim a bit of mortar over the top of a deep gap just to save time. It’s a waste of money. If you don’t pack that joint full from the bottom up, you’ve just created a hollow shell that’ll crumble the first time a heavy wheel rolls over it.
- Mind your edges. If you get mortar smeared all over the face of your paving stones, don’t just let it dry and hope for the best. Once it sets, you’re fighting a losing battle against stains and uneven finishes. Keep a damp sponge handy and clean the stone as you go—do it right the first time so you aren’t scrubbing on your knees for three hours later.
- Stop adding water to your mix just to make it “workable.” I know it’s easier to spread a runny, soup-like mortar, but you’re effectively killing the strength of the mix. You want a consistency like stiff peanut butter. If it’s too wet, it’ll shrink like a dried raisin and leave you with nothing but hairline cracks.
- Check your joints for movement before you even touch a bucket. If you’ve got a gap that’s widening because the sub-base underneath is shifting or settling, no amount of fancy pointing is going to fix it. You can’t point a moving target; get the ground sorted first, or you’ll be back doing the same job in six months.
Don't Cut Corners Now
Look, if you’ve followed what I’ve said, you’ve done more than most. You didn’t just slap some filler into a gap and call it a day. You took the time to clear out the grit, you picked the right material for the job, and you didn’t rush the application. Remember, the pointing is only as good as the cleanliness of the joint you started with. If you leave old debris or dampness in there, that new mortar is going to pop out faster than a bad tooth. It’s about the sequence—clean it, prep it, fill it, and let it cure without making it harder on yourself by adding water just to make it spread easier.
At the end of the day, a well-pointed patio isn’t just about making the garden look decent for the neighbours; it’s about doing the job so you don’t have to do it again in two years. There is a particular kind of satisfaction in walking across a surface that was built to last, knowing you didn’t take the easy way out. It might take a bit more sweat and a bit more patience, but when the seasons turn and the frost hits, you’ll be glad you did it right. Do it once, do it properly, and then get on with your life.
Frequently Asked Questions
How do I know if my existing joints are too deep or too crumbly to just patch over, or am I better off ripping the whole lot out?
Take a screwdriver and poke at it. If it goes in like butter or the edges of the pavers crumble away with the grit, you’ve got a problem. Patching over a soft joint is just masking a failure; you’ll be back doing it again in six months. If the joint is deeper than a finger or the material is falling out in chunks, don’t bother with a patch. Rip it out, clean the gaps properly, and start fresh.
If I’m pointing on a hot day, how do I stop the mix from drying out and cracking before it’s even had a chance to set?
If you’re pointing in the heat, you’re fighting the sun, and the sun always wins if you’re lazy. First, stop pouring in the midday glare; wait for the shadows to stretch. If you must go, dampen the stones first so they don’t suck the moisture straight out of your mix. Most importantly, once you’ve finished, get some damp hessian or polythene over it. If you let it bake dry, it’ll crack before you’ve even finished your tea.
Once the pointing is in, how long do I actually have to leave it alone before I can walk on it without leaving a permanent footprint?
Look, I’ve seen more ruined jobs because someone couldn’t wait twenty-four hours than I care to count. If you’re using mortar, stay off it for at least a full day. If it’s sand, you might get away with a light tread sooner, but don’t test it. The real rule? Give it forty-eight hours before you even think about dragging a heavy table or a chair over it. Let it set, or you’ll be digging it out tomorrow.



