I remember standing on a driveway in Surrey back in ’94, watching a lad from the plant add an extra bucket of water to the mix because it felt “a bit stiff.” He thought he was doing us a favour, making it easier to spread, but all he was doing was setting a timer on a disaster. People love to get all technical with me, throwing around fancy engineering terms to explain how drying shrinkage cracking happens, as if it’s some mysterious scientific phenomenon that only a lab can solve. It isn’t. It’s usually just a result of someone being lazy with the water or too impatient to wait for the right conditions.
I’m not here to give you a lecture from a textbook or sell you some overpriced chemical additive that claims to fix everything. I’m going to tell you exactly how it works from the perspective of a man who has spent forty-three years watching slabs fail because the basics were ignored. We’re going to look at the real culprits—the moisture loss, the temperature swings, and the mistakes made before the truck even arrives—so you can stop fighting the concrete and start pouring it right.
Table of Contents
The Water to Cement Ratio Impact a Recipe for Disaster
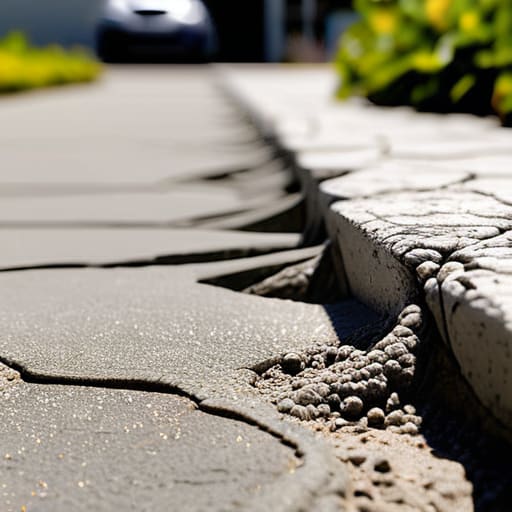
I’ve lost count of how many times I’ve stood on a site and watched a lad grab a hose to thin out a stiff mix because the lads were complaining about the shovel work. It’s the oldest sin in the book. You think you’re just making it easier to spread, but you’re actually sabotaging the whole slab. When you mess with that water-to-cement ratio impact, you’re essentially inviting trouble. That extra water isn’t part of the magic; it’s just extra volume that eventually has to go somewhere.
As that excess water evaporates, it leaves behind microscopic voids, and that’s when the internal tensile stress starts pulling the slab apart from the inside. You can have the most expensive aggregate in the world, but if you’ve turned that mix into soup, you’re just building a future crack. The concrete hydration process needs a precise balance to lock everything together. If you throw too much water in to chase a “workable” finish, you aren’t making life easier—you’re just ensuring that the slab will be fighting itself before the week is out.
Internal Tensile Stress When the Mix Fights Itself
Now, here is where things get a bit more technical, but don’t let that fool you—it’s still just common sense. Even if you’ve got your mix right, you’ve got a chemical battle going on inside that slab from the second the water hits the cement. As the concrete hydration process takes hold, the material is trying to expand and gain strength, but at the same time, it’s trying to pull itself together as it dries. This creates a massive amount of internal tensile stress. Think of it like a tug-of-war happening inside the slab; the concrete is essentially fighting itself.
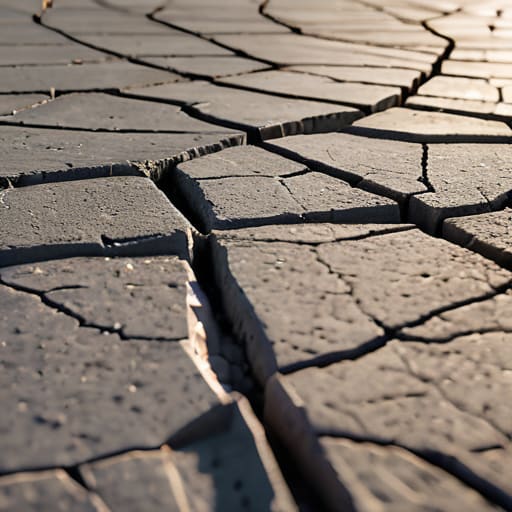
If that internal tension gets too high and there’s nowhere for the slab to “give,” it’s going to snap. That’s when you see those nasty, random cracks that don’t follow any logic. You can try to mitigate this by using shrinkage-reducing admixtures, but at the end of the day, if you haven’t planned your control joints placement properly, you’re just asking for trouble. You have to give that stress a place to go, otherwise, the slab will find its own way out, and it won’t be pretty.
Five Ways to Stop the Cracks Before They Start
- Watch the lads with the hose; if someone starts adding water to the truck just to make it easier to spread, they’re essentially signing a death warrant for that slab. You’re just diluting the strength and inviting shrinkage.
- Don’t ignore the weather forecast like a greenhorn; if you’re pouring in high heat or a stiff breeze, that surface moisture is going to vanish before the mix has even had a chance to settle, and you’ll be looking at spiderweb cracks by tea time.
- Stop skimping on the sub-base; if your ground isn’t compacted and level, the concrete is going to move as it settles, and no amount of high-grade mix will stop the tension from snapping the slab in two.
- Get your joints in early and get them in the right place; if you wait until the concrete is already fighting itself to cut your control joints, you aren’t controlling the crack, you’re just deciding where it’s going to look most ugly.
- Treat curing like it’s part of the pour, not an afterthought; whether it’s plastic sheeting or a proper curing compound, you have to lock that moisture in. If you let it air-dry too fast, you’ve failed before you’ve even finished.
The Bottom Line on Shrinkage
At the end of the day, you have to understand that drying shrinkage isn’t some mysterious act of God; it’s a predictable consequence of how you handle the mix and the environment. We’ve looked at how too much water in the drum turns into a nightmare once it starts evaporating, and how that internal tension literally pulls the slab apart from the inside out. If you ignore the water-to-cement ratio or let the surface bake under a midday sun without any protection, you aren’t just “working fast”—you are inviting the cracks to appear. You can’t fight the physics of evaporation, but you can certainly stop being the reason the concrete fails by respecting the chemistry of what you’re pouring.
My advice to the young lads starting out is this: don’t get blinded by the speed of the pour. It’s easy to get caught up in the rush of getting the truck emptied and the screed level, but the real work happens in the quiet hours of the cure. A slab that looks perfect at 4:00 PM can be a spiderweb of failure by morning if you were lazy with the joints or the moisture. Take the extra time to get the sub-base right and the curing process disciplined. If you do the hard work upfront, you won’t be the one getting the phone call six months later explaining why a customer’s driveway is splitting down the middle.
Frequently Asked Questions
If I've got a slab that's already started showing these hairline cracks, is there any point in trying to patch them, or is the whole thing already a write-off?
Look, if it’s just a few hairline cracks, you aren’t looking at a total write-off yet, but don’t go thinking a bit of filler is going to fix the underlying rot. If those cracks are just surface shrinkage, a good resin injection or a proper sealant will stop the water getting in. But if those cracks are widening or they’re moving, it means your sub-base is shifting or the mix was rubbish. In that case, you’re just painting over a disaster.
Everyone talks about adding water to make the pour easier, but how much can I actually get away with before I'm asking for trouble?
Look, if you’re asking “how much” you can get away with, you’ve already lost the plot. There isn’t a “safe” amount of extra water to just toss in because the mix feels a bit stiff. Once you start adding water on-site to make it easier to spread, you’re basically diluting the glue that holds the whole thing together. You might get a smoother finish for ten minutes, but you’re just inviting cracks to settle in later.
What's the best way to keep the moisture in once the pour is finished so the surface doesn't bake and crack before it's had a chance to set?
Stop looking for a magic spray. If you want to keep that moisture in, you’ve got to protect the surface from the elements immediately. On a hot day, get some polythene sheeting down the second it’s workable—don’t let the wind or sun grab it. If you’ve got the time, wet burlap is better, but you’ve got to keep it damp. If you let that surface bake hard while the bottom is still wet, you’ve already lost.