I’ve spent forty-three years watching men sweat over a mixer, thinking they’re doing a grand job because the surface looks smooth and wet. They think they know how to place concrete correctly just because they can level a screed without leaving a dip. But let me tell you something I learned the hard way on a housing site back in ’88: a pretty finish is just a mask for a disaster waiting to happen. I once saw a lad pour a perfect slab over a sub-base that was nothing but loose, uncompacted muck; six months later, that “perfect” pour had snapped like a biscuit. If you don’t respect the ground underneath the mix, you aren’t placing concrete—you’re just laying down expensive future rubble.
In this guide, I’m not going to give you any of that polished, textbook nonsense that ignores the reality of a muddy site or a hot afternoon. I’m going to show you the real sequence of events, from the moment you check your compaction to the second that truck starts discharging. We’ll talk about the stuff people usually skip—the sub-base prep, the moisture control, and why adding water to the drum is the fastest way to ruin your life. I’ll teach you how to do it right, the first time.
Table of Contents
Guide Overview
Tools & Supplies
- Shovel for digging and mixing
- Screed board for leveling the surface
- Bull float for smoothing the top layer
- Edger for creating clean perimeter borders
- Concrete mix 6-10 bags depending on area
- Water 2-4 gallons for mixing
- Rebar or wire mesh for reinforcement
Step-by-Step Instructions
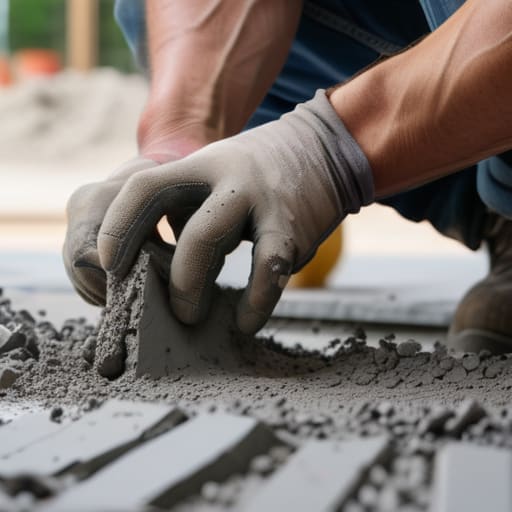
- 1. First thing you do—and I mean before you even think about looking at a delivery note—is check your sub-base. If you’ve just dumped some MOT Type 1 and hoped for the best, stop right there. You need to compact that stuff in layers with a vibrating plate compactor until it’s solid as a rock. If I can see a soft spot or a bit of clay poking through, I’m not pouring a single drop, because that slab will settle and crack before the month is out.
- 2. Once the ground is sorted, get your formwork in and double-check it. It’s not enough to just nail some boards together; they need to be braced like a fortress. Concrete is incredibly heavy, and if your forms aren’t pegged deep and braced properly, they’ll bow out the moment the chute starts moving. You’ll end up with a slab that’s thicker on one side than the other, and that’s a waste of money you can’t get back.
- 3. Now, when the truck pulls up, don’t let some lad with a hose start adding water just because the mix looks a bit stiff. I’ve lost count of how many times I’ve seen someone water down the mix to make it easier to spread. All they’re doing is weakening the structure and inviting shrinkage cracks. You want a mix that’s workable, sure, but it needs to be the strength you paid for, not a soupy mess that’ll crumble in five years.
- 4. When you start spreading, you need to get it into the corners and under the forms properly. Don’t just dump it in a pile in the middle and try to push it out. You have to consolidate the pour using a poker vibrator to get the air bubbles out. If you leave air pockets trapped in the mix, you’re essentially leaving weak spots in your foundation that will eventually fail.
- 5. Once it’s leveled out, you’ve got to get your screeding right. Whether you’re using a straight edge or a vibrating screed, you need to move with a steady rhythm. You’re looking to get a flat surface, but don’t overwork it. If you keep treading and pulling at the surface too much, you’ll bring all the fines to the top and leave the coarse aggregate underneath, which is a recipe for disaster when it comes to the finish.
- 6. As the surface starts to stiffen, it’s time for the floating. Use a bull float to push down the aggregate and bring up a bit of “cream” to the surface. This is where you see the real skill. You’re not just smoothing it; you’re closing the surface. If you do this too early, you’ll trap water under the top layer, and you’ll end up with a surface that flakes off like a biscuit the first time the frost hits it.
- 7. Finally, don’t forget your joints. You can have the best pour in the world, but if you don’t cut your contraction joints at the right depth and the right intervals, the concrete will decide where it wants to crack. You need to plan your cuts before the concrete even arrives. A controlled crack in a joint is much better than a random crack running right through the middle of your beautiful new slab.
The Slump Test Why Water on Site Is a Lie

I’ve seen it a thousand times: the truck pulls up, the mix looks a bit stiff, and the lad on the shovel thinks he’s being clever by grabbing the hose. He adds a few buckets of water to make it “workable,” thinking he’s doing everyone a favour. He isn’t. All he’s doing is ruining the water-to-cement ratio and turning a solid slab into a future mess of cracks. That’s why the concrete slump test importance can’t be overstated. If the mix isn’t hitting the spec right out of the drum, you don’t fix it with a garden hose; you call the plant.
When you start adding water on-site to chase ease of use, you aren’t just making it flow; you’re actively preventing concrete segregation from being your only worry. Too much water leads to a weak surface and massive shrinkage. You’ll end up with a top layer that dusts off like chalk and a structure that lacks the strength it was paid for. If you want to do this right, you stick to the design mix. If it’s too dry, you deal with it through proper concrete consolidation and a bit of hard graft, not by watering it down.
Proper Concrete Consolidation Avoiding the Honeycombing Trap
Now, once that mix is out of the chute, don’t just stand there watching it settle like it’s a bloody art project. This is where most lads get lazy. You’ve got to get in there with a poker or a mechanical vibrator to ensure proper concrete consolidation. If you don’t work that vibration into the corners and around the reinforcement, you’re going to end up with pockets of air and loose aggregate. That’s how you get those nasty voids—what we call honeycombing—that make a slab look like a piece of Swiss cheese and compromise the whole structural integrity.
You also need to be mindful of how you’re moving the material. If you’re dropping it from too high or dragging it too far with a rake, you’re preventing concrete segregation from happening, but you’re also risking the wrong mix settling at the bottom. I’ve seen too many youngsters try to “help” the flow by adding more water to make it easier to spread. Stop it. You aren’t making it easier; you’re just making it weak. Avoid honeycombing in concrete by vibrating it thoroughly, but don’t overdo it, or you’ll just pull all the cream to the top and leave the stones stranded.
Five Things You’ll Mess Up if You Don't Pay Attention
- Watch the weather like a hawk. If you’re pouring in the midday sun and the wind is whipping, that surface moisture is going to vanish before the concrete even sets. You’ll end up with plastic shrinkage cracks that look like a spiderweb, and no amount of trowelling will fix what’s already gone wrong.
- Stop treating your joints like an afterthought. You can’t just decide where to cut the joints halfway through the day because you’re tired. If you don’t place your control joints in the right spots—and do it at the right time—the concrete will find its own way to crack, and it won’t be where you want it.
- Don’t let the lads build up “mounds” of concrete in one spot. I’ve seen too many young lads just dump it in heaps and try to spread it out with a shovel. You’re segregating the mix; you’re letting the heavy aggregate sink to the bottom and leaving the paste on top. Place it in layers, spread it even, and do it right.
- Mind your edges and corners. The middle of a slab is easy, but the edges are where the trouble starts. If you don’t get your formwork tight and your edge compaction sorted, you’ll end up with weak, crumbling borders that won’t hold a heavy load for more than a season.
- Respect the curing process. The job isn’t finished when the screed is flat. If you walk away the moment it looks decent, you’ve failed. You need to keep that moisture in—whether it’s through sheeting or spraying—because if the top dries too fast while the bottom is still reacting, you’ve basically built yourself a very expensive piece of chalk.
The Job Isn't Done When the Truck Leaves
Look, if you’ve followed what I’ve said here, you know that placing concrete isn’t just about spreading grey sludge around a site. It’s about respect for the process. You’ve checked your sub-base until your eyes hurt, you’ve fought the temptation to add water just to make the screeding a bit easier, and you’ve made sure that vibration actually reaches the corners to stop that honeycombing from ruining your finish. If you skip the prep or mess with the mix, you aren’t just saving time; you are signing a death warrant for that slab. A good pour is won or lost in the hours before the first shovel hits the ground, and once that concrete starts to set, the clock is ticking whether you’re ready or not.
At the end of the day, I don’t care how shiny your finish looks if the ground underneath is shifting or the joints are non-existent. A slab should be built to last decades, not just until the next heavy rain. There is a quiet sort of pride in walking away from a finished job, looking back at a level, solid piece of work, and knowing that it isn’t going anywhere. Don’t be the lad who cuts corners to get home early for a pint. Do it right, do it slow, and do it once. That’s the only way to build something that actually stands the test of time.
Frequently Asked Questions
What happens if the weather turns and I can't get the slab finished before the rain hits?
If the clouds turn black and you see rain coming, you’ve got two choices: get it covered or get it finished. If you can’t finish the surface, get some heavy-duty polythene over that slab immediately. Don’t just throw it on; make sure it’s weighted down so the wind doesn’t catch it. If the rain hits an open, wet surface, it’ll wash out the cement paste and leave you with nothing but a surface of weak, dusty aggregate.
How do I know if my sub-base is actually solid enough, or if I'm just burying a load of loose rubbish?
You don’t ask the bloke who dug the hole; you ask the ground itself. Grab a heavy tamper or a plate compactor and get to work. If you can still see movement or if the surface feels “spongy” under the machine, you’ve got rubbish or uncompacted fines down there. I always look for a firm, uniform resistance. If it’s bouncing or shifting, stop. You aren’t building a foundation; you’re just burying a future crack.
When exactly should I be cutting the joints to stop the cracking from happening where I don't want it?
You’re asking the right question, but if you wait until the concrete looks dry, you’ve already lost. You need to cut those joints when the slab is hard enough to walk on without leaving a footprint, but still “green” enough to cut without the edges shattering like glass. Usually, that’s anywhere from four to twelve hours after the pour, depending on the heat. If you miss that window, the cracks will find their own way.