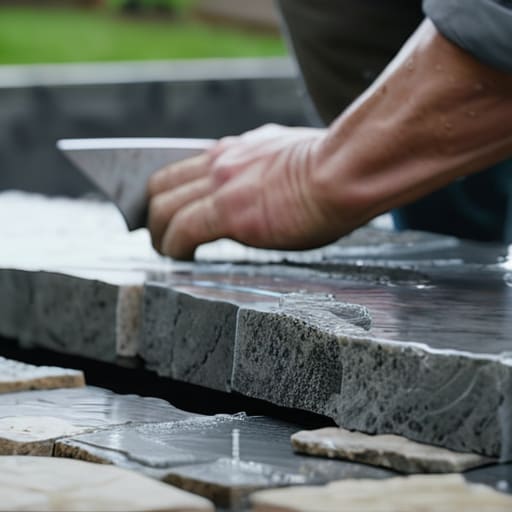
I remember standing on a driveway in Surrey back in ’98, watching a lad try to force a slab into a corner that was clearly too tight. He’d spent all morning hacking away with a cheap grinder, thinking that if he just kept cutting, he’d eventually find the right fit. He didn’t realize that once you start chipping the edges of a stone, you’ve already lost the battle. Most people think knowing how to cut paving accurately is just about having a steady hand and a sharp blade, but they’re dead wrong. It’s actually about measuring twice and cutting once, and more importantly, understanding how much room you need to leave for the joints so the whole lot doesn’t heave the moment the frost hits.
In this guide, I’m not going to give you any of that polished, textbook nonsense that ignores how tools actually behave in the real world. I’m going to show you the proper sequence for marking your lines, the exact way to steady your blade to avoid those jagged, ugly edges, and why your choice of diamond blade matters more than you think. We’ll skip the fluff and get straight to the grit of it, so you can stop wasting expensive materials and start laying stone that actually stays put.
Table of Contents
Guide Overview
Tools & Supplies
- Angle Grinder with diamond blade for precision cutting
- Measuring Tape for accurate marking
- Chalk Line or Marker for layout lines
- Safety Goggles and Dust Mask for protection
- Paving Slabs or Bricks to be cut
- Water spray bottle for dust suppression
Step-by-Step Instructions
- 1. Before you even think about touching a blade to a stone, you need to set your layout properly. I’ve seen too many lads start cutting from one corner and realize halfway through the patio that they’ve left themselves with a two-inch sliver at the far end. That’s amateur hour. Dry-lay your first few rows, check your lines with a string, and make sure your cuts are going to be substantial enough to actually hold their position once the sand is swept in.
- 2. Get yourself a decent angle grinder with a continuous rim diamond blade; don’t go trying to do this with a cheap masonry saw you found in the shed. If the blade is blunt or the motor is struggling, you aren’t cutting—you’re just shattering the edges. A clean, sharp cut is the difference between a professional finish and a pile of rubble that looks like it was hit with a sledgehammer.
- 3. Mark your line with a fine-point permanent marker or a piece of chalk, but for the love of god, use a straight edge. If you’re eyeballing a curve or a diagonal, you’ve already lost. I’ve spent forty years looking at wonky joints, and they always start with a man who thought he could “eye it” instead of taking the extra thirty seconds to pull a straight line.
- 4. When you actually start the cut, don’t try to plow through the whole stone in one go. You need to make a series of shallow passes, working your way through the depth of the slab. If you try to force the blade all the way down in one heavy movement, you’re going to bind the blade, kick the stone, and probably end up with a cracked slab and a trip to the hospital.
- 5. Keep a spray bottle of water handy and use it. Cutting dry is a nightmare for your lungs and a disaster for the stone; the dust gets everywhere and the heat from the friction can actually stress the material. A bit of water keeps the dust down and helps the diamond grit on the blade do its job without overheating.
- 6. Once the cut is made, you’ll likely have a bit of a ragged edge where the blade exited. Take a rubbing stone or a bit of fine grit sandpaper and dress the edge. You aren’t looking for perfection, but you want to knock off those sharp, jagged bits so that when you lay the stone next to its neighbor, the joint looks intentional rather than accidental.
- 7. Finally, clear the debris out of the cut before you lay the stone. If you leave a pile of stone dust and grit in the joint, you’re creating a weak point that’ll prevent your jointing compound from bonding properly. Clean it out, check your level one last time, and only then should you move on to the next piece.
Wet Saw vs Dry Saw for Paving Choosing Your Weapon
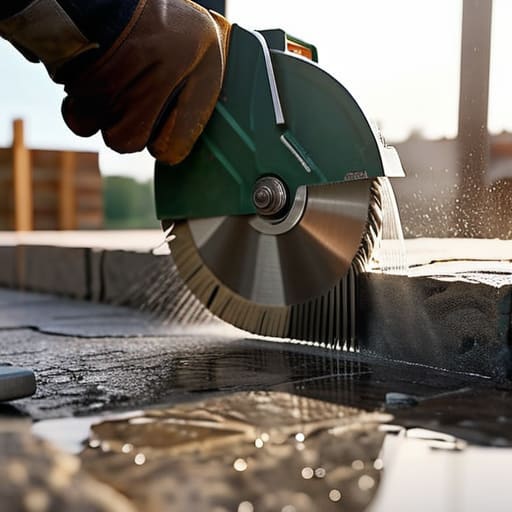
Now, listen. You’ll see lads on site grabbing whatever tool is closest to the pile, but if you want a clean edge, you need to pick the right tool for the job. If you’re looking at wet saw vs dry saw for paving, don’t let the convenience of a dry saw fool you. A dry saw is fine for a quick, rough notch in a corner, but it’s violent. It’s loud, it’s messy, and it’s punishing on the stone. If you’re working with anything more expensive than basic concrete flags, a dry saw is the fastest way to end up with a jagged, ugly edge that looks like it was done with a hammer.
If you want real results, you use a wet saw. The water isn’t just there to keep the blade cool; it’s what’s actually preventing stone cracking while cutting by absorbing that initial shock. More importantly, you’ve got to respect the dust. I’ve seen too many young lads breathing in what they’re cutting without any proper silica dust protection measures in place. It’s not just about a clean finish; it’s about not ruining your lungs for a bit of tidy paving. Use the water, keep the blade lubricated, and you’ll actually get a cut you can be proud of.
Precision Masonry Cutting Techniques to Stop Stone Cracking
Listen, you can have the most expensive kit on the market, but if you’re treating a paving slab like a piece of scrap timber, you’re going to end up with a pile of expensive rubble. Most of the lads I see making a mess are rushing the line. You need to mark your cut with a heavy-duty pencil or a scribe—don’t just eyeball it. If you’re using precision masonry cutting techniques, you have to remember that the blade doesn’t just cut; it vibrates. If you apply too much downward pressure, you aren’t cutting the stone, you’re shattering its internal structure, and that slab will snap three weeks later when the frost hits.
Another thing people overlook is the heat. If you’re using a dry saw, that blade gets screaming hot, which creates thermal stress in the stone. I always tell my crew: let the tool do the work. If you find yourself leaning your whole body weight into the saw, you’ve already lost the battle. Also, for heaven’s sake, don’t ignore your silica dust protection measures. I’ve seen too many young lads thinking they’re invincible, but that dust stays in your lungs long after the job is done. Keep it wet, keep it steady, and respect the material.
Five Ways to Stop Wasting Good Stone and Making a Mess of Your Layout
- Measure twice, cut once, and then measure a third time. I’ve seen lads rush a cut because they’re eager to get to lunch, only to find they’ve shaved off a crucial five millimetres that makes the whole row look like a zig-zag. If you aren’t certain of your line, don’t touch the trigger.
- Stop treating your blade like a blunt axe. If you’re using a dry saw and you start forcing it through the stone to save time, you’re going to blow the edges out. Let the diamond do the work; if you have to lean on it, your blade is either blunt or you’re being impatient.
- Always account for your joint width before you make the cut. A common mistake is cutting a stone to fit the gap perfectly, forgetting that you need a consistent mortar or sand joint to let the whole thing breathe. If you cut too tight, you’re asking for a crack the moment the temperature shifts.
- Mark your lines with a fine pencil or a scribe, not a thick piece of chalk. If your guide line is a half-inch wide, your cut is going to be a half-inch off, and in paving, a half-inch is the difference between a professional finish and a DIY disaster.
- Check the integrity of the stone before you even start the saw. If you see a hairline fracture or a weak spot in the slab, don’t try to cut through it. You’ll just end up with a piece of expensive rubble and a wasted afternoon. If the stone is dodgy, bin it before you waste your blade on it.
The Last Bit Before the Sand Goes In
Look, if you’ve followed what I’ve said, you know that cutting paving isn’t just about making a straight line; it’s about respecting the material. You’ve picked your saw, you’ve braced your stone, and you’ve made sure those cuts are clean enough to hold a joint without looking like a dog’s breakfast. Remember, a sloppy cut is just a pre-planned failure waiting for the first frost to expand the gap and shift the whole slab. Don’t go rushing to the next job just because the saw is off; take a minute to check that every edge is sharp and every measurement actually holds water. If you’ve cheated the cut, you’ll be paying for it in repairs three years down the line.
At the end of the day, a job well done isn’t about how fast you finished or how much you charged for the labour. It’s about that quiet satisfaction when you walk away and know that what you’ve laid is going to stay put for the next thirty years. I’ve seen plenty of lads try to skip the precision work to save twenty minutes, only to come back a year later to fix a mess they made themselves. Do it right the first time. Lay it with pride, cut it with care, and build something that actually lasts.
Frequently Asked Questions
If I've already made a slightly crooked cut, is there any way to save the stone or am I just wasting material?
Look, if you’ve botched a cut, don’t go throwing the stone in the skip just yet. If it’s just a bit wonky on one edge, you can often re-measure and take a second, cleaner cut to square it up—just make sure you’ve got enough meat left on the stone to keep it structurally sound. But if you’ve cut it too narrow? It’s scrap. Don’t try to patch it with extra mortar; you’re just building a headache.
How do I know when my blade is actually blunt and starting to chew up the stone instead of cutting it?
You’ll feel it before you see it. A sharp blade bites into the stone and moves through it like it’s meant to be there. If you start feeling a heavy vibration in your hands, or if you find yourself leaning into the saw just to keep it moving, that blade is finished. If you see fine, white dust flying everywhere instead of clean chips, or if the edges look ragged and chewed, stop. You’re just burning money and ruining good stone.
Should I be worried about the dust and slurry getting into the joints of the stones I've already laid?
Listen, you should be worried. If that slurry dries in the joints, it’s like pouring grout in all the wrong places. It’ll mess up your pointing, trap moisture where it shouldn’t be, and leave you with a patchy, unsightly mess that’ll look like rubbish in six months. Get a sponge and a bucket of clean water and clear it out now. Don’t wait until it’s set; once it’s hard, you’re just fighting a losing battle.



