I spent thirty years watching salesmen in clean high-vis vests try to convince homeowners that the “latest and greatest” polymer-based coating was a magic wand for a crumbling wall. They’ll spend an hour talking about flexibility and UV resistance, but they never mention that if your substrate is damp or your base coat is applied to a dusty brick, the most expensive system in the world is just expensive rubbish. People get so caught up in the fancy brochures that they fail to understand how render systems differ in the ways that actually matter—the chemistry of the bond and the breathability of the layers—rather than just the colour of the finish.
I’m not here to sell you a premium bucket of nothing. I’m going to strip away the marketing jargon and tell you exactly what happens when those layers meet the wall. We’re going to look at the grit, the moisture movement, and the prep work that determines whether a render stays put for twenty years or starts peeling off in sheets after the first winter. I’ll show you the real differences between sand and cement, lime, and those modern monocouche mixes, so you know exactly what you’re paying for before the first trowel hits the brick.
Table of Contents
Sand and Cement vs Monocouche the Cost of Shortcuts
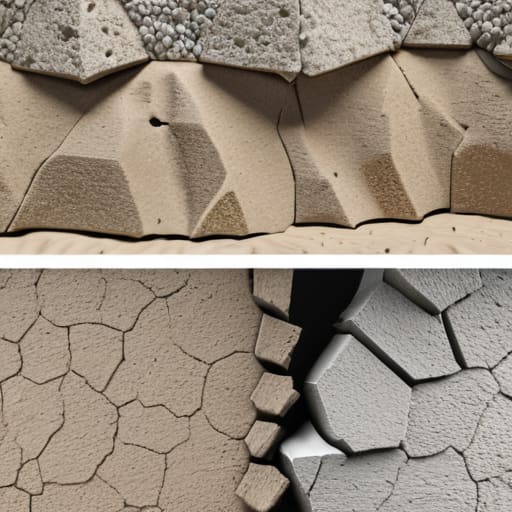
Now, I see plenty of lads trying to save a few quid by sticking to a basic sand and cement mix because they think it’s “tried and tested.” On paper, it looks cheap, but you’re playing a dangerous game with your margins. When you’re looking at sand and cement vs monocouche, you aren’t just comparing material costs; you’re comparing how much work you’ll be doing in five years when the cracks start appearing. Sand and cement is stiff, it’s unforgiving, and if the substrate moves even a fraction, that render is going to snap like a biscuit.
Monocouche is a different beast entirely. It’s a single-coat system designed to handle the movement, but the real difference lies in the moisture permeability in rendering. A traditional sand and cement mix can often act like a plastic wrap, trapping dampness inside the masonry. If you don’t account for how the wall needs to breathe, you’ll end up with blown render and damp patches that’ll have the customer screaming at you. Don’t let a cheap upfront price fool you; a shortcut on the material is just a long-term debt you’ll be paying back in repairs.
Exterior Wall Coating Types More Than Just a Pretty Face
You can spend a fortune on the most expensive finish on the catalogue, but if you haven’t matched the coating to the wall behind it, you’re just painting a disaster. When people ask me about the different exterior wall coating types, they usually want to know which one looks best in a brochure. I tell them they’re asking the wrong question. You need to be asking what the building is actually made of. If you slap a modern, non-porous polymer coating over an old, solid stone wall that needs to breathe, you aren’t protecting that house—you’re trapping moisture inside the structure until it rots from the inside out.
It comes down to one thing: moisture permeability in rendering. You’ve got your heavy-duty modern systems that are great for new builds with cavity walls, and then you’ve got traditional lime-based options. If you’re working on something historic, you don’t touch the high-strength cement stuff; you focus on the breathability of lime render. If the moisture can’t escape through the coating, it’ll find its way through the brickwork instead, and that’s when you start seeing the real damage.
Stop Looking at the Colour and Start Looking at the Chemistry
- Don’t let a salesman tell you a system is “indestructible” just because it looks good in a brochure; the real difference between a cheap sand-and-cement mix and a proper through-colour monocouche is how they handle movement, and if you don’t match the system to the flexibility of the wall, you’re just painting a disaster.
- Watch the moisture like a hawk because the biggest mistake I see is people trying to slap a render system onto a substrate that hasn’t been properly dried out or primed; if the wall is still breathing too much or holding too much damp, that expensive render is going to delaminate and fall off in sheets.
- Thickness isn’t a suggestion, it’s a requirement; some of these modern thin-coat systems are brilliant if you follow the spec to the millimetre, but if your lad tries to “make up the depth” by over-applying a coat that’s too thick, you’ll end up with cracks that’ll make your head spin.
- Get your primer right or don’t bother starting at all; whether you’re using an old-school cementitious bond or a modern acrylic primer, the way that render grabs onto the masonry is the only thing that matters when the winter frost hits.
- Stop obsessing over the final texture and start asking about the breathability; a render system might look beautiful, but if it’s a non-breathable plastic skin on a traditional lime-mortar house, you aren’t building a wall, you’re building a trap for rot.
The Bottom Line: Don't Buy the Finish, Buy the System
At the end of the day, choosing between sand and cement, monocouche, or a modern silicone-based system isn’t about picking the prettiest colour from a brochure. It’s about understanding how that material is going to behave when the rain starts hitting it or when the frost sets in. I’ve seen too many people try to save a few quid on the material only to spend five times that amount a few years later when the render starts delaminating from the substrate. You have to look at the whole picture: the breathability of the system, the compatibility with your masonry, and—most importantly—the quality of the prep work underneath. If you ignore the foundation of the render, you’re just painting a masterpiece on a crumbling wall.
If you take one thing away from this, let it be this: don’t let anyone rush you into a decision based solely on the upfront cost. A cheap system that fails in twenty-four months is the most expensive mistake you’ll ever make. Do it right the first time, respect the drying times, and ensure the substrate is ready to take the load. When you stop obsessing over the surface and start focusing on the integrity of the application, that’s when you actually get a finish that lasts. Build it to stay, not just to look good for the handover.
Frequently Asked Questions
If I'm looking at an old house with existing render, how do I know if the substrate is actually sound enough to take a new system, or if I'm just slapping a fresh coat over a ticking time bomb?
You don’t just look at the surface; you look for the movement. Take a hammer and give it a proper tap. If it sounds hollow, like you’re hitting a drum, that render has already detached from the brickwork. It’s dead. Don’t bother covering it. Check the corners for cracks and look for damp staining. If the substrate is soft or crumbling, no fancy new coating is going to save you. You fix the wall first, or you’re just painting a disaster.
Everyone talks about the price per bag or bucket, but how do the different systems actually stack up when you factor in the prep work and the man-hours needed to get a proper finish?
Listen, if you’re only looking at the invoice for the materials, you’re being played. A bag of sand and cement looks cheap on paper, but you’ll spend three days on a scaffold wrestling with shrinkage cracks and patching mistakes. A proper through-colour system might cost more upfront, but it’s designed to work with the substrate, not against it. You save money on the man-hours and the headache of fixing a failure six months later.
I've seen people try to use a modern silicone render on old, breathable lime-based masonry—is that just asking for the render to blow off in a few years?
You’ve hit the nail on the head. You’re essentially putting a plastic raincoat over a pair of woollen trousers. That old lime masonry needs to breathe; it has to move moisture in and out. When you slap a modern, non-breathable silicone render on top, you’re trapping water behind the skin. That moisture builds up, the pressure rises, and eventually, the whole lot just delaminates and blows right off the wall. It’s a disaster waiting to happen.