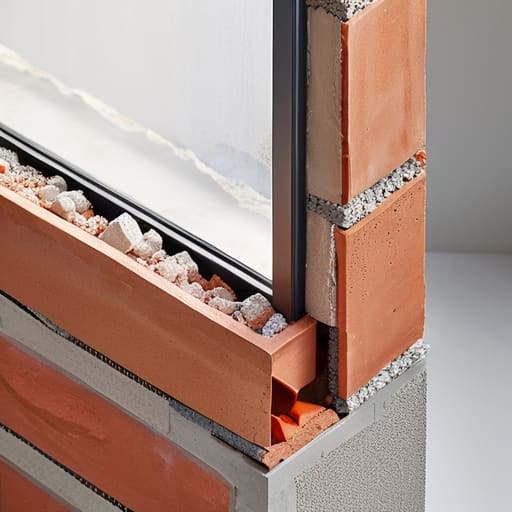
I’ve spent forty-three years watching lads chase the latest fancy insulation boards and expensive proprietary systems, thinking they’ve solved the problem of a damp house. They spend a fortune on the “best” materials, but they treat the actual structure like an afterthought. I’ve stood on sites where the brickwork looked like a textbook, yet the interior was weeping because someone forgot the most basic principle of moisture management. If you’re looking for a complete guide to cavity walls that’s just going to list expensive products and shiny brochures, you’ve come to the wrong place. Most of those guides ignore the real reason walls fail: it’s rarely the brick itself, and it’s almost always the way the cavity is managed, the lintels are seated, or the weep holes are forgotten.
I’m not here to sell you a miracle product or some high-end marketing fluff. I’m going to tell you how a cavity wall actually works when the rain is driving sideways and the wind is howling through the joints. I’ll be walking you through the sequence of things that actually matter—the unseen details like tray placement and preventing debris from choking your airflow. This is the straight talk on how to build a shell that stays dry, regardless of what the weather does.
Table of Contents
Cavity Wall Construction Types Beyond the Surface
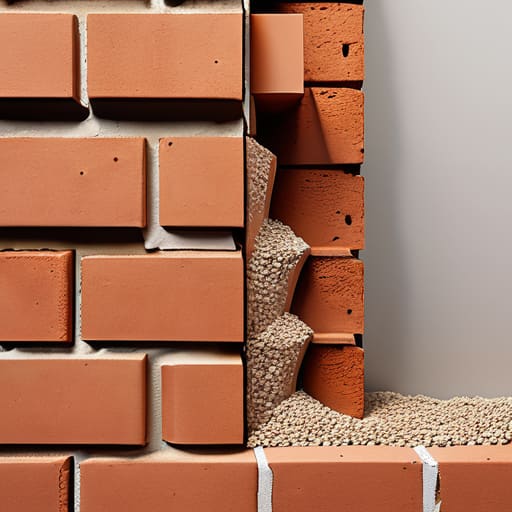
Now, don’t go thinking every cavity wall is built the same way. I’ve seen plenty of lads treat it like a one-size-fits-all job, but if you aren’t looking at the specific cavity wall construction types being used, you’re flying blind. You’ve got your standard two-skin build with a clear gap, which is what most of us are used to, but then you run into older properties with much narrower voids or even “filled” cavities that were never meant to be there. If that gap is too tight or filled with debris from a messy build, you aren’t building a barrier; you’re building a bridge for moisture to travel straight through to the inner leaf.
The real difference comes down to how the two layers are actually tied together. Some houses use the old-school metal ties that eventually rust out—that’s when you start seeing the nightmare of cavity wall tie replacement jobs. Others use modern stainless steel, which is a different kettle of fish entirely. You need to know if you’re dealing with a ventilated cavity or a closed one. If you skip the weep holes and moisture control details in a closed system, you’re just asking for a damp patch to show up on the living room wallpaper six months down the line.
Thermal Efficiency of Cavity Walls the Real Heat Killers
Everyone talks about the thermal efficiency of cavity walls like it’s a magic fix, but they forget that a cavity is only as good as its cleanliness. You can pack the best mineral wool or beads in the world into that gap, but if the original build left a mess of mortar droppings or debris on the inner leaf, you’ve just created a thermal bridge. Those little lumps of dried cement act like tiny highways for heat to escape, bypassing your expensive insulation entirely. I’ve seen plenty of “efficient” houses that stay freezing in February simply because the builders were too lazy to clear the cavity before the insulation went in.
Then you’ve got the moisture side of things, which is where most people get it wrong. People think insulation is just about warmth, but it’s also about preventing damp in cavity walls by managing how that air moves. If you’ve got blocked weep holes or if the ties are rusted through, you’re not just losing heat; you’re inviting moisture to sit right against your inner skin. It’s not enough to just stuff a gap with fluff; you have to ensure the entire system works as a barrier, not a sponge.
Five Things the Inspectors Miss (But the Damp Will Find)
- Watch your wall ties like a hawk. I’ve seen lads slap them in wherever they fit, but if they aren’t staggered and spaced right, that whole leaf is just a heavy curtain waiting to fall. It’s not about how many you use; it’s about where they sit.
- The cavity isn’t just empty space; it’s a barrier. If you let a bit of mortar droppings or a stray piece of insulation bridge that gap, you’ve just built a bridge for moisture to walk straight from the outer leaf to your inner wall. Once that happens, you might as well have built a solid wall with no insulation at all.
- Don’t let the wind do your job for you. If you’re building in a gale or a heavy rain, you keep that cavity clear and dry. If you let water pool in the bottom of the cavity because your DPC isn’t sitting right or your weep holes are blocked, you’re asking for a damp patch in six months’ time.
- Check your lintels twice. A lot of people focus on the bricks, but if the lintel isn’t seated properly or doesn’t have the right thermal break, you’ll get cold spots and condensation right above the window. It’s a common mistake that makes the rest of the wall’s efficiency look like a joke.
- Mind the DPC (Damp Proof Course). I’ve seen too many youngsters treat it like an afterthought, but if that course isn’t perfectly level and continuous, all the fancy cavity work in the world won’t stop the rising damp from ruining your plasterwork. It’s the most important bit of plastic on the site.
It’s Not Just About the Bricks
At the end of the day, a cavity wall isn’t just a stack of masonry; it’s a system, and systems fail when you ignore the details. We’ve talked about the different construction types and why that air gap is your best friend for thermal efficiency, but none of that matters if you let debris fall into the cavity or if you mess up the lintel details. You can buy the most expensive insulation on the market, but if your cavity trays aren’t seated right or your weep holes are blocked, you aren’t building a home—you’re building a damp trap. It always comes back to the same thing: the integrity of the build is decided by the small, boring bits of prep that most lads try to rush through just to get the job finished.
If you take nothing else away from this, remember that you can’t fix a bad foundation or a botched cavity once the render is on and the plaster is dry. Don’t be the person who tries to patch a structural mistake with a bit of sealant and a prayer. Take the extra hour, check your levels, and ensure that the gap stays clear and functional. When you do it right the first time, the wall does its job silently for fifty years without you ever having to think about it. That’s the difference between a job that’s just “done” and a job that’s built to last.
Frequently Asked Questions
If I’m looking at a crack in my outer leaf, is it a structural issue with the wall or just the movement of the ground underneath?
Look, I’ve seen this a thousand times. If that crack is in the outer leaf, don’t go blaming the bricks just yet. Usually, the wall is just reacting to what’s happening beneath it. If your sub-base has shifted or the ground’s settled unevenly, that outer skin is going to telegraph the movement. Is it structural? Maybe. But before you start ripping out masonry, tell me: what’s the ground sitting on?
How do I know if my cavity is actually clear, or if someone’s been lazy and let debris and mortar droppings pile up in there?
You don’t guess with a cavity; you check it. If you’re looking at a finished wall, you’re already late. But if you’re on-site, get a high-powered torch and look through the weep holes or any inspection points. If you see a pile of mortar droppings or bits of insulation slumped at the bottom, you’ve got a bridge. That debris creates a path for moisture to bypass the gap entirely. Clean it out or don’t bother building it.
When is it actually worth the money to retrofit insulation into an existing cavity, and when am I just throwing good money after bad?
Look, before you start spending a penny, get someone to check that cavity isn’t full of rubble or old mortar droppings. If it’s clean and wide enough, retrofitting makes sense. But if the wall is bridged or the cavity’s packed with debris, you’re just paying to bury a problem. Don’t throw money at a wall that’s already compromised; you’ll end up with damp, not warmth. Check the gap first, or don’t bother.



