
I remember standing on a site in the Midlands back in ’94, watching a lad—bright enough, but too keen to move fast—shovelling hardcore right up against a freshly laid DPC. He thought he was just finishing the perimeter, but he was actually building a highway for moisture straight into the brickwork. People will try to sell you expensive chemical injections or fancy membranes to fix a damp problem later, but they’re selling you a cure for a disease they helped cause. If you want to know how to avoid bridging a damp proof course, you don’t need a specialist consultant; you just need to stop being lazy with your fill.
I’m not here to give you a lecture from a textbook or some glossy brochure written by someone who’s never had mud on their boots. I’m going to tell you exactly how it’s done on a real job site, focusing on the sub-base and the levels that actually matter. We’ll talk about why your patio height is your biggest enemy and how to manage your layers so you aren’t calling me in five years to complain about rising damp. This is about doing the groundwork right the first time, so the house stays dry and your conscience stays clear.
Table of Contents
Getting the Correct Soil Level for Masonry Right
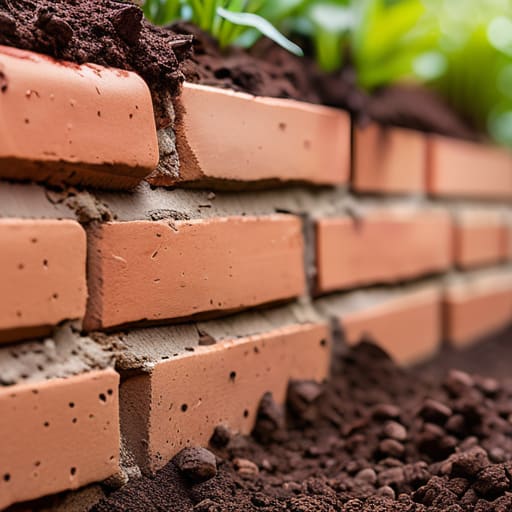
You can have the best damp proof course money can buy, but if you pile the garden soil up against the brickwork like you’re building a mound, you’ve already lost the battle. I’ve seen it a thousand times on new builds: the landscapers come in after the bricklayers have gone, and they treat the correct soil level for masonry as a suggestion rather than a rule. If that dirt sits even an inch above your DPC, you aren’t just risking a bit of moisture; you’re creating a direct highway for water to bypass your entire defence system.
It’s about more than just height, though. You need to think about how water moves once it hits that perimeter. If you’ve got heavy clay or poorly compacted fill sitting right against the wall, it’ll hold onto that moisture like a sponge, putting constant pressure on the structure. That’s why improving perimeter drainage is just as vital as the height itself. You want a clear, sloping drop-off that directs water away from the footings, not a soggy basin that keeps the masonry perpetually damp. Don’t let a bit of lazy landscaping turn a solid build into a damp nightmare.
Protecting Building Foundations From Moisture Through Depth
You can have the best damp proof course in the world, but if you don’t respect the depth of your footings, you’re just fighting a losing battle. I’ve seen too many lads think that as long as the DPC is visible, they’re golden. They aren’t. You need to ensure your foundations are set deep enough to stay below the frost line and, more importantly, well below the level where seasonal ground movement starts playing games with your moisture barrier. Protecting building foundations from moisture isn’t just about a plastic sheet; it’s about the sheer volume of stable, well-compacted material sitting beneath the structure.
If you’re working on a site with heavy clay or high water tables, you can’t just skim over the depth requirements. You need to be looking at improving perimeter drainage right from the start to keep that water from pooling against your footing. If your sub-base is shallow and your external ground levels are creeping up toward that DPC, you’ve already lost the fight. You aren’t just building a wall; you’re managing a water table, and if you don’t give it enough depth to move, it’ll find its way into your living room.
The three things you're skipping that will ruin the build
- Stop treating your sub-base like a rubbish bin. If you’re throwing loose hardcore, broken bricks, or uneven chunks of stone around the perimeter, you’re creating a highway for moisture. You need a compacted, consistent layer that doesn’t sit higher than the DPC line, or you’ll be looking at damp walls before the plaster is even dry.
- Watch your paving levels like a hawk. I’ve seen too many lads lay a nice patio, only to realize they’ve built it up right against the house, burying the DPC under six inches of bedding mortar. If your finished paving or decking sits higher than that plastic membrane, you’ve just bridged it, and no amount of sealant is going to save you from the rot.
- Don’t get lazy with the drainage. If you don’t plan your falls and your soakaways correctly, water is going to pool right against the foundation. A wet sub-base is a hungry sub-base; it’ll hold that moisture against your damp proof course and eventually find a way through, especially if your ground levels aren’t sloping away from the structure.
- Mind the garden beds. I tell people all the time: don’t go planting heavy shrubs or building raised flower beds right up against the brickwork. When that soil gets saturated, it sits there like a wet sponge against your wall, bypassing the DPC entirely. Give the house some breathing room, or at least keep the soil level well below the line.
- Check your external finishes before you walk away. Once the ground is in, it’s a nightmare to fix. Before you sign off on any hardcore or final grading, get down on your knees and look at that DPC. If it’s not clearly visible and sitting well above your finished ground level, stop the work. It’s much cheaper to move a bit of stone now than to strip wallpaper in six months.
Don't Let a Lazy Finish Ruin a Good Build
At the end of the day, preventing a bridged DPC isn’t about some complex engineering calculation; it’s about having the discipline to respect the levels you’ve set. You’ve got to get the sub-base compacted properly, ensure your hardcore doesn’t creep up into the cavity, and for heaven’s sake, keep an eye on your external paving and soil levels. If you let the ground rise up to meet the brickwork, you’ve effectively handed the keys to the damp to every rainstorm that comes through. It’s the unseen layers—the stone, the sand, and the fill—that determine whether that DPC actually does its job or just becomes a decorative strip in a wet wall. Don’t let a bit of sloppy landscaping undo months of solid masonry work.
I’ve spent forty-three years watching people try to fix damp issues with expensive sprays and chemical injections, only to find out the real culprit was a pile of dirt pushed too high against the house. It’s frustrating to see, but it’s avoidable. If you take the time to do the groundwork right, to respect the sequence, and to keep your levels honest, you won’t be getting calls from worried homeowners five years down the line. Build it once, build it deep, and leave enough breathing room between the earth and your walls. That’s how you build something that lasts, rather than something that just looks good on handover day.
Frequently Asked Questions
What's the minimum gap I actually need between my finished paving and the DPC to sleep easy at night?
Listen, if you’re looking for a magic number to satisfy a building inspector, they’ll tell you 150mm. But if you want to sleep easy, don’t just aim for a measurement; aim for a clear air gap. I’ve seen too many lads get lazy with the patio levels, thinking a few extra slabs won’t hurt, only to find they’ve turned the house into a sponge. Keep it at least 150mm clear of any paving or groundworks. Anything less and you’re playing a dangerous game with moisture.
If I’ve already poured a slab that’s sitting too high against the wall, is there a way to fix it without ripping the whole thing out?
Look, I’ve seen it a dozen times. Someone’s in a rush, the slab goes in too high, and suddenly that DPC is buried. You don’t necessarily need a sledgehammer and a jackhammer to fix it. If the slab is solid, you can cut a channel around the perimeter using a petrol saw to drop the level. It’s more work than doing it right the first time, but it’s better than letting the damp rot your walls.
How do I stop heavy rain from washing silt and grit into the gap and effectively bridging the course anyway?
You’ve got to stop thinking about the DPC as a line on a wall and start thinking about it as a barrier against the elements. If you’ve got heavy rain washing silt into that gap, you’re basically inviting a slow-motion disaster. You need a proper splash strip or a bit of paving right up against the face to shed that water away. Don’t just leave raw earth or loose grit sitting there; grade it so the run-off heads elsewhere.



