
I was standing on a site in Surrey last autumn, watching a young lad try to slap some high-end, premium lead flashing over a masonry joint that looked like it had been built by someone with a grudge. He was checking the price tag on the material, thinking the cost would save him, but I just shook my head. People spend a fortune on the “best” materials, but they completely ignore the fact that how flashings should be detailed depends entirely on what’s sitting underneath them. If your substrate is uneven or your mortar is crumbling like a biscuit, you could install gold-plated flashing and you’d still be calling me to fix a leak in six months’ time.
I’m not here to sell you on expensive gadgets or complicated manufacturer manuals that nobody actually reads on a wet Tuesday. I’m going to tell you how it actually works when the wind is howling and the rain is driving sideways. We’re going to talk about the unseen prep work, the importance of the underlying surface, and why the way you seat that metal is more important than the metal itself. I’ll show you how to do it right the first time, so you aren’t patching up failures for the next twenty years.
Table of Contents
The Waterproofing Membrane Integration Nobody Checks
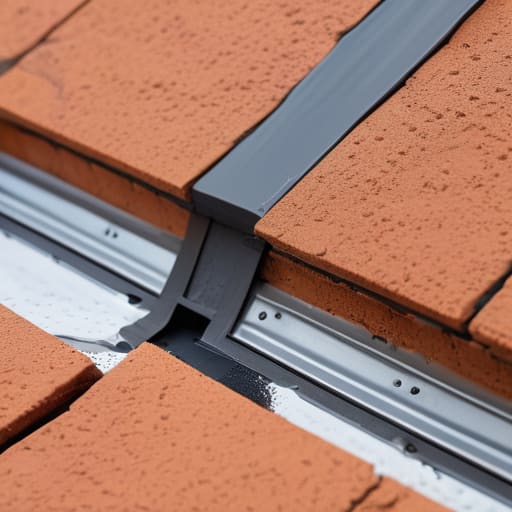
You can spend a fortune on the highest grade of metal or lead, but if you treat the junction between the wall and the roof like an afterthought, you’ve already lost the battle. I’ve seen plenty of lads slap a bit of flashing on top of a membrane and call it a day, thinking the visual finish is what matters. It isn’t. The real work happens in the waterproofing membrane integration—the part that sits tucked away where nobody looks until the ceiling starts dripping. If that membrane isn’t properly tied into the flashing, or if it’s just sitting there loosely, you’re basically building a funnel to guide rainwater straight into the structure.
Most failures I see come down to ignoring the correct upstand height requirements. If that membrane doesn’t climb high enough up the substrate before the flashing takes over, you’re asking for trouble. It doesn’t matter how well you’ve hammered that metal into place; if there’s a gap or a lack of continuity between the membrane and the flashing, the water will find it. You have to treat the transition as a single, unbroken unit, not two separate jobs being done by two different crews who haven’t spoken to each other all morning.
Correct Upstand Height Requirements or Expect Failure
I’ve seen it a hundred times: a lad finishes a job, looks at a tiny bit of membrane peeking out from under a strip of metal, and thinks he’s done. He hasn’t. If you aren’t following the correct upstand height requirements, you aren’t building a roof; you’re building a funnel for the next heavy rain. You need that membrane to climb up the wall—usually a good 150mm minimum—before the flashing even thinks about covering it. If that upstand is too low, the water doesn’t just run over it; it finds its way behind the material through capillary action or a bit of wind-driven spray.
It doesn’t matter if you’re choosing metal flashing vs lead flashing or spending a fortune on premium materials. If the vertical rise isn’t tall enough to clear the expected water level, you’re just delaying the inevitable. Most people focus on the pretty bit you see from the ground, but preventing water ingress at junctions happens in that hidden vertical space. If the upstand is shallow, the first time the wind picks up during a storm, that water is going straight into the substrate, and by then, the damage is already done.
Five Ways You’ll Screw Up Your Flashing Before the First Rain Hits
- Stop treating the flashing like a decorative trim. If you aren’t integrating it directly into the waterproofing membrane with a proper lap and a reliable sealant, you aren’t building a seal—you’re just building a ramp for water to follow straight into the structure.
- Watch your fastener placement like a hawk. I’ve seen lads drive screws right through the critical part of a flashing profile because they were rushing to finish before lunch. You hit the wrong spot, you create a channel, and you’ve just built a leak.
- Don’t get lazy with the sealant. I don’t care if the manufacturer says a certain product is “all-weather”; if you’re applying it over dust, grit, or a damp substrate, that bead is going to peel off in six months. Clean the surface properly or don’t bother.
- The geometry has to be right. If your flashing has sharp, awkward bends that the metal can’t actually hold, it’s going to spring back or crack the coating. You need smooth, continuous transitions, not a series of jagged angles that create stress points.
- Respect the expansion gaps. Buildings move—they breathe, they settle, and they shift with the temperature. If you’ve pinned your flashing down so tight that it can’t move with the substrate, the first frost is going to buckle it or tear the seal right off the wall.
Stop Chasing the Finish and Start Respecting the Foundation
At the end of the day, you can hire the most expensive specialist in the country to install your flashings, but if you’ve botched the membrane integration or let the upstands sit too low, you’re just decorating a disaster. I’ve seen it a thousand times: a site manager gets impatient, skips the membrane tie-in to save an hour, and then wonders why the building is weeping six months later. It’s not about the metal or the sealant; it’s about the sequence of work. If the substrate isn’t prepared and the waterproofing isn’t tucked in exactly where it should be, that flashing is nothing more than a shiny piece of scrap metal waiting to fail.
My advice? Stop looking at the flashy bits and start looking at what’s happening underneath them. If you want to do a job that actually lasts longer than your warranty, you have to be willing to do the unseen work properly. Don’t let the pressure of a deadline or the desire to move on to the next pour force you into a shortcut. Build it right from the ground up, respect the layers, and I promise you won’t be the one getting the phone call at midnight when the rain starts coming through the ceiling. Do it once, do it right, and do it for the long haul.
Frequently Asked Questions
If I've already poured the concrete and realised the upstand is too low, is there a way to fix it without ripping the whole thing out?
Look, I’ve seen this a dozen times. You’ve realised the mistake only once the truck’s gone and the slab’s set. If you’re asking if you can just slap some extra mortar on top, the answer is no—that’ll crack and peel faster than a cheap sunburn. You’re looking at a specialized non-shrink repair grout or a high-build epoxy system to build that upstand height. It’s a headache and it costs more than doing it right the first time, but it beats ripping it all out.
How much does the weather actually matter when you're sealing the flashing to the substrate—can you do it right if it's damp out?
If it’s damp, you stop. Period. I’ve seen lads try to “make do” by heating up a substrate or rushing a seal because the clouds are looking heavy, but you can’t bond to moisture. If that surface is even slightly tacky with condensation or dew, your sealant is just sitting on top of a film, not actually sticking. You’ll think it’s fine today, but the first frost or heatwave will peel it right off like a scab.
Most blokes tell me to just use more sealant to bridge the gaps, but at what point does a bit of extra caulk become a lazy way of hiding a bad detail?
Listen, sealant isn’t a structural component; it’s a finishing touch. If you’re using a thick bead of caulk to bridge a gap because the flashing doesn’t sit flush or the substrate is uneven, you aren’t “fixing” anything—you’re just putting a bandage on a broken bone. The moment you rely on sealant to compensate for poor geometry or bad positioning, you’ve failed. Sealant eventually dries, cracks, and peels. A proper detail stays watertight because the metal and the membrane are doing the work, not the tube of silicone.