I remember standing on a site in ’94, watching a young lad tie off a mesh sheet like he was wrapping a birthday present, only to have the whole lot sink into the muck the second the pump started. He thought he was doing a grand job, but he hadn’t a clue about how rebar is detailed and fixed to actually work with the concrete, not just sit in it. You can spend a fortune on the highest grade steel and the most expensive mix in the county, but if that steel isn’t sitting exactly where the engineer intended, you aren’t building a foundation—you’re just burying money in the mud.
I’m not here to give you a lecture from a textbook or show you some shiny 3D render that looks good on a computer screen. I’m going to tell you how it actually works when the rain is coming down and the concrete truck is idling at the gate. We’re going to strip away the nonsense and look at the real-world mechanics of proper placement, chair spacing, and tying techniques that ensure your steel stays in the middle of the slab. If you want to know how to do it right the first time, listen close.
Table of Contents
Structural Reinforcement Detailing Before the Trucks Arrive
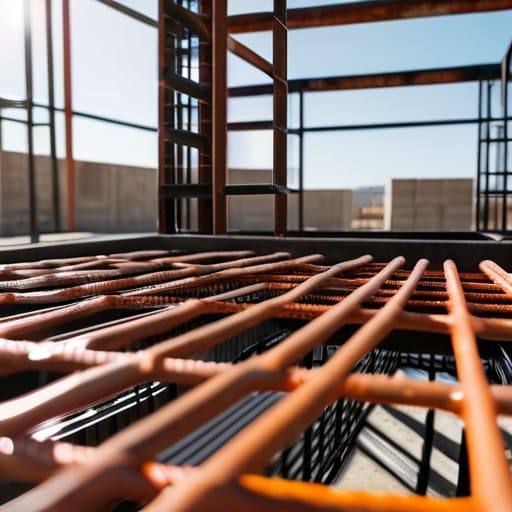
You can spend all day obsessing over your rebar cages, but if your crew is sloppy with the spacing or forgets the chairs, that steel is going to end up sitting in the mud instead of the middle of the slab. I’ve seen it a hundred times: a lad thinks he’s being clever and skips the spacers to save time, only for the steel to sink two inches during the pour. Once that happens, you’ve lost your concrete cover requirements, and you might as well be pouring a glorified sidewalk instead of a structural foundation. If that steel isn’t positioned exactly where the engineer intended, the whole job is compromised before the first shovel hits the mix.
It isn’t just about where the bars sit, though; it’s about how they connect. I’ve seen sites where they treat lap splice length standards like they’re mere suggestions rather than the law. If those overlaps aren’t long enough or aren’t secured properly, the tension won’t transfer through the steel, and you’ll see cracks the moment the load hits. You need to be meticulous with your rebar tying techniques to ensure nothing shifts when the vibrator starts humming. If it isn’t tight and it isn’t right, don’t bother calling the truck.
Lap Splice Length Standards That Keep the Slab Whole
Now, here is where I see most young lads getting caught out. They think as long as two bars are touching, they’re doing the job. They aren’t. If you don’t respect the lap splice length standards, you might as well not be putting steel in there at all. You need enough overlap so the tension can actually transfer from one bar to the next through the concrete. If your lap is too short, that connection becomes a weak point, and once the slab starts to deflect, that joint is exactly where the crack is going to find its way to the surface.
I’ve seen too many sites where the lads are rushing to get the pour started, so they cut the laps down to save a bit of steel or time. Don’t be that person. It’s not just about the length; it’s about the integrity of the connection. You also need to make sure your reinforcement steel placement stays consistent through those laps. If the bars shift or sag because they weren’t tied off properly, you’ve lost your structural advantage before the first shovel of aggregate even hits the ground.
Five Ways to Stop Your Steel From Becoming a Total Waste of Money
- Stop treating rebar chairs like an afterthought. If you just toss the mesh onto the ground or let the lads kick it down while they’re walking the slab, that steel is going to end up sitting in the mud. Once that happens, it’s useless. You need that steel dead-centre in the concrete, not hugging the sub-base like a lost dog.
- Watch the lap splices like a hawk. I’ve seen too many crews try to save a few quid by shortening the overlap because they’re in a rush to get the pour started. If you don’t get that lap length right according to the spec, you haven’t built a continuous reinforcement; you’ve just built a series of disconnected, weak links waiting to snap.
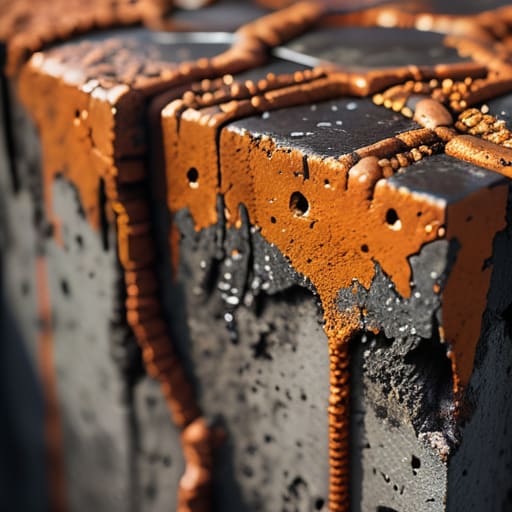
- Clean your steel before it’s buried. I don’t care if it’s been sitting in a yard for a week; if there’s loose scale, heavy rust, or dried mud caked onto those bars, the concrete isn’t going to bond to it properly. You aren’t just pouring around the steel; you’re trying to make them work as one unit. If the bond is rubbish, the reinforcement is just expensive decoration.
- Secure your ties properly. A rebar cage shouldn’t move when you step on it. If your lads are being lazy with the tie wire and the whole skeleton shifts or wobbles when the concrete starts hitting it, your detailing is gone. I’ve seen a perfectly designed layout get completely ruined in the first ten minutes of a pour because nobody bothered to tie it down tight.
- Mind the edge distance. People get so focused on the middle of the slab that they forget the edges. If your rebar is sitting too close to the formwork, you’re asking for “spalling”—where the concrete cracks and falls off the edge because there isn’t enough cover to protect the steel. You need enough concrete around that metal to protect it from the elements, or you’ll be back fixing it in two years.
The Final Inspection Before the Mix
At the end of the day, you can have the most expensive mix design in the world, but it won’t save a job where the steel is misplaced. We’ve talked about why the detailing matters, from the way you lap those splices to ensure the load actually transfers, to making sure your chairs aren’t crushed the moment a man walks across the cage. If your rebar is sitting in the mud, or if your spacing is a joke because someone wanted to save a few minutes on the ties, you aren’t building a foundation; you’re building a future headache. Remember, the concrete will eventually hide your mistakes from the naked eye, but it will never hide the structural failure that follows when the ground shifts and that steel isn’t where it’s supposed to be.
I’ve spent forty-three years watching men rush the prep work only to spend the next ten years explaining why a slab is cracking. My advice is simple: treat the rebar like it’s the only thing holding the whole project together, because in a lot of ways, it is. Don’t let the pressure of the concrete trucks arriving make you cut corners on the layout. Take the extra time to check your laps, verify your cover, and ensure that steel is exactly where the drawings say it should be. When you do it right, the pour is just a formality; when you do it wrong, you’re just waiting for the inevitable.
Frequently Asked Questions
If the rebar is all positioned correctly according to the drawings, why does it still end up shifting or sinking into the sub-base once the concrete starts flowing?
Because you’re treating the steel like it’s sitting on a shelf instead of a job site. You can have the perfect drawings, but if you haven’t got enough chairs or the wrong grade of spacer, that rebar is going for a swim the moment the pump starts. I’ve seen it a thousand times: a lad walks over a cage to check a level, the steel shifts, and suddenly your reinforcement is buried in the sub-base. Once it’s down there, it’s useless.
How much does the actual spacing of the bars matter if the slab isn't under a heavy structural load, or is that just another area where people try to cut corners?
Listen, I hear this one a lot. People think if it’s just a garden path or a light domestic slab, they can space the steel out like they’re laying a fishing net. That’s a mistake. Even if you aren’t building a bridge, that steel is there to control the shrinkage cracks. If your spacing is wonky and too wide, you’re just inviting the slab to crack in the big, ugly gaps between the bars. Don’t get lazy just because the load is light.
When am I actually going to see a failure caused by poor lap splices versus just having a bad mix or a dodgy sub-base?
If your sub-base is dodgy, you’ll see cracks running straight through the slab or, worse, the whole thing will tilt like a bad tooth. If the mix is rubbish, it’ll crumble like a biscuit or scale off the top. But a bad lap splice? That’s a different beast. You’ll see structural splitting or a clean break right at the joint where the steel stops. It’s a failure of strength, not just a surface crack.