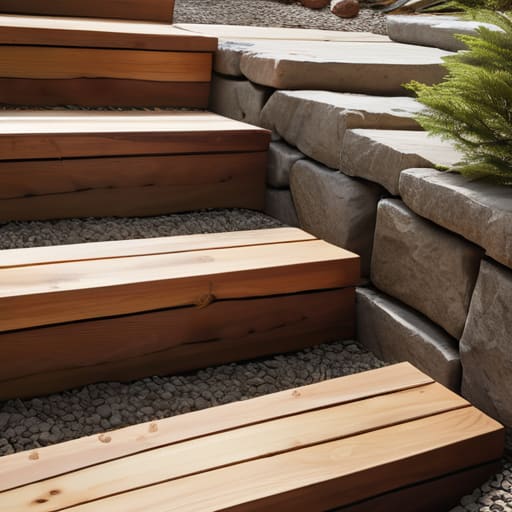
I once spent a Tuesday afternoon watching a lad—barely old enough to shave—trying to figure out how to build steps outdoors using nothing but a handful of gravel and a prayer. He was so focused on getting the concrete looking smooth and level that he didn’t even notice the ground beneath him was nothing but soft, uncompacted clay. I didn’t bother telling him then; I just watched. Three months later, after the first heavy rain, those steps didn’t just crack—they migrated halfway down the garden. Most people think the hard part of learning how to build steps outdoors is the pouring or the finishing, but they’ve got it backwards. The pour is the easy bit; it’s the invisible work you do in the dirt hours before the truck arrives that determines if you’re building a permanent structure or a future headache.
In this guide, I’m not going to give you any of that polished, textbook nonsense that ignores the reality of a muddy site. I’m going to walk you through the proper sequence of getting your sub-base rock-solid, setting your forms so they don’t blow out, and managing your mix so it doesn’t fail you when the temperature drops. We’re going to talk about the stuff nobody photographs—the digging, the compaction, and the uncomfortable truth about why shortcuts always cost you double in the long run.
Table of Contents
Guide Overview
Tools & Supplies
- Shovel for digging the base and leveling ground
- Level to ensure steps are even and safe
- Drill/Driver for securing timber or stones
- Handsaw or Circular saw for cutting materials
- Pressure-treated lumber or stone pavers (quantity depends on scale)
- Crushed stone or gravel for a stable base
- Landscape fabric to prevent weed growth
- Wood screws or masonry adhesive for fastening
Step-by-Step Instructions
- 1. First thing you do—and I mean the very first thing—is stop looking at the blueprints and start looking at the dirt. You can’t just dig a hole and hope for the best. You need to excavate down until you hit solid, undisturbed ground. If you’re building on soft topsoil or muck, you might as well be pouring your concrete into a sponge. Dig out your footprint, making sure you go deeper than the actual steps to allow for a proper foundation layer.
- 2. Now, we talk about the sub-base, because if you skip this, don’t bother calling me when it shifts. You need to lay down a thick, compacted layer of MOT Type 1 aggregate. Don’t just dump it in a pile; you need to spread it out in thin layers and hit it hard with a vibrating plate compactor. If that sub-base isn’t rock solid and perfectly level, your steps will settle unevenly, and you’ll be looking at a diagonal crack that no amount of sealant will ever fix.
- 3. Once the base is tight, you need to set your formwork. I’ve seen too many lads use thin, flimsy timber that bows out the moment the weight of the wet concrete hits it. Use heavy-duty shuttering and brace it like your life depends on it. You need to calculate your rise and run precisely here; if your forms are even a fraction off, your steps will look like a drunkard’s staircase. Use a spirit level on every single face, and don’t trust your eyes—trust the bubble.
- 4. Before the truck even pulls up, you need to prepare your reinforcement. For anything substantial, you should be laying down steel mesh or rebar. This isn’t just “extra” work; it’s what gives the slab its tension strength. Make sure the steel is propped up on spacers so it sits in the middle of the concrete, not resting on the dirt at the bottom. If the steel is buried at the base, it’s doing absolutely nothing for the structural integrity of the steps.
- 5. When the pour actually happens, keep a close eye on the mix. If the driver shows up and the concrete looks like soup, or if some bloke on site suggests adding a bucket of water to make it “easier to spread,” tell him to get lost. You want a mix that is workable but stiff. Use a shovel or a rake to move it into the corners, and use a poker to get the air bubbles out. You want a dense, solid mass with no voids, or you’re just building a house of cards.
- 6. Once you’ve leveled it off with a screed board, the real work begins: the finish. Don’t go overboard with the power float too early, or you’ll trap moisture under the surface. Wait until the “bleed water” has disappeared. I always tell people to keep it simple. A clean, brushed finish is better than a shiny one that looks great for a week and then starts flaking off because you finished it too wet.
- 7. Finally, and this is where most amateurs fail, you have to manage the curing. You can’t just walk away and leave it to the sun and wind. If the water evaporates too fast, the concrete will shrink and crack before it’s even reached full strength. Cover it with plastic sheeting or damp hessian and keep it moist for at least a few days. You aren’t just waiting for it to get hard; you are nurturing the chemical reaction that makes it strong.
The Ground Truth Why Your Sub Base Dictates the Lifespan
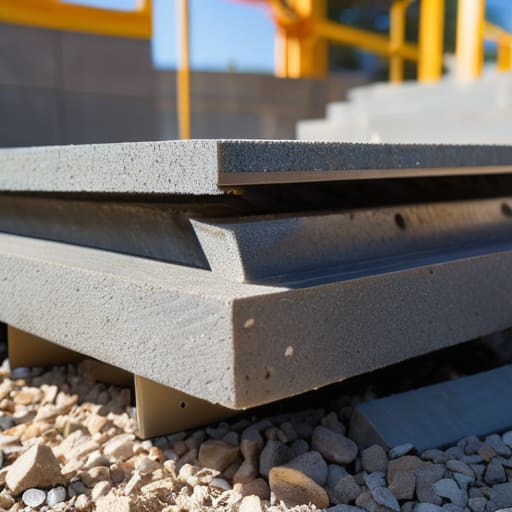
Listen, I’ve seen plenty of lads spend a fortune on fancy outdoor staircase construction materials, only to watch their work heave and split two summers later. They focus on the finish, the texture, or how the stone looks against the garden, but they’re ignoring the only thing that actually matters: what’s underneath. If you’re building on soft soil or haven’t compacted your MOT Type 1 until it’s rock hard, you aren’t building steps; you’re building a future headache. You can have the most expensive granite treads in the world, but if that sub-base shifts even a fraction of an inch, your geometry is gone.
Don’t let anyone tell you that a little bit of sand or some loose rubble is “good enough” for a foundation. I’ve spent forty years watching people try to cut corners on the prep work, and it never ends well. Before you even think about calculating stair rise and run, you need to be obsessing over your compaction layers. If you don’t get the ground right, those precise tread and riser dimensions you worked so hard on won’t mean a damn thing once the earth decides to settle.
Beyond the Surface Choosing Outdoor Staircase Construction Materials
Now, once you’ve actually sorted the ground so it isn’t going to shift under you, you have to decide what you’re actually putting on top. People get blinded by the pretty stuff in catalogues, but you need to think about the long game. If you’re building garden steps with stone, you’d better be sure those slabs are thick enough to handle the weight without snapping, and you’d better have a plan for how they sit on your bedding mortar. I’ve seen too many lads try to save a few quid on thin pavers only to have them tilt and crack within a single season because they didn’t respect the load.
If you aren’t going the masonry route, you might look at wooden deck step installation, but don’t think that’s an easy way out. Wood rots, warps, and moves with the moisture in the air. If you go timber, you’ve got to be obsessive about the framing and the drainage underneath. Whether it’s stone, timber, or poured concrete, the material is only as good as your understanding of how it reacts to the weather. Don’t pick something just because it looks good in a magazine; pick it because you know how it’s going to behave in five years’ time.
Five Things You’ll Regret Skipping When the Frost Hits
- Stop obsessing over the tread and start worrying about the drainage. If you don’t pitch your steps slightly forward—just a tiny fraction, mind you—water is going to sit on those treads, freeze, and start prying your concrete apart from the inside out.
- Don’t let some lad with a hose make the mix too wet just because he’s tired of working a stiff load. Adding water on-site to make it “flow better” is the fastest way to ruin your strength and leave you with a surface that’ll scale and flake off in two seasons.
- Get your reinforcement right the first time. I don’t care if you think a bit of wire mesh is overkill; if you’re building anything substantial, you need steel in there to tie that mass together, or you’re just building a very expensive pile of gravel waiting to shift.
- Watch the weather like a hawk. If the ground is frozen or if there’s a heavy frost forecast for the night, don’t even think about calling the truck. Pouring on a cold base is a recipe for a structural disaster that no amount of curing compound can fix.
- Don’t skimp on the expansion joints. Steps are a moving target, especially when the temperature swings. If you don’t give the concrete a place to move when it expands, it’ll find its own way to crack, and it won’t be where you planned it.
The Hard Truth About the Finish
Look, if you’ve followed what I’ve said, you know that building steps isn’t just about slapping some wet mix into a wooden frame and calling it a day. It’s about the hours you spent compacting that MOT Type 1, the precision of your formwork, and the discipline you showed when you resisted the urge to add extra water to the truck just to make the trowel glide easier. You’ve dealt with the sub-base, you’ve picked your materials, and you’ve planned your joints. If you skip any of that, you aren’t building steps; you’re just building a future headache that’ll be cracking and shifting by next winter.
At the end of the day, I want you to walk away with more than just a set of stairs; I want you to have something that actually lasts. There is a massive difference between a job that looks decent on the day of the pour and a job that stands its ground for twenty years. Do the work properly, even the parts that nobody will ever see once the grass grows back around the edges. If you respect the process and the preparation, the concrete will do the rest of the work for you. Now, get out there and do it right.
Frequently Asked Questions
How do I know if my sub-base is actually compacted enough, or am I just guessing with a plate compactor?
You aren’t guessing if you’re doing it right, but you’re probably not checking the only thing that matters. Stop looking at the surface and start looking at the movement. If you can drive a heavy screwdriver into that base with any ease, it’s rubbish. I used to carry a penetrometer, but honestly? If you hit it with a sledgehammer and it feels like a drum, you’re getting there. If it gives, you go again.
If I'm pouring these steps in the middle of summer, how do I stop the concrete from drying too fast and cracking?
Listen, if you’re pouring in the heat, the sun is your enemy. If that water evaporates before the concrete has set, you’re looking at shrinkage cracks that’ll haunt you forever. Don’t let some lad add water to the truck just because it’s “stiff”—that’s suicide. Once you’ve finished, get it covered. Use damp hessian or even plastic sheeting to keep the moisture in. You want it to cure, not bake.
When do I actually need to cut expansion joints into the steps so the whole thing doesn't heave when the ground shifts?
You don’t wait until the concrete is dry to think about joints; you plan them before the first shovel hits the dirt. For steps, you need to cut your control joints as soon as the concrete is hard enough to walk on without leaving a footprint, but before it’s too brittle. Usually, that’s within 6 to 18 hours. If you wait until tomorrow, you aren’t “cutting” a joint—you’re just following a crack that’s already happened.



