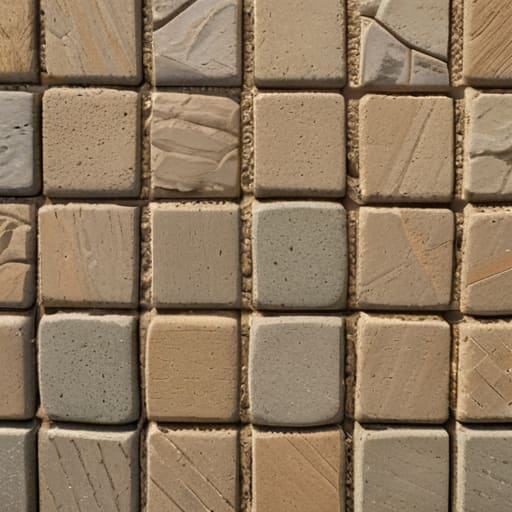
I remember standing on a driveway in Surrey five years ago, watching a lad finish off a beautiful pattern of granite setts, looking damn proud of himself. He thought he’d done a grand job because the surface looked like a magazine spread, but I could already see the trouble brewing. Two months later, I was called back to look at a mess of shifting stones and hollow spots. The problem wasn’t the blocks; it was the fact that he’d skimped on the sub-base compaction to save a few hours of rental time. Most people think a complete guide to block paving should be about choosing the right colours or patterns, but they’re dead wrong. If you don’t get the ground underneath sorted, you aren’t building a driveway—you’re just setting a trap for a sinkhole.
I’m not here to sell you on fancy aesthetics or expensive sealants that won’t last a season. In this complete guide to block paving, I’m going to tell you the truth about what actually keeps a patio level and solid for twenty years instead of two. We’re going to talk about the grit, the depth of your MOT Type 1, and why the way you compact your layers matters more than the brand of stone you buy.
Table of Contents
Guide Overview
Tools & Supplies
- Shovel and spade for excavation
- Plate compactor for sub-base leveling
- Rubber mallet for setting blocks
- Spirit level for ensuring even surface
- String lines and pegs for alignment
- Block paving stones (calculate area + 10% extra)
- Sub-base material/MOT Type 1 (crushed stone)
- Sharp sand (for bedding layer)
- Jointing sand/Kiln dried sand (for filling gaps)
- Geotextile membrane (to prevent weed growth)
Step-by-Step Instructions
- 1. First things first, you need to dig out the area. Don’t just scrape the grass off the top and call it a day; you need to get down to the actual sub-grade. For a standard driveway, I’m looking at a depth of about 150mm to 200mm depending on what’s driving over it. If you leave organic matter, roots, or soft topsoil in that hole, you’re essentially building your driveway on a sponge. Dig it deep, dig it wide, and make sure the bottom is dead level and firm before you even look at a bag of sand.
- 2. Now we talk about the sub-base, which is where most of you lot fail. You need a good, thick layer of MOT Type 1—not that cheap rubbish, the proper crushed stone. Spread it out in layers, maybe 75mm at a time, and use a heavy-duty vibrating plate to compact it. If you just dump it all in at once and run a small wacker over the top, you’ll have hollow spots that will cause the paving to dip the moment a car rolls over it. I want to see that stone locked together so tight you couldn’t drive a screwdriver through it.
- 3. Once your sub-base is solid, it’s time for the bedding layer. You’ll be using sharp sand here—not the soft, rounded stuff you use for a sandbox. Spread it over your compacted stone to a depth of about 30mm to 40mm. Use a straight edge to screed it perfectly flat, and for heaven’s sake, do not walk on it once it’s leveled. If you step on that sand, you’ve ruined the plane, and you’ll spend the next six hours fighting a battle you’ve already lost.
- 4. Laying the blocks is the part everyone likes to photograph, but it’s pure geometry. Start from a straight edge—usually a house wall or a curb—and work your way out. Lay your blocks in the pattern you’ve chosen, whether it’s herringbone or stretcher bond, and keep your joints tight. If you see gaps wider than a couple of millimetres, you’re doing it wrong. You want them snug against each other so the load is distributed across the whole surface, not just sitting on the edges of individual stones.
- 5. When the last block is down, you’ve got to deal with the edges. If your edges aren’t restrained by a concrete haunch or a solid curb, the whole lot will start “creeping” outward within six months. I’ve seen too many beautiful driveways turn into a pile of loose bricks because someone thought a bit of dirt would hold them in place. Make sure your edge restraints are rock solid before you move on to the finishing touches.
- 6. The final step is the most underrated: the jointing sand. Sweep fine, kiln-dried sand over the entire surface so it fills every single gap between the blocks. Once it’s in, you need to go over the whole thing with that vibrating plate again—but wrap the drum in a piece of heavy carpet or rubber first so you don’t crack your expensive new stones. You’re vibrating the sand down into the depths of the joints to create a solid mass that locks everything in place. Sweep off the excess, and only then is the job actually finished.
Why Sub Base Preparation for Paving Outlasts Any Pretty Pattern
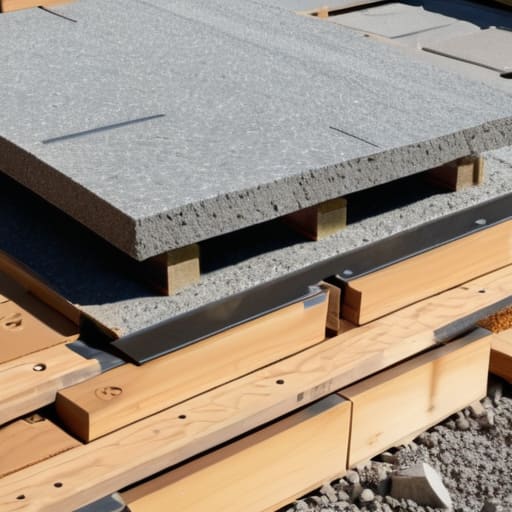
You can spend weeks obsessing over block paving pattern ideas, picking out the finest granite sets or the most expensive clay pavers, but if you’ve botched the groundworks, you’re just decorating a disaster. I’ve seen driveways that looked like a work of art on day one, only to be a wavy, tripping hazard six months later. The problem isn’t the stones; it’s that the owner thought they could save a few quid by skimping on the MOT Type 1. If you aren’t compacting that sub-base until it’s rock hard, you aren’t building a driveway—you’re just setting a trap for a sinkhole.
Proper sub-base preparation for paving is the only thing standing between a professional finish and a total structural failure. You need to get in there with a heavy plate compactor, layer by layer, ensuring there isn’t a single soft spot left. People always want to rush straight to the laying steps, but the ground is the only part of the job that actually carries the weight. If the foundation is hollow or uneven, no amount of fancy sand jointing or expensive edging is going to stop the ground from shifting under a heavy vehicle.
Preventing Block Paving Subsidence Before the First Stone Drops
Listen, if you want to talk about preventing block paving subsidence, you need to stop looking at the surface and start looking at what’s happening underneath the dirt. Most people think a driveway is just a pretty pattern of stones, but a driveway is actually a structural system. If your ground is soft or hasn’t been properly excavated to remove the organic topsoil, it doesn’t matter how expensive your blocks are; they’ll be undulating like a sea within two seasons. I’ve seen lads try to save a few quid by skipping a layer of MOT Type 1, and I’ve spent many a Monday morning explaining to a homeowner why their driveway looks like a mountain range.
You also can’t ignore your paving edge restraint methods. You can have the most perfect sub-base preparation for paving in the world, but if your edges aren’t locked down tight with a proper concrete haunch or a solid kerb, the whole lot will start to spread outward. Once those edges move, the internal structure loses its tension, the sand washes out, and you’re left with a mess. A driveway is only as strong as its perimeter. Get the edges right, or don’t bother starting.
Five Things the Salesmen Won't Tell You (But Your Driveway Will)
- Stop obsessing over the pattern and start looking at the grit. If you aren’t using the right grade of MOT Type 1 and you aren’t compacting it in thin, disciplined layers, you’re just laying expensive decorations on top of a sponge.
- Watch the edges like a hawk. A block driveway is only as strong as its containment; if your kerbing or edge restraints aren’t locked in tight, the whole lot will start migrating toward the road the first time a heavy van drives over it.
- Don’t get stingy with the jointing sand. You need to sweep that kiln-dried sand into every single gap until it’s packed tight, then vibrate it in. If those joints are hollow, the blocks will shift, and once they start moving, they never stop.
- Check your falls before you get comfortable. If you haven’t got a clear, consistent fall away from the house, you aren’t building a driveway—you’re building a swimming pool. Water is the enemy of every joint and sub-base you’ve worked hard to build.
- Resist the urge to “help” the mix. I’ve seen too many lads try to wash the dust off the blocks or mess with the bedding mortar to make it go down faster. You do it right the first time, or you’ll be back there with a crowbar in two years’ time.
Don't Let the Pretty Patterns Fool You
Look, if you’ve followed what I’ve said here, you know that a successful driveway isn’t about the colour of the stone or how fancy the pattern looks in the brochure. It’s about the grit, the depth, and the compaction of that sub-base you spent all that time sweating over. You can buy the most expensive, premium blocks on the market, but if your foundation is soft or your edge restraints are flimsy, you aren’t building a driveway—you’re just building a future headache. Remember: get the sub-base right, ensure your drainage is sorted so the water has somewhere to go, and for heaven’s sake, don’t skip the compaction. If you do those things, the blocks will stay exactly where you put them.
At the end of the day, there’s a real pride in doing a job that lasts. I’ve spent forty-three years watching people take shortcuts to save a few quid or an afternoon of hard graft, only to see their work crumble and sink two years down the line. Don’t be that person. When you finish this job, I want you to be able to stand back, look at that clean, level surface, and know in your bones that it’s solid. Do the hard work underneath the surface now, and you won’t be calling me to come out and look at the cracks in five years’ time.
Frequently Asked Questions
How thick does my sub-base actually need to be if I'm paving over an old concrete patio instead of bare earth?
You’re asking the right question, but don’t let that old concrete fool you into getting lazy. If that slab is solid, uncracked, and well-bonded to the ground, you might get away with a thin layer of grit to level things out. But if it’s already showing signs of movement or if it’s just a thin, brittle crust, you can’t skip the heavy lifting. You still need a proper, compacted sub-base. Don’t build on a lie.
I've seen people using sand for the bedding layer—is that enough to stop the blocks from shifting, or am I asking for trouble?
Sand alone? You’re asking for a nightmare. If you just dump sand on a sub-base and expect it to hold, you aren’t building a driveway, you’re building a sandbox. Without a proper grit or a well-graded sharp sand mix, those blocks will shift and wander the moment a heavy car rolls over them. Sand moves; it washes, it compacts unevenly, and it migrates. You need a solid, compacted bedding layer, or you’ll be back here in six months fixing a wavy mess.
What's the right way to handle the edges so the whole lot doesn't start spreading outward like a slow-motion landslide?
If you think the blocks are what hold the driveway together, you’ve already lost. The edges are the only thing standing between a neat pattern and a slow-motion landslide. You need a solid, rigid edge restraint—not some flimsy plastic strip that’ll buckle the first time a heavy van rolls past. I’m talking deep, compacted concrete haunching or heavy-duty timber, locked tight into the sub-base. If the edge can’t hold the lateral pressure, the whole lot will spread.



