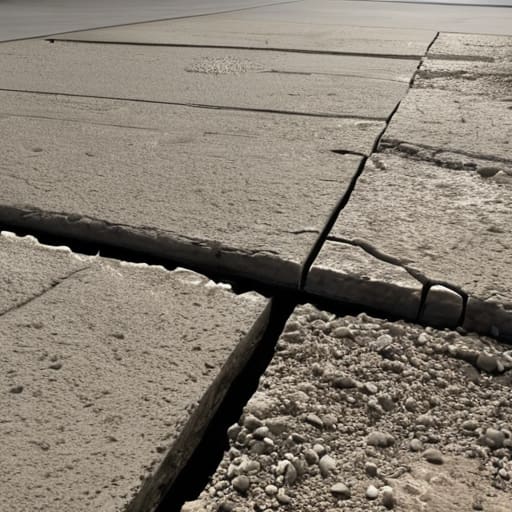
I remember standing on a driveway in Surrey back in ’98, watching a lad try to save a few quid by plopping mortar blobs under paving slabs like he was playing a game of jacks. He thought he was being clever, but I could see the uneven sub-base from ten yards away. He’d tell me later it was a “bad batch of sand,” but we both knew the truth. People love to blame the materials, but when you look at how spot bedding fails, it’s rarely the grit or the cement that’s the culprit; it’s the sheer laziness of trying to bridge a gap that shouldn’t have been there in the first place.
I’m not here to give you a lecture from a textbook or some fancy engineering diagram that doesn’t mean a thing when the rain starts coming down. I’m going to tell you exactly why those slabs are going to rock, tilt, or sink within six months. We’re going to talk about the real reasons behind the failure—from hollow voids to the way the ground settles—so you can stop wasting money on repairs that should have been avoided before the first bag of sand was even opened.
Table of Contents
Subbase Compaction Issues Are Your Silent Killers
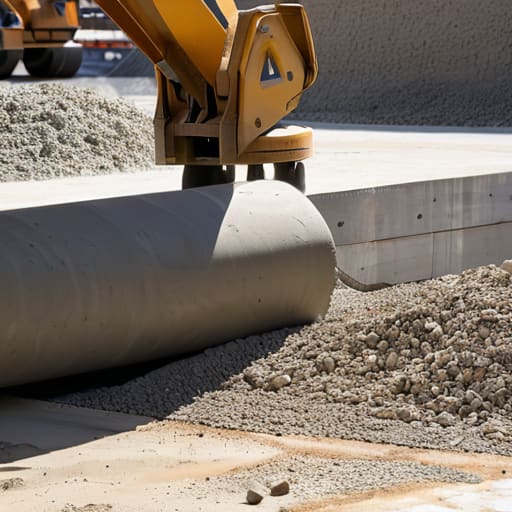
You can buy the most expensive, high-spec mix in the country, but if you’ve been lazy with the roller, you’re just pouring money into a hole. I’ve seen it a thousand times: a crew gets a bit rushed, thinks the MOT Type 1 looks “good enough,” and skips the heavy compaction. That’s your first mistake. When you have improper material grading or loose pockets in that sub-base, you aren’t building a foundation; you’re building a trap. Those voids stay there, waiting for the weight of the slab and the first heavy load to come along.
Once that weight hits, the ground shifts, and you get structural slab settlement that no amount of epoxy resin is ever going to fix. People call me up panicking about cracks, thinking the concrete is weak, but what they’ve actually got is a slab that’s trying to bridge a gap that shouldn’t exist. If that sub-base hasn’t been packed down tight and even, the slab is going to follow the movement of the earth beneath it. The ground doesn’t care about your schedule, and it certainly won’t forgive a soft spot.
Improper Material Grading Makes a Mess of the Base
You can have the best compaction machine on the planet, but if you’re feeding it the wrong rubbish, you’re just wasting diesel. I’ve seen it a thousand times: some lad thinks he can just throw a load of unsorted, chunky hardcore down and call it a day. That’s not a foundation; that’s a recipe for a disaster. When you have improper material grading, you end up with big, hollow voids between the large stones that the smaller fines simply can’t fill.
The problem is that those voids don’t stay empty. Over time, as the weight of the slab settles, those gaps collapse. You might think you’ve got a solid base, but what you actually have is a ticking time bomb for structural slab settlement. If the material isn’t graded correctly to create a dense, interlocking mass, the whole thing will shift under load. It doesn’t matter how much you vibrated it; if the particles don’t fit together like a proper jigsaw, the ground will eventually give way, and your expensive pour will follow it down.
Five Ways You’re Setting Yourself Up for a Crack
- Stop treating the sub-base like a suggestion. If you aren’t compacting in layers—not just dumping a heap and running a plate over the top—you’re just building a house of cards. You need that base tight and solid, or that slab will move the first time a heavy vehicle rolls over it.
- Watch the water like a hawk. I’ve lost count of how many lads have added a splash of water to the mix on-site because it’s “too stiff” to work with. You do that, you’re just inviting shrinkage cracks to show up before the week is out. You want a workable mix, not a soup.
- Don’t get lazy with your joints. A joint isn’t just a line you draw for decoration; it’s a controlled failure point. If you place them in the wrong spot or skip them entirely because you’re running behind schedule, the concrete will decide where it wants to crack, and it won’t be where you want it.
- Check your weather before you call the plant. If you’re pouring in the heat of the day without a plan to keep it damp, or if you’re trying to finish a slab while a frost is creeping in, you’re fighting a losing battle. You can’t outrun the temperature.
- Mind the edges and the thickness. If your sub-base isn’t consistent, you’ll end up with “soft spots” where the concrete is thinner than it should be. A thin patch is a weak patch, and a weak patch is a crack waiting to happen. If the base isn’t level, the pour won’t be either.
Don't Blame the Mix
At the end of the day, you can order the most expensive, high-spec concrete in the country, but it won’t save you if you’ve botched the prep. We’ve looked at how poor compaction creates those hollow air pockets and how using the wrong grade of material turns your foundation into a sponge. If your sub-base isn’t a solid, uniform platform, you aren’t building a slab; you’re just laying a trap for future cracks. Spot bedding fails because people treat the ground like it’s a secondary thought, when in reality, the ground is the entire job. Once that truck starts discharging, the clock is ticking, and there’s no going back to fix a foundation that wasn’t right to begin with.
My advice to the younger lads starting out is this: take your time with the muck before the concrete arrives. It’s tempting to rush the compaction or skip a bit of grading just to get the pour finished before the rain hits, but shortcuts are expensive. You’ll spend more time later coming back to patch cracks and deal with angry customers than you would have spent doing it right the first time. Do the hard graft on the sub-base, check your levels twice, and respect the sequence of the build. If you get the ground right, the concrete will do exactly what it’s supposed to do.
Frequently Asked Questions
If the sub-base is compacted right, does it matter if I’m using a sand-cement mortar or just direct bedding for the slabs?
Listen, if your sub-base is solid and compacted properly, you’ve won half the battle, but don’t go thinking you can skip the mortar just because you’re feeling lazy. Direct bedding—laying them straight on the grit—is fine for a garden path that doesn’t see much footfall, but for anything substantial, you want that sand-cement bed. It fills the voids and gives you a level plane. Without it, you’re just hoping the slabs don’t wobble.
How can I tell if my ground is actually settled or if I’m just being paranoid before I start the pour?
You’re not being paranoid; you’re being sensible. If you’re asking the question, you’ve already spotted something that doesn’t look right. Take a heavy tamper or even a sledgehammer and give the sub-base a good whack. If it feels hollow or gives way under a bit of weight, it hasn’t settled—it’s just loose rubbish. If you can drive a screwdriver into it with your thumb, it’s not ready. Don’t trust your eyes; trust the bounce.
What’s the tell-tale sign that someone's gone and watered down the mix on-site to make it easier to spread?
You’ll see it the moment the shovel hits it. If that mix looks like soup and slumps like a wet sandcastle the second you stop moving it, someone’s been playing chemist with the hose. It looks easy to spread, sure, but watch it set. It’ll look “creamy” for a minute, then it’ll shrink, crack, and leave you with a surface that’s as weak as a biscuit in tea. If it flows like water, it’s rubbish.



