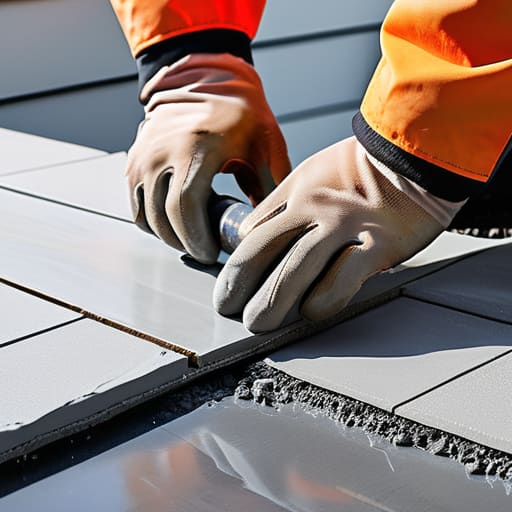
I spent forty-three years watching men pour concrete, and if there’s one thing I’ve learned, it’s that people spend far too much money on the “pretty” stuff and not nearly enough on what’s underneath it. You’ll see homeowners spending a fortune on high-end porcelain, thinking that once those sleek, polished slabs are down, the job is done. But let me tell you, if you don’t understand how porcelain paving is laid from the ground up, you aren’t building a patio; you’re just laying a very expensive ticking time bomb. I’ve been called out to sites more times than I can count to look at cracked, shifting tiles, and nine times out of ten, the fault wasn’t the porcelain—it was a sub-base that was half-baked and a bedding mix that was rushed.
I’m not here to give you some glossy, filtered version of a DIY guide that ignores the grit and the grime. I’m going to show you the real way to do it, focusing on the parts most people skip because they’re “boring”—the excavation, the compaction, and getting that mortar mix exactly right. By the time you finish reading this, you’ll know the sequence required to ensure those tiles stay level and locked in place for the next twenty years, rather than sinking the moment the first heavy rain hits.
Table of Contents
Guide Overview
Tools & Supplies
- Angle grinder with diamond blade for precise cuts
- Rubber mallet for setting tiles into bed
- Spirit level to ensure a flat surface
- Plate compactor to settle the sub-base
- Porcelain paving slabs (number of slabs required for area)
- Sub-base aggregate/MOT Type 1 (volume based on depth)
- Porous bedding mortar/Semi-dry mix (volume based on area)
- Jointing compound (quantity based on joint width and area)
Step-by-Step Instructions
- 1. Before you even think about touching a tile, you need to dig out the area and get your sub-base sorted. I’m talking about a proper, compacted layer of MOT Type 1—not some loose rubbish you found in the corner of the garden. You need to dig deep enough to account for the sub-base, the bedding mortar, and the tile itself, then get that Type 1 down in layers and compact it until it’s rock hard with a heavy vibrating plate. If that base moves even a millimetre, your expensive porcelain is going to tell the tale.
- 2. Once you’ve got a base that won’t budge, you need to set your levels. Don’t just eyeball it like a cowboy; get your screed rails and a string line out. You’re looking for a slight fall—about a 1:60 ratio—to make sure the rain actually runs off the surface instead of sitting there in a puddle. If you get the fall wrong at this stage, you’ll be dealing with algae and staining before the first winter even hits.
- 3. Now we get to the bedding. Forget the old way of using sand and cement; porcelain is non-porous, which means it won’t soak up water to “grip” the bed. You have to use a high-quality, ready-mixed priming slurry on the back of every single tile. Slather it on thick and consistent. If you skip the primer, you’re essentially just laying tiles on grease, and they’ll be popping off your patio within months.
- 4. When you’re ready to lay, you’ll be using a thick bed of mortar—usually a 4:1 or 5:1 sand and cement mix—to bed the tiles down. Use a rubber mallet to tap them into place, but don’t go mad. You want them level with each other, but you need to keep an eye on those joints. Porcelain is unforgiving; if one tile is a fraction higher than the next, you’ll have a trip hazard that’ll drive you mad.
- 5. Keep your spacers handy. Unlike natural stone, you can’t just “cheat” the gaps with porcelain. You need consistent, clean joints—usually 6mm to 10mm depending on the manufacturer’s spec. I’ve seen too many lads try to butt these tiles up tight against each other like they’re floorboards, and the moment the ground breathes, the tiles will crack under the pressure.
- 6. Once the tiles are bedded and the mortar has had a chance to set, it’s time for the grout. Don’t use the cheap stuff from the supermarket; get a high-performance, polymer-modified grout that’s designed for outdoor use. Sweep the joints clean, get the grout in there firmly, and make sure you wipe the excess off with a damp sponge before it turns into a nightmare. If you leave haze on the surface, you’ll be scrubbing until your hands bleed.
- 7. Finally, give it a bit of time. Don’t go running around on it the minute the grout is dry. Let the whole thing cure properly. If you’ve done the sub-base right, used the primer, and kept your joints even, you’ll have a patio that lasts. If you’ve cut corners, don’t come crying to me when the first frost hits and your hard work starts shifting.
Sub Base Preparation for Porcelain the Invisible Foundation of Success
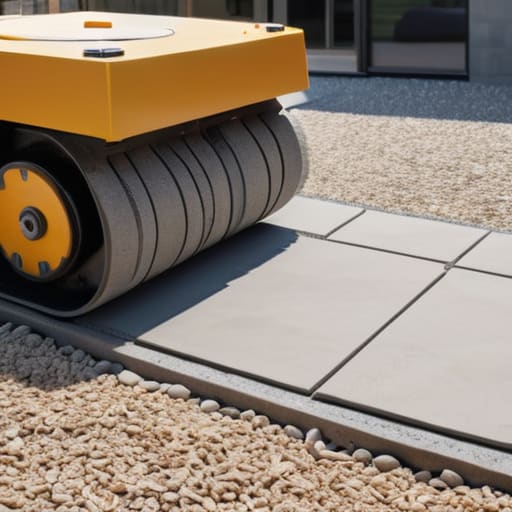
Now, listen to me: if you think you can just slap some sand down and call it a day, you’ve already lost. I’ve seen plenty of lads try to save a few quid on the sub-base preparation for porcelain by skimping on the MOT Type 1, and I’ve seen the results—cracked tiles and a patio that looks like a staircase within eighteen months. You need a compacted, solid layer of crushed stone that’s been rammed down until it doesn’t budge. If your base is soft or uneven, no amount of fancy porcelain is going to save you from the ground moving underneath it.
Once that base is rock-solid, you have to get the bedding right. You aren’t just throwing some dry mix under there; you need a consistent, semi-dry wet mortar bedding mix to ensure there are no voids. If there’s a gap between the mortar and the tile, water gets in, freezes, and pops your expensive porcelain right off the ground. And don’t even get me started on the bond. If you skip the slurry primer application on the back of the tile, you might as well be laying them on grease. It’s the only way to make sure that tile actually sticks to the bed for the long haul.
Why a Perfect Wet Mortar Bedding Mix Saves Your Reputation
Listen, I’ve seen lads try to save a few quid by using a standard sand and cement mix, thinking it’s “good enough” for a bit of porcelain. It isn’t. Porcelain is a different beast entirely because it’s non-porous; it doesn’t soak up moisture like a traditional sandstone would. If you don’t get your wet mortar bedding mix exactly right—usually a sharp sand and cement ratio that’s thick enough to support the weight but won’t shrink and leave hollow spots—you’re basically building a bridge on stilts. You want a mix that’s consistent, not a soupy mess that someone’s watered down just to make it easier to spread.
The real killer, though, is the bond. You can have the best sub-base in the world, but if you skip the slurry primer application on the back of those tiles, they’ll be rocking like a loose tooth within six months. That primer is what actually glues the tile to the bed. Without it, you’re just laying expensive slabs on a bed of loose gravel. Do it right the first time, or you’ll be the one back there with a pry bar, ripping it all up and starting again.
Five ways to stop your porcelain from becoming a tripping hazard
- Stop treating porcelain like natural stone; it’s non-porous, which means it won’t “suck up” the water from your bedding mix. If you don’t get that mortar mix right and spread it thick enough to fully support the tile, you’ll end up with hollow spots that crack the moment a heavy wheelbarrow rolls over them.
- Check your levels twice and your drainage three times. Because porcelain is so smooth, any slight dip in the sub-base or a lazy slope in your bedding will turn your patio into a swimming pool after the first decent rain. Water sitting on those joints is a recipe for disaster.
- Don’t get lazy with the jointing compound. You can’t just sweep some sand into the gaps and call it a day like you might with sandstone. You need a dedicated, high-quality resin or grout that can handle the movement, otherwise, the grit will wash out and you’ll be back to square one in six months.
- Watch the weather like a hawk during the setting stage. I’ve seen too many lads try to rush a pour or a bedding layer when the sun is beating down or a frost is rolling in. If that mortar dries too fast because it’s too hot, it loses its bond; if it’s too wet, it won’t hold the tile level.
- Use the right tools for the job, especially when it comes to suction lifters and spacers. Porcelain is heavy, brittle, and unforgiving. If you try to manhandle these tiles into place without the right gear, you’ll snap a corner, and there’s no such thing as a “subtle” repair once that tile is broken.
The Long View
At the end of the day, laying porcelain isn’t about the pretty finish you see in the brochure; it’s about the grit and the prep work that nobody ever bothers to look at once the job is done. If you’ve cut corners on the sub-base, if you’ve skimped on the mortar mix, or if you’ve let the weather dictate your pace instead of controlling it, you aren’t building a patio—you’re just building a problem for yourself to fix in twelve months’ time. You have to respect the sequence of operations. From the compaction of the MOT Type 1 to the exact consistency of that bedding layer, every single step is a link in a chain. If one link is weak, the whole thing is going to fail, and no amount of expensive grout is going to hide a shifting slab.
I’ve spent forty-three years watching men try to rush the easy parts and wonder why the hard parts failed. My advice is simple: do it right the first time so you only have to do it once. There is a massive amount of pride to be found in a job where the foundation is as solid as the surface. When you finish a pour and you know that the ground underneath is rock-solid and the curing is handled properly, you can walk away knowing that your work will stand the test of time. Don’t just lay tiles; build something that lasts.
Frequently Asked Questions
If I’ve already laid the porcelain and I’m seeing movement, is it the tiles that are the problem or did I mess up the bedding?
If your porcelain is moving, stop looking at the tiles. Porcelain is a hard, unforgiving material; it doesn’t just “decide” to shift. If there’s movement, you’ve got a bedding failure. Either your sub-base wasn’t compacted enough to stop the settling, or you used too much water in your mortar, causing it to shrink and pull away from the tile. You didn’t lay tiles on a solid foundation; you laid them on a sponge.
How do I know if my sub-base is actually compacted enough, or am I just guessing with the plate compactor?
You don’t guess with a plate compactor; you test it. If you’re still seeing “pumping”—where the ground bounces or feels spongy under your boots—you haven’t finished the job. I always use a heavy rubber mallet or even just a steel rod. Give the sub-base a sharp whack. If it rings hollow or moves, keep compacting. If it feels like hitting a solid block of granite, you’re ready for the bedding. Don’t trust your eyes; trust the vibration.
What’s the proper way to handle the joints so they don't crack or let weeds in after the first winter?
Listen, everyone loves the look of those tight, clean porcelain joints, but they’re a nightmare if you don’t respect the movement. You can’t just pack them tight with sand and hope for the best. You need a high-quality, polymer-modified grout that’s designed for low absorption. If you don’t get the joint width consistent and the grout deep enough, the first frost will heave them, or you’ll be pulling weeds out of the cracks by May.



