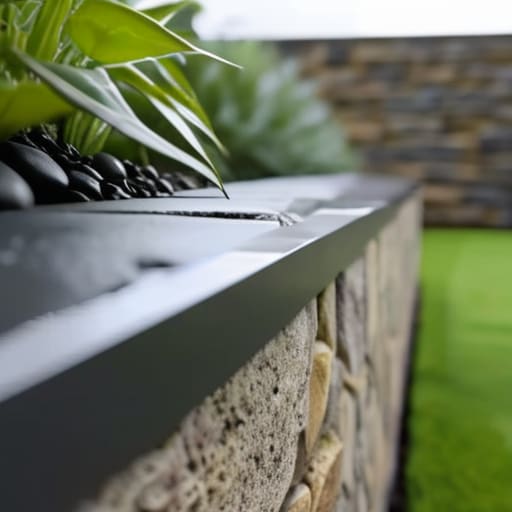
I was standing on a driveway in Surrey last autumn, looking at a brand-new retaining wall that cost the homeowner a small fortune. The stone was premium, the mortar was clean, and the finish looked like something out of a magazine. But as I pointed to the hairline fractures spreading across the top, the owner looked at me like I was speaking Greek. He didn’t understand how copings and cappings protect walls; he thought he was just buying a bit of decoration to tidy things up. He’d spent all his money on the “pretty” part and zero pence on the actual defense, leaving the core of that wall wide open to the first heavy frost.
I’m not here to sell you on expensive masonry or show you glossy brochures of garden features. I’m here to tell you that a cap isn’t a luxury—it’s the only thing standing between a solid build and a pile of rubble in five years’ time. I’m going to show you exactly how to do this right, focusing on the practical reality of water shedding and joint integrity. We’ll skip the fluff and get straight to why the way you seat that top layer determines whether your wall lasts a lifetime or fails before the next winter hits.
Table of Contents
Preventing Water Ingress in Brickwork Before the Damage Starts
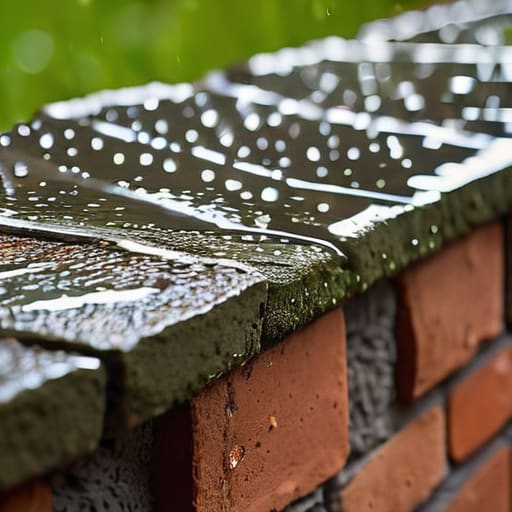
If you think a wall is just a stack of bricks held together by mortar, you’re asking for a headache in five years’ time. Most people look at a wall and see the face of it, but I’m looking at where the rain hits. If you don’t have a proper cap, every single downpour is essentially an invitation for water to soak straight into the core of your masonry. Once that moisture gets behind the face, you aren’t just dealing with damp; you’re dealing with the freeze-thaw cycle tearing your mortar joints to bits. Preventing water ingress in brickwork starts with making sure the top of the wall isn’t a sponge.
That’s where the geometry of your capping comes into play. You can’t just slap a flat stone on top and call it a day. You need a proper wall capping drip edge function to kick that water away from the face of the wall. If that water just rolls off the edge and runs straight down the brickwork, you’re going to see white, salty streaks—that’s efflorescence—and eventually, you’ll see the brick faces spalling off. If you don’t direct the water away from the structure immediately, you’ve already lost the battle.
The Wall Capping Drip Edge Function Deflecting the Enemy
Now, here is where most people get it wrong. They think a cap is just a bit of stone to make the wall look finished, like a bit of icing on a cake. It isn’t. If you’ve got a flat-edged stone sitting flush with the face of the brickwork, you’re basically building a slide for rainwater. That water is going to run straight down the face of your wall, soaking into the mortar joints and causing nothing but grief. That’s how you end up with white, salty stains—what the book-learners call preventing efflorescence on walls—but I just call it a sign of a job done poorly.
The real magic happens with a proper wall capping drip edge function. You need that little groove or overhang on the underside of the stone. When the rain hits that edge, it’s supposed to drop off clean, hitting the ground clear of the structure. If you don’t have that drip, the water clings to the underside of the cap and gets pulled right into the masonry by capillary action. You can spend a fortune on the best bricks in the country, but if you don’t deflect that water away from the face, you’re just waiting for the frost to heave those joints apart come winter.
Five Things Most Lads Forget When They’re Fitting the Top
- Don’t skimp on the mortar bed. If you’re just slapping a coping stone on top with a thin smear of cement, it’s going to rock, it’s going to crack, and eventually, it’ll be sitting in a puddle of its own making. You need a solid, level bed that keeps that stone pinned tight so water can’t get underneath.
- Watch your overhang. I’ve seen too many jobs where the cap is flush with the brickwork. That’s a recipe for disaster. If you don’t have a proper drip edge or a decent overhang, the rain is just going to run straight down the face of your wall, washing out the pointing and soaking the core.
- Seal the joints, or don’t bother. It doesn’t matter how expensive your stone is if you leave a gap between the cap and the wall. You need to make sure those joints are tight and properly sealed—whether it’s with a decent pointing or a flexible sealant—otherwise, you’re just building a funnel for the rain.
- Check your levels before the mortar sets. I’ve spent more time fixing “wavy” wall tops than I care to admit. If that coping isn’t dead level or correctly pitched to shed water away from the structure, you’re just creating a pond on top of your hard work.
- Mind the sub-structure. You can put the fanciest, most expensive coping stone in the world on top of that wall, but if the wall itself hasn’t been built on a proper foundation or if the masonry is crumbling underneath, that cap is just going to follow the wall down into the ground.
Don't Skimp on the Finish
Look, I’ve seen too many lads try to save a few quid by slapping on some cheap, thin coping or, worse yet, leaving the top of a wall exposed to the elements. You can have the best brickwork in the county, but if you don’t have a proper cap to shed that water away from the face, you’re just building a slow-motion disaster. We’ve talked about why you need that drip edge to keep the moisture from running down the masonry and why the seal between the cap and the wall is where the real battle is won. If you ignore the way the water moves or try to cut corners on the materials, you aren’t saving money—you’re just scheduling a repair job for three years down the line.
At the end of the day, a wall is only as good as its ability to stand up to the weather, and the weather doesn’t care about your budget. My advice is simple: treat the capping like it’s the most important part of the build, because when the rain starts driving sideways in February, it’s the only thing standing between a solid structure and a crumbling mess. Do it right the first time, focus on the details that nobody sees, and you won’t be the one getting the phone call when the cracks start appearing. Build it to last, not just to look good for the handover.
Frequently Asked Questions
Can I just use a bit of mortar to bed the coping stones down, or do I need something more substantial to stop them moving later?
If you think a thin smear of mortar is going to hold a heavy stone in place against frost heave and thermal movement, you’re asking for a headache. A bit of mortar might get it level for the photo, but it’ll crack and wash out within two seasons. You need a proper, consistent bed—usually a high-strength mortar mix—laid thick enough to ensure there are no voids. If there’s air underneath that stone, water gets in, freezes, and pops your coping right off.
If I’ve already got a wall with cracks and damp, will slapping a new cap on top actually fix the problem or am I just masking a mess?
Look, if you’re seeing cracks and damp, slapping a new cap on top is just putting a fancy bandage on a broken leg. It might stop a bit more rain from hitting the brickwork, but it won’t fix the rot already inside. If the core of that wall is saturated or the footing has shifted, that new stone is just going to sit there while the damage continues underneath. Fix the source first, or you’re just wasting good stone.
What happens if the coping stone is too wide for the wall—is that going to cause more trouble with the way water runs off?
If you let that coping stone overhang too far, you’re just building a waterfall. You think a wider stone gives you more protection, but if it’s excessive, the water isn’t just dripping off the edge—it’s gaining momentum. It’ll splash right back against the face of your brickwork, soaking the mortar joints and undermining the very wall you’re trying to save. Keep the overhang sensible and controlled, or you’re just inviting damp to settle in.