I remember standing on a site in ’94, watching a lad stack aerated blocks like he was playing with Lego, thinking he was doing a grand job because the lines looked straight. He didn’t realize that by skipping the proper damp-proof course and ignoring the way the footing had settled, he was just building a very expensive pile of rubble. Most people think understanding how blockwork is used is just about knowing which block goes where, but they’re dead wrong. They focus on the pretty face of the wall and completely ignore the structural reality of what’s holding it up.
I’m not here to give you a textbook lecture or sell you on some fancy new proprietary adhesive that costs a fortune. I’m going to tell you how it actually works when the rain is coming down sideways and the ground is shifting under your boots. We’re going to talk about the stuff that actually matters: the footings, the mortar consistency, and the unseen connections that keep a wall standing for fifty years instead of five. If you want the truth about how to build something that lasts, you’re in the right place.
Table of Contents
The Truth About Load Bearing Wall Construction
Now, when people talk about load-bearing wall construction, they usually start looking at the blocks themselves. They’re looking at the brand, the color, or how neat the joints look. But that’s missing the point entirely. A load-bearing wall isn’t just a stack of masonry; it’s a vertical highway for weight. If you don’t understand the structural integrity of concrete blocks and how they actually sit on that footing you spent all morning prepping, you’re just building a very expensive pile of rubble. I’ve seen lads try to swap out materials mid-job because the delivery was late, not realizing that the difference between dense and lightweight blocks isn’t just about how much they weigh—it’s about how they handle the compression from the floors and roof above.
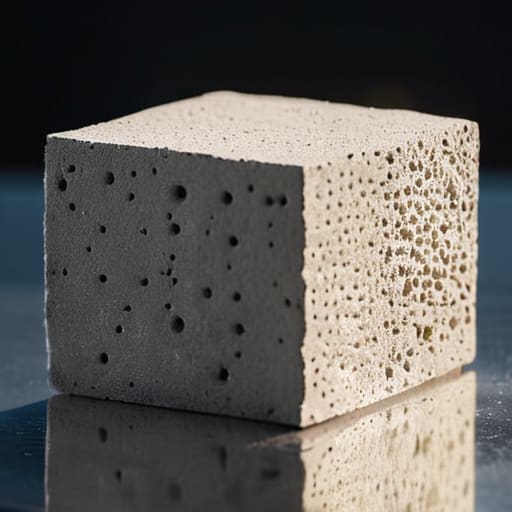
If you’re using aerated blocks for their thermal properties, you’ve got to treat them with respect. They aren’t the same as the heavy, dense stuff we used to lay back in the day. You can’t just slap them together with any old mortar and expect them to hold a house up. If your bed joints aren’t consistent or if your wall is shifting because the sub-base wasn’t compacted properly, the load-bearing capacity is gone before the roofers even show up. It’s about the physics of the weight traveling straight down to the ground.
Why Masonry Construction Techniques Fail at the Base
Listen, I’ve seen it a hundred times: a lad starts laying blocks like he’s playing with Lego, thinking the height of the wall is the only thing that matters. But you can have the best masonry construction techniques in the world, and if your footing is uneven or your first course is sitting on a bed of sand instead of a solid, level base, you’ve already lost. The moment that first layer of blocks is laid, you’re setting the destiny of everything above it. If that base isn’t dead-level and perfectly seated, the weight of the building will find that tiny error and turn it into a diagonal crack that runs straight to the roof.
The real trouble usually comes down to people ignoring the structural integrity of concrete blocks by failing to account for how they actually sit on the substrate. I’ve seen crews try to rush the job, skipping the proper bedding mortar or failing to check if the foundation had settled properly. They think because the blocks look straight, the job is done. They’re wrong. If your base is wonky, your wall is just a slow-motion disaster waiting to happen.
Five Things Most Lads Forget Before They Even Pick Up a Trowel
- Stop obsessing over the block quality and look at your footing first. I’ve seen top-tier masonry crumble because the bloke before me laid a foundation on soft, uncompacted ground that hadn’t seen a bit of proper sub-base preparation. If that footing moves, your blockwork is just a very expensive pile of rubble waiting to happen.
- Watch the water like a hawk, especially when you’re mixing your mortar. I’ve lost count of how many young lads add extra water to the mix because they want it to spread easier and “flow” better. You’re not making soup; you’re making a structural bond. Too much water and you’re just inviting shrinkage cracks into your wall before the sun even goes down.
- Don’t treat your verticality as a suggestion. You can have the best blocks in the country, but if your plumb line is off by even a fraction at the base, that error is going to grow as you go up. By the time you hit the lintel, you’ll be fighting the wall just to keep it straight, and that’s when you start making mistakes that lead to structural failure.
- Respect the weather or don’t bother starting the job. If you’re pouring a damp footing or trying to lay blocks in a biting wind that’s drying out your mortar too fast, you’re setting yourself up for a nightmare. You need a controlled environment; if the sun is baking the life out of your joints, you’ll be back there next month patching cracks that shouldn’t have been there in the first place.
- Mind your bed joints and don’t get greedy. I see it all the time—trying to stretch a mix too far or leaving gaps that are too thick because the lad is tired or rushing to get home. A consistent, even bed of mortar is what actually carries the load. If your joints are uneven, the weight isn’t being distributed; it’s being concentrated on certain points, and that’s exactly how you get those nasty diagonal cracks.
Don't Blame the Blocks
Look, if you’ve followed me this far, you ought to know by now that a wall is only as good as the ground it’s sitting on. You can buy the highest grade, most expensive blocks on the market, but if your footing is uneven or your mortar mix was watered down to save time, you’re just building a very expensive pile of rubble. It comes down to the basics: a solid sub-base, a consistent mix, and respect for the sequence of construction. If you skip the prep work or try to rush the curing process because the client is breathing down your neck, you aren’t saving money—you’re just scheduling a future repair job that someone else will eventually have to pay for.
At the end of the day, my job—and yours—isn’t just about stacking units from one level to the next. It’s about having the backbone to do things right when nobody is watching. There’s a real, quiet pride in walking away from a site knowing that the foundation is dead solid and the joints are clean, even if the finished wall is eventually covered up by plaster or cladding. Build it properly, respect the materials, and don’t take shortcuts just to get home an hour earlier. If you get the groundwork right, the rest of the build will stand long after we’ve both retired.
Frequently Asked Questions
If my sub-base is solid and level, does it actually matter what kind of block I use for the first two courses?
Listen, a solid sub-base is half the battle, but don’t go thinking you can just throw any old block on there and call it a day. Those first two courses are your anchor. If you use lightweight blocks where you should be using high-density engineering bricks or heavy-duty blocks, you’re building on a lie. You need something that can handle the moisture from the ground and the weight of everything sitting on top. Get the base wrong, and the rest of the wall is just decoration.
How do I know if the mortar mix is too weak for the weight of the wall, or if the blocks themselves are just rubbish?
Look, you can’t tell just by staring at it. If the blocks are crumbling like dry biscuits under a trowel, they’re rubbish—end of story. But if the blocks look solid and the wall is still leaning or cracking, it’s your mortar. If it’s sandy, pale, and wipes away too easy with a thumb, you’ve got a weak mix. You’ve likely skipped the cement or let it sit too long in the sun.
When am I actually allowed to start building upwards without worrying about the bottom courses shifting or settling?
You don’t “allow” yourself to start; you wait until the ground tells you it’s ready. If you’re rushing to get those first few courses up while the footing is still settling or the mortar is still green, you’re just building a future headache. I’ve seen lads try to outrun the clock. Wait until that concrete has hit its design strength and the sub-base has stopped moving. If you build on a moving target, your walls will follow.