I’ve lost count of how many times I’ve stood in a living room, watching some lad in a clean high-vis kit wave a fancy electronic moisture meter around like it’s a magic wand, claiming he’s found the smoking gun. They’ll charge you a fortune for a “specialist report” and tell you exactly how rising damp is diagnosed based on a digital reading, but they’re looking at the symptoms, not the cause. I remember a job back in ’94 where a homeowner spent three grand on chemical injections that did nothing but rot his plaster; the real issue wasn’t the wall, it was a bungled footing that had let the ground moisture migrate straight up through a hairline crack in the slab.
If you’re tired of being sold expensive, surface-level fixes that never stick, you’ve come to the right place. I’m not here to sell you a gadget or a chemical spray; I’m going to tell you what actually matters. We’re going to look past the peeling paint and the musty smell to see what’s happening underneath the floorboards. I’ll show you how to spot the difference between a leaky pipe and a genuine structural failure, because if you don’t get the ground right, you’re just painting over a disaster.
Table of Contents
The Damp Proof Course Inspection Finding the Invisible Break
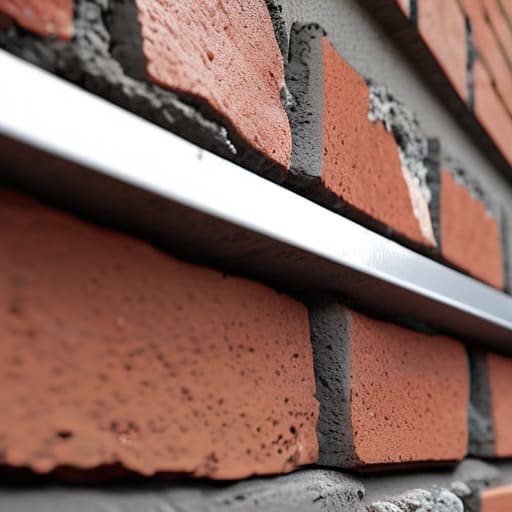
Now, everyone loves to point at a wet patch on the plaster and start shouting about rising damp, but you need to look at the actual barrier first. A proper damp proof course inspection isn’t just about looking at the wall; it’s about finding where that physical line was broken or never existed in the first place. In my experience, you’ll often find that a builder skipped the DPC entirely on a renovation, or worse, they bridged it with a bit of render that’s been sloppily applied right over the top. If that line is compromised, the moisture isn’t “rising”—it’s just taking the easiest path through the brickwork.
When you’re out there, don’t just trust your eyes. You need to be using proper moisture meter testing methods to see how deep that wetness actually goes. If the readings are high only at the base, you’re likely looking at a failed DPC. But if the moisture levels are jumping all over the place, you might just be dealing with a ventilation issue. You have to trace the path of the water, not just the puddle it leaves behind.
Moisture Meter Testing Methods That Actually Tell the Truth
Now, don’t go thinking a little plastic gadget with two pins is going to give you the gospel truth. I’ve seen lads walk onto a site, poke a meter into a wall, and declare it’s rising damp just because the reading jumped. That’s amateur hour. Most of these moisture meter testing methods only tell you if the surface is wet, not why it’s wet. If you’re just skimming the plaster, you’re guessing. You need to understand the difference between a surface-level soak and moisture actually migrating up from the footing.
If you want to get it right, you have to look deeper than a single reading. You need to be using proper dampness investigation techniques, like comparing readings at different heights. If the moisture is heavy at the floor and tapers off as you go up, you’ve likely got a problem with the DPC. But if it’s consistent or higher up, you’re probably just looking at a ventilation issue or salt contamination in masonry that’s pulling moisture out of the air. Don’t let a single beep on a meter fool you into ripping out a perfectly good floor.
Stop Looking at the Plaster and Start Looking at the Ground
- Check the ground levels around the perimeter first. If your patio or garden soil is sitting higher than the damp proof course, you aren’t dealing with a “damp problem,” you’re dealing with a drainage problem. You can swap out every brick in that wall, but if the ground is bridging that barrier, the water’s coming straight in.
- Look for the “tide mark” pattern. Real rising damp doesn’t just appear randomly; it follows a line. If you see salt staining and peeling paint that stops abruptly at a certain height, that’s your clue. If the damp is climbing higher than the DPC or moving in patches, you’re likely looking at penetrating damp from a leaking pipe or a blown render, not rising moisture.
- Inspect the sub-base and the footing for any signs of recent ground movement. I’ve seen plenty of “damp” that was actually just a hairline crack in the foundation caused by poor compaction of the sub-base. If the ground shifted, the moisture barrier broke, and now the water is finding its way up through the masonry like it’s a straw.
- Don’t trust a single meter reading. If you’re using a moisture meter, you need to test a dry area first to get a baseline. If you just stick a probe into a wet patch, you’re telling me nothing. You need to map the moisture levels across the whole wall to see if it’s actually rising from the bottom or if it’s just condensation sitting on a cold surface.
- Watch the weather before you make a call. If you walk into a room and it feels damp after a week of heavy rain, check the external pointing and the gutters. I’ve seen many a lad try to diagnose rising damp when the real culprit was a blocked gutter dumping water directly onto the brickwork right above the DPC.
Stop Looking at the Surface
At the end of the day, diagnosing rising damp isn’t about staring at a patch of peeling wallpaper or a bit of salt on the plaster. If you’ve done the work right, you’ve looked past the aesthetics and dug into the actual mechanics of the build. You’ve checked if that damp proof course is actually continuous or if some lad on-site decided to skip a course of bricks to save time. You’ve used the meters to find the true moisture profile instead of just guessing where the wet spot looks worst. Remember, the symptoms are always upstairs, but the verdict is always decided downstairs in the masonry and the footings.
Don’t let a contractor sell you a quick fix of new plaster and a bit of paint just to get the job done and move on to the next site. A coat of paint doesn’t stop water from climbing; it just hides the evidence while the structure rots behind it. If you want a house that stays dry, you have to be willing to chase the source right down to the ground. It’s more work, and it’s a lot more expensive upfront, but I’ve seen enough failed repairs to tell you that doing it right the first time is the only way to sleep soundly when the rain starts hitting the ground.
Frequently Asked Questions
If the moisture meter is reading high, how do I know if it's actual rising damp or just condensation trapped behind a bit of bad rendering?
You don’t look at the meter; you look at the pattern. Rising damp has a logic to it—it follows the capillary action, creeping up from the floor in a predictable line. Condensation? That’s a mess. It’ll be patchy, clustered around cold corners or behind where a bit of cheap, non-breathable render is trapping moisture against the brick. If the dampness doesn’t respect the floor line, it ain’t rising; it’s just bad airflow and trapped breath.
You talked about the DPC, but what if the damp is coming from a breached ground level or a garden bed piled up too high against the wall?
That’s exactly where most people go wrong. They stare at the bricks, but the problem is actually in the dirt. If you’ve got flower beds or patio paving piled up above that DPC line, you’ve basically turned your wall into a sponge. You’ve bypassed the protection entirely. It doesn’t matter how good your membrane is if the ground is sitting right on top of it, soaking the masonry like a wet rag.
Once you've found the source, how can I tell if the damp is just a temporary patch from a recent heavy rain or a permanent failure in the sub-base?
Look, if it’s just a heavy rain, the walls will dry out once the sky clears. But if that damp stays put, you’ve got a sub-base problem. I always tell people: check the ground. If the soil around your footings is saturated or hasn’t been compacted right, it’s holding water like a sponge. If the moisture reading doesn’t drop after a week of dry weather, your foundation is basically sitting in a puddle.