I was standing on a site in the Midlands last autumn, looking at a brand-new extension that was already weeping moisture through the base of the brickwork. The homeowner was frantic, pointing at expensive “specialist” sealants they’d bought online, convinced they needed a high-tech chemical spray to save the house. I just shook my head. People spend a fortune on fancy coatings because they don’t actually understand how damp proof courses work; they think it’s about painting a barrier on, when in reality, it’s about managing the physics of the ground you’re sitting on. If you don’t get the placement and the continuity right from the start, all the expensive additives in the world won’t stop the rising damp.
I’m not here to sell you a magic spray or some over-complicated architectural theory. I’m going to tell you exactly what happens when that moisture hits the masonry and why most installs fail before the mortar even sets. I’ll strip away the jargon and give you the straight truth on the layers, the breaks, and the mistakes that turn a solid foundation into a sponge. You’ll learn the real mechanics of the barrier, so you can stop worrying about the symptoms and start getting the groundwork right.
Table of Contents
Fighting Capillary Action in Masonry Before the Walls Rise
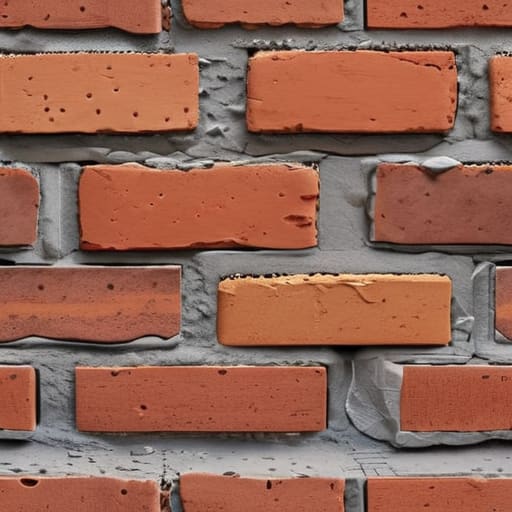
You can have the best bricks and the cleanest mortar in the county, but if you don’t stop the physics of the ground from climbing, you’re just building a very expensive sponge. What we’re really fighting here is capillary action in masonry—that nasty business where moisture travels through the microscopic pores of your bricks and mortar like water through a straw. If you don’t break that connection at the foundation level, the water will find its way up, no matter how much you complain about the weather later.
I’ve seen lads try to save a few quid by rushing the damp proofing installation methods, thinking a bit of plastic tucked loosely in the bed will do the trick. It won’t. A proper DPC needs to be a continuous, unbroken line. If there’s even a tiny gap or a way for the moisture to bypass the barrier, that rising damp prevention is effectively zero. You aren’t just laying a course; you are creating a hard stop for the earth’s moisture. If you miss that connection when the walls are still low, you’ll be looking at the signs of a failed DPC before the first coat of paint is even dry.
Choosing a Moisture Barrier in Building Construction That Lasts
Now, when you start looking at your options, don’t let a salesman talk you into thinking every bit of plastic or bitumen is the same. There’s a massive difference between a proper damp proof membrane vs course setup, and if you confuse the two, you’re asking for a headache ten years down the line. A membrane is your heavy-duty shield for the ground, but the course is what sits in your masonry to stop the moisture from climbing. I’ve seen lads try to save a few quid by using a thin, flimsy roll that looks fine on the packaging but shreds the moment you’re laying your first course of brick. If that barrier isn’t continuous and properly seated, you might as well not have installed it at all.
You need to pick a material that actually plays well with the mortar and the bricks you’re using. Whether you’re going with a traditional bitumen strip or a modern polymer, the integrity of the bond is what matters. I’ve walked onto too many sites where the moisture barrier in building construction was slapped in halfway, leaving a gap that acts like a straw for groundwater. If you don’t get the material right for the specific load and moisture level of your site, you aren’t building a house; you’re just building a very expensive sponge.
Five Ways You’ll Screw Up the Barrier Before the First Brick is Laid
- Don’t trust a DPC that isn’t continuous; I’ve seen lads lap the membrane poorly or leave a gap around a service pipe, and that’s exactly where the damp finds its way in. If that line isn’t unbroken, you might as well not have installed it at all.
- Watch your mortar joints like a hawk. If you’re laying your courses and the mortar is too wet or you’re slopping it around the DPC, you’re creating a bridge that lets moisture bypass the barrier entirely.
- Check the sub-base and the footing level before the DPC goes down. If your footing is sitting in a soup of uncompacted ground or standing water, that moisture is going to find a way to migrate up and over your barrier through sheer pressure.
- Stop treating the DPC like a “set and forget” bit of plastic. You need to ensure the cavity is clean and that no debris—no bits of brick, no mortar droppings—is sitting on top of that barrier, because those little gaps become highways for moisture.
- Mind the weather during the install. If you’re laying a barrier in a driving rain or on a frost-heaved surface, you’re fighting a losing battle from the start; a DPC needs a stable, dry environment to be seated correctly so it can actually do the job it was designed for.
Don't Let a Cheap Layer Ruin a Solid Build
At the end of the day, a damp proof course is only as good as the work you put in before the first brick is even laid. You can buy the most expensive, high-spec membrane on the market, but if your footing is uneven or your sub-base hasn’t been compacted properly, you’re just masking a fundamental failure. We’ve talked about fighting capillary action and picking the right barrier, but none of that matters if the installation is sloppy or the continuity is broken. A DPC isn’t a “set and forget” luxury; it is a precise structural requirement that demands your full attention during the most critical hours of the build.
I’ve spent forty-three years seeing what happens when people try to shave five minutes off a job or save a few quid on materials. They always come back to me a few years later, pointing at damp patches and peeling plaster, asking me why their house is failing. The truth is, the failure was decided months earlier when they skipped the details. Build it right from the ground up, respect the physics of the moisture, and don’t take shortcuts just because the weather is turning or the client is breathing down your neck. If you get the barrier right, the rest of the structure has a fighting chance to actually last.
Frequently Asked Questions
If the DPC is installed correctly, why am I still seeing damp patches creeping up the brickwork six months later?
If you’ve got damp patches after six months, your DPC isn’t “failing”—it’s being bypassed. I’ve seen it a thousand times. Either your sub-base was too high and you’ve bridged the course with wet soil, or you’ve got a puncture in the membrane from some lad being careless with a trowel during the build. Check your ground levels and your pointing. If the water can find a way around the barrier, it will.
Does it actually matter what kind of mortar I use above the course, or is the barrier the only thing that keeps the moisture out?
Listen, the DPC is your shield, but the mortar is your skin. If you use a mix that’s too rich or too weak for the bricks you’ve laid, you’re asking for trouble. A bad mortar can crack or crumble, creating tiny highways for water to bypass your barrier entirely. If the mortar fails and lets moisture soak into the wall, it doesn’t matter how good that plastic layer is underneath—the damage is already inside.
When you're dealing with a site that's sitting in a bit of a hollow, can a standard DPC actually handle the hydrostatic pressure, or are we just wasting our time?
If you’re sitting in a hollow, you aren’t just dealing with damp; you’re dealing with a swimming pool waiting to happen. A standard DPC is a barrier, not a dam. It’s designed to stop moisture wicking up, not to fight hydrostatic pressure pushing in from the outside. If that water builds up against your masonry, it’ll find a way around, under, or through. You don’t need a better plastic sheet; you need better drainage and a proper sub-base.