I’ve lost count of how many times I’ve stood in a damp living room, listening to some lad in a high-vis vest explain why a house is “breathing” when it’s actually just soaking up moisture like a sponge. Most people think they understand how cavity walls work because they’ve seen a diagram in a textbook, but they’ve got it all wrong. They think it’s just two layers of brick with some fluff in the middle, but if you don’t respect the movement of moisture and the way that air gap is actually managed, you aren’t building a home—you’re building a glorified terrarium.
I’m not here to give you the polished, architectural-magazine version of the truth. I’ve spent forty-three years on site seeing exactly where the shortcuts are taken and where the “experts” let the weather win. In this article, I’m going to strip away the jargon and tell you how it actually functions when the rain is lashing down and the ground is saturated. We’ll focus on the real mechanics—the lintels, the damp proofing, and the airflow—so you can stop worrying about the brickwork and start understanding the system.
Table of Contents
The Silent Battle Outer Leaf vs Inner Leaf
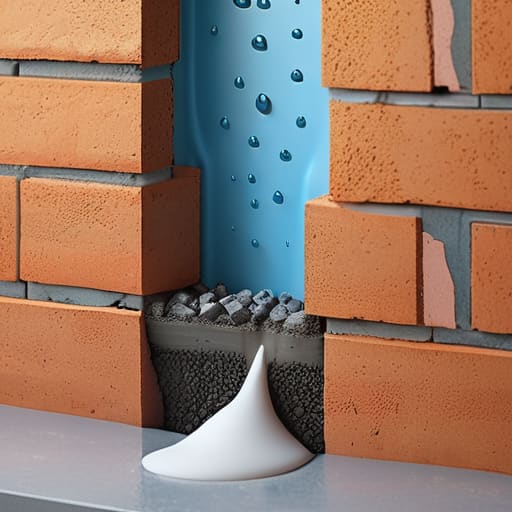
You’ve got two different structures standing side-by-side, separated by nothing but a bit of air, but they’re doing two completely different jobs. The outer leaf is your shield; it takes the brunt of the driving rain, the wind, and the frost. It’s the face of the building. The inner leaf, though, is your sanctuary. Its job is to stay dry and keep the heat in. The whole point of the gap between them is to ensure that any moisture that manages to soak through that outer skin doesn’t just keep travelling straight into your living room.
The real trouble starts when people forget that these two layers aren’t actually touching. They’re held together by metal ties, and if you’re dealing with wall tie corrosion because someone used cheap, rubbish components, that connection fails and the whole system goes south. You have to respect the relationship between the outer leaf vs inner leaf. If the outer skin gets saturated and you haven’t managed your weep holes and drainage properly, you’re basically inviting a damp problem that no amount of expensive insulation is going to fix later on.
Thermal Efficiency of Cavity Walls More Than Just Air
Most people think the gap in a cavity wall is just a dead space meant to keep the heat in, but they’ve got it half wrong. It’s not just about stopping the draft; it’s about managing the energy. When we talk about the thermal efficiency of cavity walls, you have to understand that air is a terrible insulator if it’s allowed to circulate freely. If that gap is working like a chimney, pulling warmth straight out of your living room and venting it through the bricks, you might as well have built the house out of cardboard.
That’s why we don’t just leave it empty and hope for the best. You fill that void with something that actually works, but you can’t just go stuffing it with whatever is lying around. If you don’t account for how moisture moves, you’ll end up preventing damp in cavity walls only to create a different headache entirely. You have to respect the physics of it. If the insulation is packed in too tight or if the moisture can’t escape through the proper channels, you’re just building a thermal battery that’s going to hold onto cold and damp instead of warmth.
Don't Let the Details Rot Your Wall: 5 Things Most Lads Skip
- Watch your ties. Those metal wall ties are the only thing keeping the outer leaf from leaning away from the inner one, and if you’re using the wrong ones or spacing them like you’re building a garden fence, you’re asking for structural trouble.
- Mind the lintels. A cavity wall is only as strong as the bits that span the openings; if you’ve got moisture creeping into a poorly seated lintel, that dampness will travel straight through the cavity and ruin your internal finish before you’ve even painted it.
- Keep the cavity clean. I’ve seen too many jobs where the lads get lazy and let mortar droppings or bits of brickwork fall into the gap—once that cavity is bridged by debris, it’s no longer a thermal barrier, it’s just a highway for moisture to bypass your insulation.
- Don’t mess with the DPC. The Damp Proof Course isn’t a suggestion; it’s the line in the sand. If you get your levels wrong and end up with ground levels sitting above that DPC, you might as well stop worrying about the cavity and start worrying about the mould.
- Check your weep holes. You need a way for moisture to get out, and that means ensuring your weep holes are clear and correctly placed. If you seal up the cavity too tight and don’t allow for that bit of breathing room, you’re essentially trapping dampness inside the wall.
It’s Not About the Bricks, It’s About the System
At the end of the day, a cavity wall isn’t just two separate lines of masonry standing next to each other; it is a managed system designed to keep the wet out and the heat in. You can buy the most expensive facing bricks on the market, but if you let the insulation sag, forget the weep holes, or let debris bridge that gap, you’ve essentially built a very expensive sponge. It’s the unseen details—the lintels, the damp proof courses, and the integrity of that air space—that determine whether a house stays dry for fifty years or starts rotting within five. If you don’t respect the gap, the gap will eventually fail you.
I’ve spent forty years watching people focus on the finish while ignoring the fundamentals, and I’ll tell you now: the quality is in the prep. Whether you’re pouring a slab or laying a cavity wall, the goal is always the same—to build something that doesn’t need fixing in a decade. Don’t get distracted by the aesthetics or the “easy” way to lay a course. Build it right from the ground up, respect the physics of the wall, and you’ll build something that actually lasts. Do the job properly the first time, because the ground and the weather won’t give you a second chance.
Frequently Asked Questions
What happens if the cavity gets filled with debris or mortar droppings during the build?
That’s a disaster waiting to happen. You call it “mortar droppings,” but I call it a bridge. When you let debris or spilled mortar pile up in that gap, you’ve just built a highway for moisture to travel straight from the outer leaf to the inner one. It completely bypasses the whole point of having a cavity. Once that thermal break is bridged, you’ve got damp walls and no insulation value. It’s lazy work, and it’ll cost the homeowner a fortune to fix later.
How do you stop moisture from jumping across the gap through capillary action?
You don’t stop it by wishing it away; you stop it with the right hardware. If you’ve got a cavity, you’ve got to ensure those wall ties are doing their job without acting like a bridge for moisture. You use stainless steel ties—they don’t rust and they don’t soak up water like some cheap galvanized rubbish. But more importantly, you keep the cavity clear. If you let mortar droppings or debris pile up in that gap, you’ve just built a staircase for the damp to climb right into the inner leaf. Keep it clean, keep it wide, and don’t let the boys bridge it.
If I'm seeing damp on my internal wall, is it a failure of the cavity or a problem with the insulation itself?
Look, if you’ve got damp on the inside, don’t go blaming the insulation first. Insulation doesn’t leak; it just sits there. You’re likely looking at a failure in the cavity’s ability to manage moisture. It’s usually a blocked weep hole, a botched lintel, or a damp proof course that wasn’t laid right. If the cavity is bridged by debris or the wrong kind of mortar, that water’s going to find its way straight through to your plaster.