
I’ve lost count of how many times I’ve stood on a driveway, watching some lad try to smear a bit of cheap sealant over a hairline fracture like he’s putting frosting on a cake. He thinks he’s figured out how to repair cracked concrete slabs, but he’s just masking a symptom of a much deeper sickness. Let me tell you something I learned forty-three years ago: if you don’t understand why that crack opened up in the first place—whether it was a soft sub-base, a lack of expansion joints, or someone adding too much water to the mix on a hot day—you aren’t repairing anything. You’re just waiting for it to happen again.
In this guide, I’m going to skip the fancy marketing fluff and tell you how we actually do it on a proper site. I’ll show you how to diagnose the cause, prep the gap so the filler actually bites, and select the right material so you aren’t back out there in six months. We aren’t just slapping on a cosmetic fix; we are going to learn how to repair cracked concrete slabs in a way that actually lasts. If you want the quick, lazy way, go elsewhere; if you want to do it right, keep reading.
Table of Contents
Guide Overview
Tools & Supplies
- Wire brush for cleaning debris
- Hammer and chisel for widening cracks
- Caulking gun for applying sealant
- Concrete crack filler or liquid filler (1-2 tubes/bottles)
- Concrete patch compound (1 small tub)
- Sandpaper for smoothing edges
Step-by-Step Instructions
- 1. Before you even touch a trowel, you need to figure out if you’re fixing a cosmetic nuisance or a structural disaster. Get a screwdriver or a small hammer and tap along the crack. If it sounds hollow or if the edges move when you apply pressure, you aren’t looking at a surface crack; you’re looking at a failed sub-base or a slab that’s settling. If the ground underneath has shifted or washed away, no amount of expensive filler is going to save you—you’ll need to dig out and replace rather than patch.
- 2. Once you’ve decided the slab is actually worth saving, you have to clean the wound. You can’t just smear new material over old dirt and expect it to bond. Use a wire brush to scrub the edges of the crack, and if you’re doing it right, you should use a pressure washer or even a shop vac to get the grit and loose dust out of the deep parts. If there’s any organic matter or moss sitting in that gap, the patch will pop out within six months, and I’ll be the one hearing about it.
- 3. Now, you need to widen the gap to give your repair material somewhere to actually sit. I call this “undercutting.” Don’t just clean the thin line; use a grinder with a diamond blade to cut a wider, slightly V-shaped channel along the crack. You want the bottom of the crack to be wider than the top. This creates a mechanical lock so the repair material doesn’t just slide right back out when the slab undergoes its natural thermal expansion.
- 4. If you’re dealing with a crack that’s wider than a quarter inch, don’t try to fill the whole depth with expensive epoxy or specialized cement. That’s a waste of money and a recipe for failure. Instead, use a backer rod—that foam rope stuff—to fill the bottom of the void. You want to leave just enough room at the top for the actual repair material to sit. This saves you a fortune and ensures the patch has enough structural integrity to stay put.
- 5. Choosing your filler is where most people get it wrong because they buy the cheapest tub at the hardware store. For a driveway or something that takes a load, you want a high-strength, non-shrink repair mortar or a dedicated epoxy injection kit. Mix it exactly how the bag says—and for heaven’s sake, don’t add extra water to make it easier to spread. Adding water breaks down the chemistry and leaves you with a patch that’s softer than the original slab.
- 6. Apply the material using a stiff putty knife or a small trowel, and make sure you force it into the crack with some real pressure. You aren’t painting it on; you’re packing it in. Once it’s in, strike it off so it’s flush with the surface. If you’re using a cementitious repair mortar, keep a damp sponge nearby to lightly wipe the excess off the surrounding concrete before it sets, otherwise, you’ll leave a messy, ugly ridge that looks like a scar.
- 7. The final, and most ignored, step is the cure. People finish a patch and immediately walk all over it or drive a car over it. If you’re using a cement-based product, you need to control the drying rate. If it’s a hot day, cover your repair with a bit of plastic or mist it lightly with water to keep it from drying out too fast. A patch that dries in an hour is a patch that’s going to flake and crumble by next winter.
Distinguishing Structural vs Cosmetic Concrete Cracks Before You Start
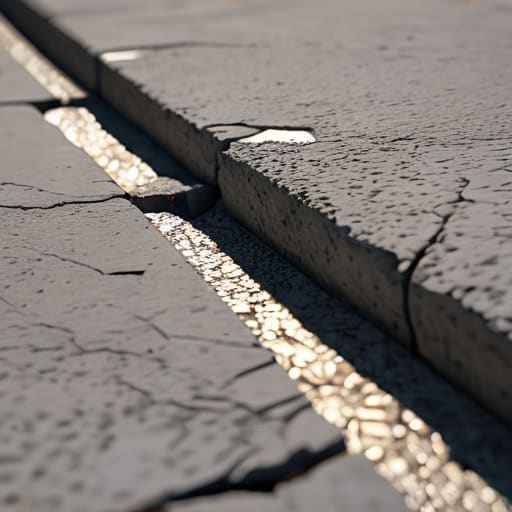
Now, before you go buying up every concrete patch kit tool you can find at the local merchant, you need to look at that crack with a bit of sense. Not all cracks are created equal, and if you treat a structural failure like a bit of surface scuff, you’re just wasting your time and your money. If the crack is hair-thin and just sits there on the surface, it’s likely just shrinkage from when the slab dried too fast. That’s cosmetic. You can fill that, move on, and forget about it.
But if that crack is wider than a tenner, or if you see the edges are actually moving when you step near them, you’ve got a real problem. That’s when we talk about structural vs cosmetic concrete cracks. If the slab is sinking or shifting, no amount of surface filler is going to save you; you’re looking at a sub-base failure or something deeper. In those cases, you aren’t just looking for a quick fix; you might be looking at epoxy injection for concrete to bond the mass back together, or worse, a complete rethink of the ground underneath. Don’t just mask the symptom—find the cause.
Why Epoxy Injection for Concrete Beats a Cheap Patch Kit
Look, I’ve seen enough weekend warriors ruin a perfectly good slab with a five-pound tub of grey goop to last a lifetime. If you’re staring at a crack that actually goes deep, those little concrete patch kit tools and the cheap fillers they come with are a waste of your Saturday. A patch kit is just a bandage; it sits on the surface like a scab, and as soon as the ground shifts or the temperature swings, that “repair” will pop right out. You aren’t fixing the crack; you’re just hiding it until it fails again.
If you want to do it right, you need to be looking at epoxy injection for concrete. Unlike a surface filler, epoxy actually penetrates the full depth of the fracture, effectively welding the two sides of the crack back together. It turns that weak point back into a solid mass. It’s the difference between painting over a hole in a wall and actually filling it with mortar. If you’re dealing with something that needs to hold weight, stop trying to skim the surface and start reinforcing the structure from the inside out.
Five Things You’ll Get Wrong If You Rush the Repair
- Stop treating the crack like a cosmetic blemish; if you haven’t cleaned out the grit, dust, and old debris from deep inside that fissure, your new resin or mortar is just sitting on top of nothing. It won’t bond, and it’ll pop out before the first frost.
- Don’t go chasing the crack until you’ve checked the edges. If the concrete around the crack is crumbling or “spalling,” you can’t just fill it—you need to chip back to solid, sound material first, or you’re just burying a failure.
- Watch the weather like a hawk. I’ve seen lads try to pour a repair in the midday sun or when the wind is howling; if that patch dries out too fast because the air is thirsty, it’ll shrink and crack right alongside the original slab.
- Put the water away. I know it’s tempting to splash some water on the area to help the mix spread, but adding water to your repair material ruins the strength of the mix and guarantees it’ll be weaker than the slab you’re trying to fix.
- Respect the depth. A shallow skim of filler is a waste of money and time. If the crack goes deep, your repair needs to go deep, otherwise, you’re just putting a bandage on a broken bone.
Don't Just Cover It Up
Look, if you’ve followed what I’ve said here, you aren’t just slapping some grey filler into a gap and hoping for the best. You’ve taken the time to figure out if that crack is a structural nightmare or just a surface itch, and you’ve hopefully opted for a proper epoxy injection rather than that rubbish in a tub you find at the local DIY shop. Remember, a repair is only as good as the preparation. If you haven’t cleaned out the grit, dried the crack properly, and understood why the movement happened in the first place, you’re just wasting your time and your money. You can’t fix a mistake made in the sub-base by painting over the surface.
At the end of the day, concrete is a living, breathing thing that reacts to the earth beneath it and the sky above it. You can’t control the weather, and you certainly can’t control the ground, but you can control the quality of the work you put into it. Do it right the first time, respect the chemistry of the materials, and don’t let anyone talk you into a shortcut. If you take pride in the prep work and the curing, you’ll find that a well-repaired slab can outlast the very house it sits next to. Now, get to work and do it properly.
Frequently Asked Questions
If I fix the crack today but the ground underneath is still settling, am I just wasting my money and time?
Look, I’ll give it to you straight: if that ground is still moving, you aren’t fixing a crack, you’re just putting a bandage on a broken leg. You can pour the most expensive epoxy in the world into that gap, but if the sub-base is shifting or washing out underneath, that crack will be back before the resin is even fully cured. Don’t waste your hard-earned cash on a cosmetic fix until you’ve sorted the foundation.
Can I use a standard mortar patch for a crack that’s wider than a finger, or is that just asking for another failure?
If the crack is wider than a finger, a standard mortar patch is nothing more than a funeral shroud for your slab. You’re just masking a wound that’s going to reopen. Mortar has no structural integrity and zero bond to the old concrete once it starts moving. You’ll spend twenty quid on a bag of sand and cement only to be back here in six months staring at the same gap, just filled with grey grit.
How long do I actually need to wait before I can walk on the repair without worrying about it crumbling out?
Look, I’ve seen too many lads rush a repair because they’ve got somewhere to be. If you’re using a standard epoxy, you can usually walk on it after 24 hours, but don’t go celebrating just yet. If you’re putting any weight on it—like a wheelbarrow or a heavy tool—give it at least three days. If you rush the curing, you’re just asking for that patch to pop right back out.



