I remember standing on a site in ’94, watching a lad pour a pristine, high-spec slab over what looked like nothing more than loose, uncompacted topsoil and a bit of crushed rubble. He was so proud of how smooth that finish was, but I could see the disaster coming from a mile off. People spend thousands on the fancy stuff—the premium aggregates and the high-strength mixes—but they treat the ground underneath like an afterthought. If you’re looking for a complete guide to sub bases that tells you which expensive brand of gravel to buy, you’ve come to the wrong place. Most of those guides are just fluff; they don’t tell you that if your compaction is rubbish, your concrete is already broken before the truck even pulls up.
I’m not here to sell you anything or give you a textbook lecture. I’m going to give you the truth, straight from forty-three years of watching foundations heave and slabs snap. I’ll walk you through the actual mechanics of getting the ground right, from the moisture content to the layers of MOT Type 1, without the unnecessary jargon. This is my no-nonsense approach to ensuring that whatever you pour stays exactly where you put it.
Table of Contents
Crushed Stone Subgrade the Silent Foundation of Every Pour
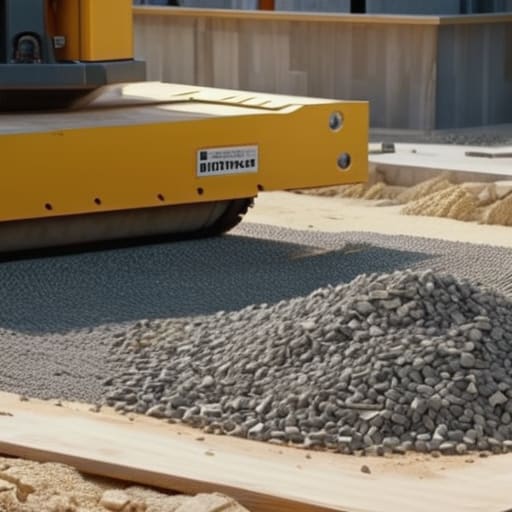
Now, listen. You can talk all you want about the strength of your mix or the quality of your reinforcement, but if you’re skimping on the crushed stone subgrade, you’re building on sand. I’ve seen it a thousand times: a lad gets a load of high-spec concrete delivered, feels like a king, and then pours it straight onto some loosely packed muck. That’s a recipe for disaster. You need a solid aggregate base course that’s been laid and compacted until it doesn’t budge. This isn’t just about filling a hole; it’s about creating a structural platform that distributes the load so the concrete doesn’t have to do all the heavy lifting alone.
If you don’t get the grading right, you’re asking for trouble. A proper crushed stone layer does more than just sit there; it acts as a vital component of your pavement foundation design by providing a stable, non-yielding surface. More importantly, it helps with the drainage. If water gets trapped under your slab because you didn’t account for the drainage layer importance, the ground will soften, the stone will shift, and you’ll be staring at a spiderweb of cracks before the first winter hits.
Pavement Foundation Design Building on Truth Not Hope
Now, listen. You can’t just eyeball a job and hope the math works out when the heavy plant starts rolling over it. Real pavement foundation design isn’t about guessing how thick a layer needs to be; it’s about understanding the load. I’ve seen lads try to save a few quid by thinning out the aggregate, only to watch a driveway turn into a jigsaw puzzle six months later because they didn’t account for the weight of a modern SUV. You have to build based on the actual traffic and the ground you’re standing on, not what the bloke next door did for his garden path.
If you’re dealing with soft, spongy ground, you can’t just throw stone on top and call it a day. You need to look into proper soil stabilization techniques before you even think about bringing a mixer on site. Whether that means lime, cement, or just a much more robust aggregate base course, you have to turn that weak soil into a platform that won’t shift. If you try to build on hope instead of a solid, engineered design, you aren’t a contractor—you’re just a gambler, and the house always wins when the cracks start appearing.
Five Things You’ll Forget to Do (But Your Slab Will Remember)
- Don’t trust the ground just because it looks flat. I’ve seen more slabs fail because someone skipped a proper compaction test than because the mix was off. If you haven’t run a plate compactor over that sub-base until it feels like solid rock, you aren’t ready to call the ready-mix plant.
- Watch your moisture levels like a hawk. If your sub-base is bone dry, it’ll suck the life out of your concrete before it’s even set; if it’s a soup of mud, your slab will sink like a stone. You want it damp, not drowning.
- Stop using “dirt” as a base. I don’t care how much money you’re trying to save; you cannot build a proper foundation on top of topsoil or organic matter. It’ll rot, it’ll compress, and your beautiful new pour will be nothing but a cracked mess in twelve months.
- Grading is everything. If you don’t get the fall of your sub-base right, you’re fighting a losing battle with water. If water sits on that base, it’ll soften the ground underneath your concrete, and once that happens, there’s no fixing it from the top.
- Check your stone size. If you’re using fines that are too small, you’re just making a glorified mud pit. You need the right gradation—the right mix of sizes—so they lock together. If they don’t lock, they move, and if they move, you’re back here calling me to look at a crack.
The Bottom Line
At the end of the day, you can spend your entire budget on high-spec, reinforced concrete and fancy additives, but it won’t mean a damn thing if you’ve ignored what’s happening beneath the surface. We’ve talked about why a crushed stone subgrade is your best friend and why you can’t just build on hope and a prayer. Whether you’re dealing with soft clay or shifting sand, the truth remains the same: your foundation is only as good as the compaction and the material you put in the hole. If you skip the testing or try to save a few quid by spreading the stone too thin, you aren’t saving money—you’re just pre-ordering a crack that’ll show up in six months.
I’ve spent forty-three years watching men try to outsmart the ground, and let me tell you, the ground always wins. There are no shortcuts in groundwork that don’t eventually come back to haunt you. But if you take the time to do it right—if you respect the sub-base, get your layers even, and ensure that compaction is solid—you can sleep soundly knowing that what you’ve built is actually meant to last. Build it once, build it properly, and don’t let anyone on your site talk you into doing it any other way.
Frequently Asked Questions
How do I know if my ground is actually compacted enough, or am I just guessing with the plate compactor?
If you’re guessing, you’ve already lost. You don’t just run a plate compactor over the MOT Type 1 until you’re tired and call it a day. I always tell my lads: if you can still see the tracks of the machine or if the ground feels “spongy” under your boot, it isn’t ready. For real work, you use a nuclear density gauge or a sand replacement test. If you won’t pay for the test, don’t complain when the slab cracks.
If I'm working on a bit of clay or soft soil, do I need a thicker layer of stone to stop the whole thing sinking?
If you’re sitting on clay, you’re not just building a slab; you’re fighting a sponge. Clay holds water, shifts when it gets wet, and settles like a dream—and not the good kind. You can’t just throw a thin layer of stone on top and hope for the best. You’ll need a thicker, more robust sub-base to distribute that load, and you’d better make sure it’s compacted properly. If you don’t, that concrete’s going nowhere but down.
What's the difference between using MOT Type 1 and just throwing down whatever leftover hardcore is lying about?
Listen, I’ve seen it a thousand times. You think you’re saving a few quid by throwing down some random hardcore, but you’re actually just buying yourself a headache. MOT Type 1 is graded specifically to interlock; those stones nestle together to create a solid, non-shifting mass. That “leftover” rubble? It’s full of voids and inconsistent sizes. It’ll shift, it’ll settle unevenly, and before you know it, your slab is cracking because the ground decided to move.



