I spent thirty years watching lads get excited about the fancy, expensive pavers they’ve picked out from a showroom, only to watch the whole lot sink into the mud six months later. Everyone wants a “complete guide to permeable paving” that tells them which stone looks best in the sunlight, but nobody wants to talk about the grit and the muck underneath. I’ve stood on more sites than I can count, watching a homeowner pour a fortune into high-end permeable blocks, only for it to fail because they treated the sub-base like an afterthought. If you think the magic is in the surface, you’ve already lost the battle before you’ve even broken ground.
I’m not here to sell you on aesthetics or show you glossy brochures that don’t tell the truth. What I’m going to give you is the unvarnished reality of how these systems actually work when the heavens open. We’re going to skip the marketing fluff and get straight into the sub-base, the drainage layers, and the critical mistakes that turn a professional install into a muddy disaster. If you want to do it right the first time, you’ll listen to what’s happening below the surface.
Table of Contents
Permeable Paving Installation Layers Building What the Eye Misses
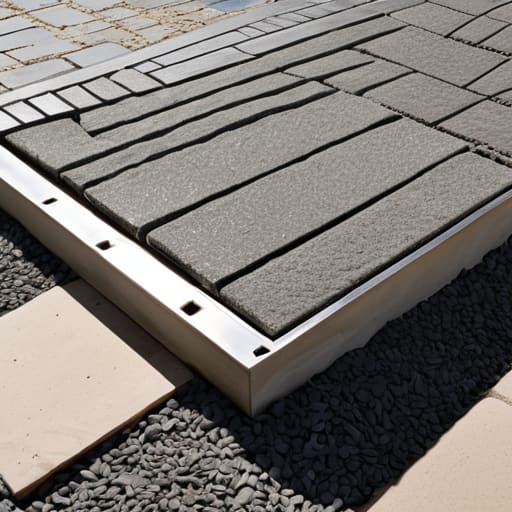
Most people look at a finished driveway and see the pretty blocks or the stone surface. They think that’s the job. It isn’t. If you want to understand permeable paving installation layers, you have to stop looking at the top and start looking at what’s underneath. A permeable system isn’t just a surface; it’s a structural filter. If you treat it like a standard patio and skip the specialized sub-base, you’re just building an expensive way to watch your driveway sink into the mud.
The real magic happens in the voids. You aren’t just laying stone; you are building a reservoir. You need a clean, angular crushed stone base—not some dusty, rounded rubbish from a local yard—to create the gaps necessary for reducing surface water runoff. These gaps allow the water to move through the structure rather than sitting on top or pooling against your house foundations. When you get these layers right, you aren’t just paving; you’re creating a functional part of the local stormwater management solutions. If the layers aren’t graded and compacted exactly to spec, the whole thing is just a ticking time bomb.
Porous Paving Materials Comparison Choosing Tools Not Just Finishes
Now, don’t go getting blinded by the brochures. Most people walk into a yard, see a nice-looking block or a bit of resin, and think they’ve solved their problem. They haven’t. When you’re looking at a porous paving materials comparison, you need to stop thinking about the colour and start thinking about the voids. If the material doesn’t allow water to move through it properly, you aren’t building a drainage solution; you’re just building an expensive, fancy-looking dam that’s going to cause puddles and heave.
You’ve got your block paving with wide, grit-filled joints, your resin-bound stuff, and your porous concrete. Resin is popular because it looks tidy, but if the contractor gets lazy with the mix or the sub-base isn’t spot on, it’ll crack faster than a dry summer slab. On the other hand, permeable block paving is a workhorse for reducing surface water runoff, provided you don’t let some cowboy fill those joints with sand instead of the specified aggregate. Every choice you make here is about how that water travels from the surface down into your sub-base layers. Pick the material for how it handles the load and the water, not how it looks in a catalogue.
Five Ways to Make Sure Your Permeable Paving Doesn't Become a Muddy Mess
- Stop looking at the top layer. If you haven’t spent enough time compacting that sub-base until it’s rock solid, it doesn’t matter if you’re using the most expensive stone in the country; the whole thing will shift and dip the moment the ground gets saturated.
- Watch your aggregate sizes like a hawk. You can’t just throw any old rubble in there and call it a day. You need a specific gradation of clean, crushed stone to create those voids that actually let the water pass through, rather than just trapping it in a soup of fines.
- Don’t go skimping on the geotextile membrane. People see it as an extra cost, but that fabric is what keeps your expensive clean stone from getting swallowed up by the silt and soil underneath. Without it, your drainage path will clog up faster than a blocked drain in a storm.
- Mind the edges. A permeable system is only as good as its containment. If you don’t have a rigid, solid edge restraint to hold those stones in place, the lateral pressure from the ground and the weight of a vehicle will push your paving outward until the whole thing looks like a wave.
- Keep the grit out of the mix. I’ve seen too many lads try to save a few quid by using “crushed run” that’s got too much dust and fines in it. That dust is the enemy; it’ll settle in the gaps, turn into sludge, and turn your “permeable” system into a waterproof slab of nothing.
Don't Get Distracted by the Pretty Bits
At the end of the day, a permeable driveway isn’t just about picking a stone or a block that looks good in the brochure. It’s a system, and if one part of that system is rubbish, the whole thing is a waste of money. You can buy the most expensive porous pavers on the market, but if you’ve skimped on the sub-base or failed to manage your aggregate layers correctly, you’re just building a very expensive way to watch your driveway sink. Remember: the strength and drainage of your installation live in the layers you can’t see. If you don’t get the foundation right, you aren’t paving; you’re just delaying the inevitable.
My advice? Stop looking at the surface and start looking at the ground. When you’re standing there on-site, don’t just check if the lines are straight; check if your sub-base is compacted and if your layers are sized exactly like the spec demands. It takes more sweat and more time to do it properly, but doing it right the first time is the only way to sleep soundly when the heavy rains hit. Build it for the long haul, not just for the handover.
Frequently Asked Questions
I’ve got a bit of clay in my garden; is permeable paving actually going to work or am I just wasting my money?
Listen, if you’ve got clay, you’ve got a sponge that won’t let go of water. If you just slap permeable pavers on top of it, you’re just building a very expensive, very pretty bathtub. It’ll work, but only if you treat that clay like the enemy. You’ll need a much deeper, more robust sub-base to manage the drainage and prevent the whole thing from shifting when the ground gets heavy. Don’t skip the prep.
How much more do I need to spend on the sub-base compared to a standard solid driveway?
Listen, if you’re looking for a quick number, you’re already looking at it wrong. You’re going to spend more—and significantly more. With a standard driveway, you’re just building a platform. With permeable, you’re building a reservoir. You aren’t just buying stone; you’re buying depth and specific, clean aggregates that won’t clog. Expect your sub-base costs to jump by 30% to 50% minimum. It’s more material and more labor, but it’s the only way it works.
Once it's laid, how often do I actually need to clean out the joints so it doesn't turn into a solid, non-porous slab?
Look, if you treat your permeable paving like a set-and-forget job, you’ve already failed. You don’t need to scrub it every week, but if you let silt, moss, and grit build up, you might as well have poured a solid slab of concrete. I’d say give the joints a proper sweep or a light vacuum twice a year—once in spring and once in autumn. Keep those voids clear, or you’re just wasting your money.



