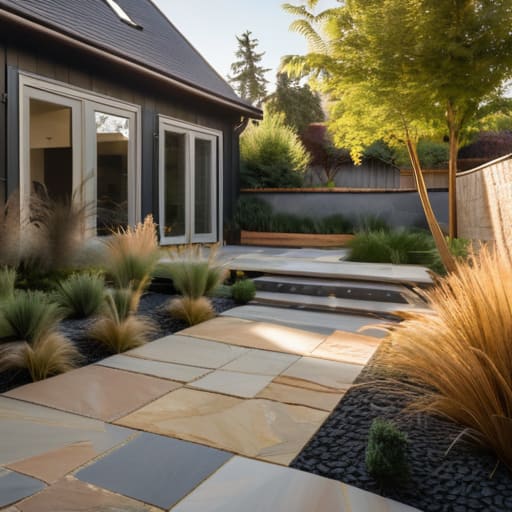
I’ve spent forty-three years watching men pour money down the drain, and most of it happens before a single slab of granite even touches the ground. You see these glossy brochures promising a lifetime of beauty, but they never show you the sinking, shifting mess that happens when the prep work is rushed. Most people think a complete guide to natural stone paving should be about picking the right colour or the prettiest texture, but they’ve got it backwards. If you don’t get the sub-base right and the compaction sorted, that expensive limestone is going to rock and roll like a loose tooth within six months.
I’m not here to sell you on fancy finishes or expensive sealers that just mask a bad job. What I’m going to give you is the truth about what actually keeps stone level and stable through a hard winter. We’re going to strip away the nonsense and talk about the grit: the drainage, the bedding mortar, and why you should never skip the heavy lifting underneath. This is the no-nonsense, sequence-driven approach to making sure your hard work stays exactly where you put it.
Table of Contents
Guide Overview
Tools & Supplies
- Plate compactor to settle the sub-base
- Rubber mallet for leveling stones
- Angle grinder with diamond blade for cutting
- Spirit level to ensure correct slope
- Natural stone slabs (calculated by square footage plus 10% waste)
- Sub-base aggregate/crushed stone (approx. 4 inches deep)
- Sharp sand or grit sand (approx. 1-2 inches deep)
- Jointing compound or polymeric sand (per bag requirements)
Step-by-Step Instructions
- 1. Before you even think about ordering a single slab, you need to get your hands dirty with the excavation. You aren’t just digging a hole; you are creating a structural platform. Dig down deep enough to account for your sub-base, your bedding layer, and the thickness of the stone itself, then add a bit of extra room for a margin of error. If you’re lazy here and leave the ground uneven or soft, you might as well throw your money straight into the skip.
- 2. Now, let’s talk about the part everyone tries to rush: the sub-base. This is where most jobs die a slow death. You need a solid layer of MOT Type 1—not some cheap, sandy rubbish—spread out in thin, manageable lifts. I want to see you compacting that material with a heavy vibrating plate until it’s rock hard. If you try to dump six inches of stone in all at once and expect it to settle properly, you’re setting yourself up for a wavy, sinking mess that’ll make me wince.
- 3. Once that base is as solid as a drum, it’s time for your bedding layer. Most blokes will tell you to use sand, but if you want it to last, you should be looking at a sharp sand and cement mix. You want a semi-dry consistency—think of it like damp soil, not a soup. Spread it out to about 30mm to 50mm, and for heaven’s sake, don’t over-compact it once it’s down. You want to bed the stone into it, not squeeze the life out of the mix before the stone even touches it.
- 4. Laying the stone is the part people like to take photos of, but it’s where you can really mess up the levels. Start from your most fixed point—usually a house wall or a straight edge—and work your way out. When you drop a slab, give it a firm tap with a rubber mallet to settle it into the bed, but watch your levels like a hawk. Use a long straight edge to ensure you aren’t creating puddles or dips that will turn your patio into a pond every time it rains.
- 5. Don’t go rushing in to fill the gaps the second the stone is down. You need to give those slabs time to settle and the bedding to firm up. Once you’re happy with the layout, it’s time for pointing. Whether you’re using a dedicated jointing compound or a traditional mortar, make sure you pack it in tight. A common mistake is just “painting” the grout over the top; you need to fill the void completely so water can’t get underneath and freeze, which is what’ll split your expensive stone come January.
- 6. The final, most neglected step is the cleaning and sealing. Once the joints are set, wash away the grit and excess cement. If you’re using a natural stone that’s porous, like sandstone, you’ll want to consider a sealer. But don’t just slap it on like paint; make sure the stone is bone dry first. If you seal moisture into the stone, you’ll end up with white stains that’ll haunt you for the next ten years.
The Invisible War Mastering Paving Substrate Preparation
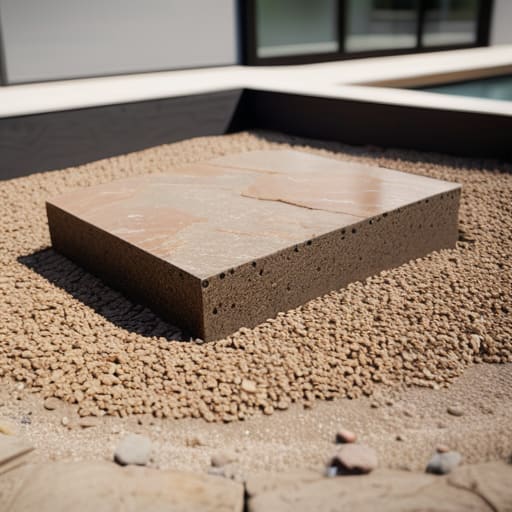
Listen, I’ve seen more expensive sandstone slabs end up in a skip than I care to admit, and nine times out of ten, it wasn’t the stone’s fault. It was the ground. People get so caught up in choosing between sandstone and limestone based on the colour in a showroom that they completely forget the most important part of the paving substrate preparation: the sub-base. If you haven’t got a solid, compacted MOT Type 1 base that doesn’t move when you walk on it, you’re just building a very expensive way to watch your patio sink. You can have the finest natural stone in the world, but if that base is soft or poorly graded, the whole thing is a ticking time bomb.
Once you’ve sorted the ground, don’t go skimping on your bedding. I’ve seen lads try to save a few quid by thinning out their sand and cement mortar mix, and let me tell you, the stone will tell you exactly how much you’ve cheated. You need a full, consistent bed with no voids. If there’s air trapped under those slabs, water gets in, freezes, and cracks your hard work before the first year is out. You do the prep right, or you don’t do it at all.
Choosing Between Sandstone and Limestone Dont Buy the Wrong Lie
Now, once you’ve actually done the hard graft of the paving substrate preparation and you’ve got a base that won’t budge, you’ll face the salesperson’s pitch. They’ll try to sell you on the “look” of a stone, but they won’t tell you how it behaves when the weather turns foul. When you’re choosing between sandstone and limestone, you aren’t just choosing a colour; you’re choosing how much headache you want to deal with in five years. Sandstone is the workhorse—it’s hardy, it’s got character, and it handles the grit of a busy garden well. But don’t let them sell you a soft, porous slab that’ll soak up every bit of oil or tannin like a sponge.
Limestone, on the other hand, is a different beast entirely. It can look stunningly uniform, but it’s far more temperamental. If you’re using a limestone, you’d better be prepared for a more rigorous set of stone paving maintenance tips, because it can etch or stain if you aren’t careful with what you spill on it. I’ve seen too many lads pick a beautiful, pale limestone only to watch it turn grey and mottled after one bad winter because they didn’t respect the stone’s chemistry. Know what you’re laying before you sign the cheque.
The things they don't tell you in the showroom
- Stop obsessing over the colour of the slab and start looking at the thickness. If you’re laying natural stone on a sub-base, and that stone is only 20mm thick, you’re asking for trouble. You need meat on the bone; if the stone is too thin, it’ll snap like a biscuit the moment the ground settles or a heavy wheel rolls over it.
- Watch the water, and I don’t just mean the rain. If you’re using a wet mix to bed your stone, you’ve already lost the battle. You want a consistent, workable bed, but if you turn that mortar into soup just to make it easier to level the slabs, you’ll end up with hollow spots that’ll crack within six months.
- Don’t let them talk you out of expansion joints. I’ve seen lads try to pave a massive patio as one continuous sheet of stone because they wanted it to look “seamless.” It isn’t seamless; it’s a ticking time bomb. Without proper movement joints, the heat will expand that stone and it’ll heave right out of the ground.
- Check your falls before you even think about laying the first stone. I don’t care how pretty the pattern is—if you haven’t got a clear, consistent fall away from the house, you’re just building a very expensive swimming pool. Water sitting on natural stone is a recipe for algae, staining, and eventually, structural failure.
- Learn to respect the curing time. You can’t rush a job just because the customer wants to host a BBQ on Saturday. If you’re bedding stone in mortar, that bed needs time to set and find its strength. If you start walking all over it or putting weight on it too early, you’ve compromised the bond, and once that bond is gone, it’s gone for good.
The Final Word Before You Start Pouring
At the end of the day, if you’ve followed what I’ve said, you aren’t just slapping some expensive slabs onto a patch of dirt and hoping for the best. You’ve understood that the stone is just the finish line; the real work happened in the trenches, in the compaction of the sub-base, and in the careful selection of a material that actually suits your local climate. Don’t let anyone talk you into skipping the bedding layer or rushing the setting time just to get the garden furniture out. If you get the foundation right and respect the physics of how stone sits on the earth, you won’t be calling me in three years to ask why your patio is rocking like a boat in a gale.
Building something that lasts isn’t about being flashy or buying the most expensive slab in the catalogue; it’s about having the patience to do the parts that nobody ever sees. There’s a certain pride in knowing that while your neighbours are patching up cracked, shifting paving, your ground is solid as a rock because you didn’t take the easy way out. Do the job properly, respect the process, and build it once. If you do that, you won’t just have a patio—you’ll have a piece of groundwork that stands the test of time long after the cheap jobs have crumbled into the mud.
Frequently Asked Questions
I’ve got a solid sub-base, but how do I know if I’ve compacted it enough to stop the slabs from dipping in two years?
You can’t just look at it and hope for the best. If you’re relying on your eyes, you’ve already lost. You need to be using a heavy-duty plate compactor—not one of those little vibrating plates meant for garden paths. Run it over until the surface feels dead, not bouncy. If you can still see a footprint or a slight depression after a pass, you’re not done. If it doesn’t feel like solid rock, it isn’t.
If I’m paving in a spot that gets a lot of shade or stays damp, what’s the real risk of the stone staining or moss taking over?
You’re asking about the surface, but you should be asking about the drainage. If a spot stays damp, it’s because your sub-base isn’t shedding water or your falls are rubbish. That moisture sits in the pores of the stone, and that’s when the moss and algae move in to claim it. It’s not just a cleaning job; if the stone stays saturated, you’ll see staining that no pressure washer can touch. Fix the water, or the stone’s gone.
Everyone talks about the stone, but when exactly should I be worrying about the jointing compound and whether it'll wash out?
You start worrying about the joints the second you think the job is finished. People treat jointing like an afterthought, but it’s the glue holding the whole system together. If you’re using a compound, you better be certain your base is stable and your bedding is consistent. If there’s any movement or water pooling because your falls are rubbish, that compound will wash out or crack like a biscuit. Get the levels right first.



