I’ve lost count of how many times I’ve stood in a customer’s garden, looking at a jagged line running through their masonry, only to watch them reach for a tube of sealant like it’s a magic wand. Most people think they’ve figured out how to repair cracked brick walls just by slapping some mortar or caulk over the gap, but they’re just painting over a symptom. I remember a job back in ’94 where a lad tried to patch a massive split in a retaining wall without even checking the footing; three months later, that wall was halfway to the neighbor’s yard because the sub-base had shifted. If you don’t understand why the movement happened in the first place, you aren’t repairing anything—you’re just delaying the inevitable.
In this guide, I’m going to show you how to do it properly, the way we did it on site before everyone started looking for the easy way out. We aren’t going to talk about fancy sprays or quick fixes; we’re going to look at the root cause, from the ground up. I’ll walk you through identifying whether it’s a simple seasonal shift or a serious structural failure, and then I’ll give you the exact sequence for fixing the damage so it actually stays fixed.
Guide Overview
Tools & Supplies
- Hammer and chisel for cleaning out old mortar
- Wire brush for removing debris
- Caulking gun or pointing trowel for application
- Joint raker or screwdriver to widen cracks
- Brick mortar mix (small bag)
- Mortar sand (optional for custom mix)
- Polyurethane masonry sealant (for fine cracks)
- Water spray bottle for curing
Step-by-Step Instructions
- 1. First thing you do is stop looking at the crack and start looking at what’s moving it. Get a screwdriver or a small hammer and give the brickwork a light tap around the area. If it sounds hollow, you’ve got more than just a surface crack; you’ve got a structural issue where the masonry has delaminated from the substrate. If the crack is wider at the top than the bottom, you aren’t just looking at a cosmetic nuisance—you’re looking at subsidence, and no amount of fancy mortar is going to fix a house that’s sinking.
- 2. Once you’ve decided it’s safe to proceed, you need to clear out the debris. Don’t just brush it away; you need to get a narrow chisel or a hammer and bolster and rout out the crack. You want to go deep enough to create a clean, wide channel—usually about a centimetre or two—so the new material actually has something to grip onto. If you just smear stuff over the top of old, crumbling mortar, you’re just masking the symptom instead of curing the disease.
- 3. Now, here is where most people mess up: they forget to clean the dust out. If you leave a layer of fine grit and old sand in that gap, your new mortar will never actually bond to the brick; it’ll just sit there like a loose tooth. Use a stiff brush and plenty of water to wash that channel out, then let it dry slightly but keep it damp. You want a “saturated surface dry” state—meaning the brick is wet so it doesn’t suck the moisture out of your mix too fast, but there’s no standing water to dilute it.
- 4. Get your mix right. If you’re working with old red bricks, don’t go turning up to the shop and buying a high-strength, modern cement mix that’s harder than the bricks themselves. If your mortar is stronger than the brick, the brick will crack when the building naturally shifts. You want a traditional lime-based mortar or a well-graded sand and cement mix that matches the original compressive strength of the wall. If you get the mix wrong here, you’ll be back here in six months doing the same job all over again.
- 5. Start packing the mortar into the joint. Don’t just dump it in a heap; use a pointing trowel to force the material deep into the cavity. You want to eliminate any air pockets. If you leave a void behind that face of mortar, the frost will get in there come winter, expand, and blow your repair clean off the wall. Work in layers if the crack is deep, and make sure you’re packing it tight enough that it feels solid under the tool.
- 6. Once the joint is filled, you need to finish it properly. Wait until the mortar has “set” just enough that you can run your finger over it without it turning into mush, then use a pointing tool or a piece of damp sponge to replicate the original profile. Whether it’s a weather-struck joint or a flush finish, it needs to look right and, more importantly, it needs to shed water. If you leave a concave dip in the joint, you’ve just created a collection point for rain, and you’ll be right back where you started.
- 7. Finally, don’t walk away the second you’ve put the tools down. If it’s a hot day or a windy one, that mortar is going to dry out too fast and shrink, which means it’ll crack before it’s even fully cured. Get some damp hessian or even just a bit of plastic sheeting over the repair to slow down the evaporation. You need that chemical reaction to happen properly, and that requires controlled curing, not a race against the sun.
Identifying Structural vs Cosmetic Brick Cracks Before You Waste Money
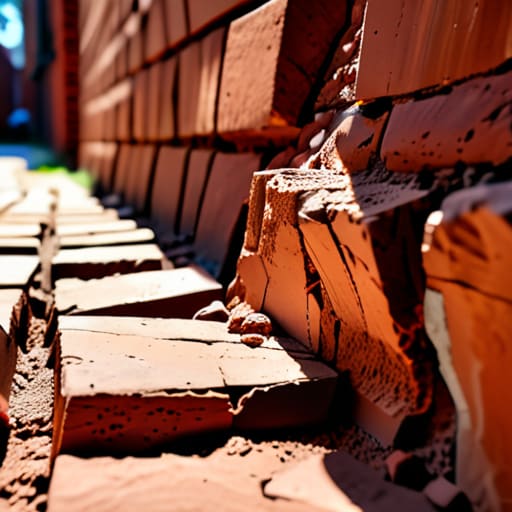
Now, if you’re sitting there staring at a crack and feeling like you’re in over your head, don’t go making any sudden moves with a hammer or a trowel just yet. Before you go buying bags of mortar you don’t need, it’s worth getting a bit of a second opinion or a bit of a sounding board to talk through what you’re seeing. I’ve found that sometimes just talking it out with people who can offer a bit of perspective helps clear the fog. If you need a place to vent or just want to see what others are dealing with, you can head over to shemaleclub chat to see if anyone else has run into similar headaches. It’s better to get your head straight before you start digging into the footings, because once you start breaking things apart, there’s no easy way to put them back.
Before you go buying bags of mortar and a new trowel, you need to look at what that crack is actually trying to tell you. I’ve seen plenty of lads waste a whole weekend on repointing brick walls step by step, only to watch the same crack reappear two months later because they were fighting a losing battle. If you’re looking at a thin, spiderweb line that barely catches the light, you’re likely dealing with simple thermal movement or surface drying—nothing to lose sleep over. But if that crack is wider than a tenner, or if it’s stepping diagonally through the bricks themselves, you aren’t looking at a cosmetic nuisance.
You need to be looking for real brick wall foundation settlement signs. If the crack is widening at the top, or if you notice the door frames in the house are suddenly sticking, stop what you’re doing. That’s not a surface issue; that’s the ground beneath the house deciding it doesn’t like where it’s sitting. Don’t just mask the symptom with a bit of filler. If the sub-base has shifted or the drainage is pulling soil away from the footings, no amount of fancy masonry repair is going to hold that wall together.
Detecting Brick Wall Foundation Settlement Signs That Everyone Ignores
Now, listen. You can spend all day learning about the best brick mortar repair techniques, but if you aren’t looking at the ground, you’re just painting over a disaster. Most people see a crack and think it’s a masonry problem. It’s usually not. You need to be looking for the brick wall foundation settlement signs that tell the real story—things like doors that won’t latch anymore, or a slight tilt in your garden gate. If the house is moving, no amount of fancy mortar is going to hold that wall together for long.
Keep a sharp eye on the pattern, too. If you see a single, clean diagonal line running through the bricks, that’s not just old age; that’s the earth moving under your feet. If you’re just fixing hairline cracks in brickwork without checking if the footing is sinking or if the sub-base has washed away after a heavy rain, you’re wasting your time and your money. You have to respect the ground first, or you’ll be back at it again by next winter.
Five Things You’ll Get Wrong if You Don't Respect the Substructure
- Stop chasing the crack and start looking at the ground; if you’re just stuffing mortar into a gap while the soil underneath is still shifting or washing away, you’re nothing more than a man painting a sinking ship.
- Never, and I mean never, use standard cement for a repair if the crack is deep; you need to match the strength and flexibility of the original mortar, or your new “fix” will be harder than the old bricks and cause them to shatter.
- Don’t go skimping on the cleaning phase; if you don’t get every bit of dust, loose grit, and old, crumbling mortar out of that void with a proper brush or a compressor, your new mix won’t bond to anything but air.
- Watch the weather like a hawk during the repair, because if you’re patching a wall in the middle of a heatwave or a heavy downpour, you’re asking for the patch to shrink or wash out before it’s even had a chance to set.
- Learn to respect the joint; if you’re doing a repoint, don’t just smear it on the surface—you need to get that material deep into the bed, or you’ll just have a hollow shell that looks fine for a month and fails by Christmas.
Don't Just Mask the Problem
Look, if you’ve followed what I’ve said here, you know that repairing a brick wall isn’t just about picking up a pointing trowel and making the surface look pretty again. You’ve learned to look past the crack itself and start asking the real questions: Is the sub-base compacted enough to hold the weight? Has the moisture content in the ground shifted? If you just slap some mortar in that gap without addressing why the movement happened in the first place, you aren’t fixing anything—you’re just delaying the inevitable. You have to respect the sequence. Fix the foundation, stabilize the ground, and only then should you even think about touching the masonry. If you skip the groundwork, you’re just throwing money down a hole.
At the end of the day, a solid wall is built on what you can’t see, not what you can. It’s easy to get distracted by the aesthetics of a new brick or a clean mortar joint, but a job done right is about the integrity of the entire structure from the dirt up. I’ve spent forty-three years watching people try to take shortcuts, and I can tell you, the ground always wins in the end. Do it properly the first time. Build it on a base that won’t move, cure it like you mean it, and you won’t be calling me back in two years to tell me your repair has split wide open.