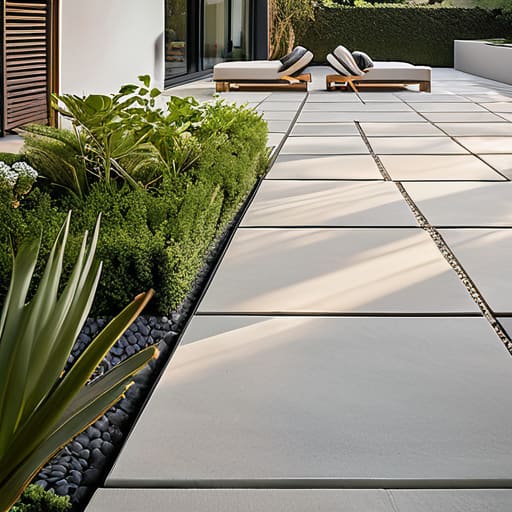
I’ve lost count of how many times I’ve walked onto a job site to see a homeowner staring despondently at a set of cracked, uneven porcelain slabs that cost them a small fortune. They always think the porcelain itself is the problem, but they’re dead wrong. You can buy the most expensive, high-end slabs on the market, but if you don’t respect the ground underneath them, you’re just throwing money into a hole. Most of these fancy “how-to” articles online are useless because they focus on the pretty surface, but this complete guide to porcelain paving is going to focus on what actually keeps it level: the sub-base, the bedding, and the unforgiving reality of the preparation.
I’m not here to sell you on a lifestyle or show you pretty pictures of garden parties; I’m here to make sure your patio doesn’t become a trip hazard in two years’ time. I’m going to walk you through the exact sequence I used for forty-three years, from the first shovel of MOT Type 1 to the final grout line. We’re going to talk about why you cannot use a standard sand and cement mix for these slabs, and I’ll show you exactly how to avoid the common mistakes that turn a weekend project into a structural nightmare.
Table of Contents
Guide Overview
Tools & Supplies
- Angle grinder with diamond blade for precise cuts
- Rubber mallet for leveling and setting slabs
- Spirit level to ensure correct fall and flatness
- Plate compactor for sub-base stability
- Spacers to maintain consistent grout lines
- Porcelain paving slabs (total area plus 10% extra)
- Sub-base material/MOT Type 1 (depth of 100-150mm)
- Wet mortar mix/Priming slurry (for slab adhesion)
- Porcelanous jointing compound (matching color)
- Sharp sand and cement (for bedding layer)
Step-by-Step Instructions
- 1. First thing you do—and I mean the very first thing—is stop thinking about the pretty slabs and start thinking about the sub-base. You can’t just throw porcelain onto a bit of sand and hope for the best. You need to dig out the area to a proper depth, usually around 150mm, and get a layer of MOT Type 1 down. You need to compact that stuff with a heavy vibrating plate until it’s rock solid. If you leave even a tiny bit of soft spot in that sub-base, I promise you, that porcelain will be rocking like a seesaw within six months.
- 2. Once your base is compacted, you need to get your drainage and levels sorted. Porcelain is non-porous, which is why it looks so good, but it also means water doesn’t soak in—it sits there. You need to ensure you’ve got a slight fall, at least a 1:60 ratio, so the rain runs off toward a drain or a soakaway rather than pooling in the middle of your patio. If you get the levels wrong here, you’ll end up with a lake in your garden every time there’s a heavy downpour.
- 3. Now, listen closely because this is where most DIYers and even some cowboys mess up: you cannot use a standard sand and cement mix to bed these slabs. Porcelain is too dense; it won’t soak up the moisture from a normal mortar, which means it’ll just pop right off the bed. You have to use a priming slurry on the back of every single slab. It’s a bit of extra work, and it’s a bit of extra cost, but it’s the only way to get that chemical bond that keeps the slab stuck to the mortar.
- 4. When you’re ready to lay them, you’ll be using a wet mortar bed, typically a 4:1 or 5:1 sand and cement mix. Spread it out with a trowel, but don’t go making a massive mountain of it. You want a consistent thickness, usually around 30mm to 50mm. Lay your slab onto that bed, and use a rubber mallet to tap it down to your finished level. Don’t be stingy with the tapping; you need to make sure there are no hollow spots underneath, or you’re just asking for a crack later on.
- 5. While you’re laying, keep a sharp eye on your joint widths. Porcelain looks best with tight, clean lines, but you can’t butt them up edge-to-edge like you might with some natural stone. You need a consistent gap—usually about 3mm to 10mm depending on the manufacturer’s specs—to allow for natural movement. If you lay them too tight, the thermal expansion will have them shoving each other out of alignment once the sun hits them in July.
- 6. Once the slabs are down and the mortar has had a chance to set, you need to deal with the joints. Forget about using sand to fill the gaps; that’ll just wash out in the first storm. You need to use a dedicated porcelain jointing compound. These are modern, polymer-based products that you can apply almost immediately. They’re designed to stay flexible and waterproof, which is exactly what you need to keep the weeds out and the structure stable for the long haul.
- 7. Finally, give the whole thing a thorough clean. Once the jointing compound has cured, wash away any residue with clean water. Don’t go using any harsh chemicals that might leave a film on the surface; just a simple wash to show off that finish you’ve worked so hard for. If you’ve done the groundwork properly, you won’t be calling me in two years to ask why your expensive patio is sinking.
Porcelain Paving Subbase Preparation the Foundation Nobody Photographs
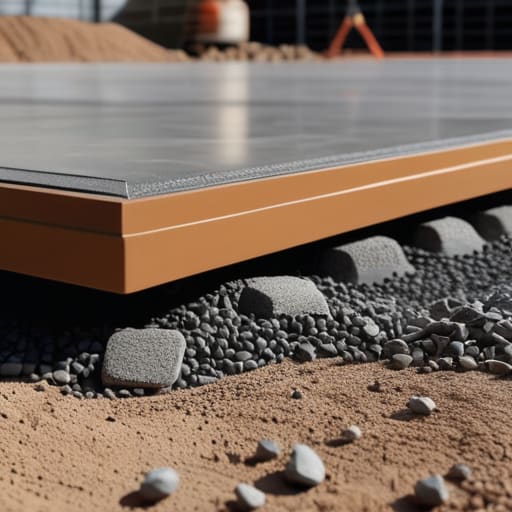
Listen, I’ve spent forty years watching people spend a fortune on high-end porcelain slabs only to watch them tilt and wobble six months later. They think the beauty is in the tile, but the beauty is actually in the dirt. When you’re looking at porcelain paving subbase preparation, you aren’t just digging a hole; you are building a platform that has to remain absolutely motionless for the next thirty years. If your sub-base isn’t compacted to a rock-hard finish with a proper MOT Type 1, all that expensive porcelain is just going to follow the movement of the ground. I don’t care how many layers of sand you throw down—if the foundation shifts, the tiles will snap.
Most lads will try to rush this part because nobody wants to take a photo of a pile of crushed stone. But let me tell you, the real work happens before the first tile even touches the bedding mortar. You need to ensure your sub-base is deep enough to prevent any frost heave or settling. I’ve seen too many “professionals” skip the heavy compaction, and they’re the ones getting calls at midnight when a customer’s patio starts looking like a mountain range. Get the ground right, or don’t bother starting.
Finding the Best Mortar for Porcelain Tiles Without Cutting Corners
Now, once you’ve sorted your sub-base—and I mean actually done it right, not just raked some gravel flat—you’re faced with the bedding. This is where I see most lads go wrong. They treat porcelain like it’s sandstone, but it’s a different beast entirely. Porcelain is non-porous; it doesn’t “suck” the moisture out of a standard sand and cement mix like natural stone does. If you use a basic mix, the tile won’t bond, and you’ll be back here in six months with a hollow sound every time you step on it.
When people ask me about the best mortar for porcelain tiles, I tell them to stop looking for a “recipe” and start looking for a high-quality, polymer-modified adhesive. You need something designed to create a chemical bond, not just a mechanical one. I’ve seen too many people try to save a few quid by using a standard mortar, only to watch those expensive slabs pop right off the bed. If you aren’t using a specialist thin-set or a dedicated porcelain bedding compound, you aren’t installing a patio; you’re just laying expensive crackers on a pile of sand.
Five Things That Will Save Your Patio (And Your Sanity)
- Stop thinking about the porcelain and start thinking about the drainage. If you don’t have a clear path for water to escape from under those slabs, you aren’t building a patio; you’re building a very expensive, very heavy swimming pool that will heave the moment the frost hits.
- Don’t you dare use standard sand and cement for the bedding layer. Porcelain is non-porous, which means it won’t “grip” a regular mix. You need a primed, high-performance mortar or a specialized adhesive mix, otherwise, those slabs will be sliding around like hockey pucks on ice within six months.
- Watch the weather like a hawk. I’ve seen too many lads try to lay porcelain in the midday sun or right before a downpour. If it’s too hot, your mortar sets before it can bond; if it’s wet, you’re just washing your profit down the drain.
- Check your levels with more than just a “gut feeling.” A slight dip in a gravel driveway is one thing, but a slight dip in a porcelain patio is a permanent puddle that’ll stay there until the end of time. Use a proper spirit level and don’t be afraid to go back and fix it before the first slab goes down.
- Clean the back of the tiles before they hit the mortar. It sounds like a small thing, but those manufacturers often coat the back in a fine dust or a release agent. If you don’t wipe that off, you’re essentially trying to glue two pieces of glass together with nothing in between.
Don't Let the Pretty Finish Hide a Shoddy Job
At the end of the day, porcelain is just a very expensive skin. You can spend a fortune on the finest, most frost-resistant slabs from Italy, but they won’t save you if you’ve been lazy with the prep. If you’ve skipped the proper sub-base compaction, used the wrong mortar mix, or ignored the necessity of a slurry primer to bond that non-porous surface, you aren’t building a patio—you’re building a future headache. I’ve seen too many people get distracted by the colour of the tile and forget that the real work happens in the mud and the grit before the first slab even touches the ground. The integrity of your paving is decided in the trenches, not in the showroom.
If you do it right—and I mean doing it right the first time, without looking for the easy way out—that porcelain will still look brand new long after the people who cut corners are tearing it up to fix the cracks. There is a particular kind of satisfaction in walking across a finished terrace, knowing that every inch of it is sitting on a foundation that is solid as a rock. Don’t build for next week; build for the next twenty years. If you respect the sequence and respect the materials, you won’t just have a patio; you’ll have a job you can actually be proud of.
Frequently Asked Questions
If I’m laying these on an existing concrete patio, do I really need to dig it all up and start from scratch with a new sub-base?
Look, I’ve seen this a hundred times. People think they’re saving time by slapping new porcelain over an old slab, but they’re usually just burying a disaster. If that old concrete is solid, level, and—most importantly—doesn’t have any movement or cracks, you might get away with a thin-set application. But if it’s heaving, sinking, or cracked? Dig it out. You can’t build a premium finish on a failing foundation.
How do I know if I’ve added too much water to my mortar mix and ruined the bond before the porcelain even touches it?
If your mortar looks like soup or a runny porridge, you’ve already lost the battle. It should be a stiff, workable paste that holds its shape when you pull a trowel through it. If you can slide a trowel through it without any resistance, or if the mix starts “bleeding” water onto the surface, it’s too wet. You’re just inviting shrinkage cracks and a weak bond. If it’s soupy, bin it and start again.
What’s the best way to manage the curing process if I get hit with a sudden heatwave or a heavy downpour right after the pour?
If the sun starts baking that slab and the water evaporates too fast, you’ve got shrinkage cracks before you can even say “finished.” Get some polythene sheeting down on it immediately to trap the moisture. If it’s a downpour, you’ve got to cover it or you’ll wash the cement out of the mix and be left with nothing but gravel. Don’t let the weather dictate your finish; you dictate the weather.



