
I once watched a lad, barely twenty, spend three days laying a beautiful, perfectly plumb garden wall, only to see the whole thing lean like the Tower of Pisa after the first heavy frost. He thought he was a master because his joints were thin and his lines were straight, but he’d completely ignored the footing and the moisture in the ground beneath. Most people think a complete guide to bricklaying is all about how you hold your trowel or how you butter a brick, but they’ve got it dead wrong. You can have the steadiest hands in the county, but if you don’t respect the prep work and the way the weather treats your mortar, you’re just building a future headache.
I’m not here to give you any of that polished, textbook nonsense that ignores how a site actually works when it’s raining or freezing. In this complete guide to bricklaying, I’m going to walk you through the real grit of the job—from setting a solid base that won’t shift, to the exact way you need to manage your mix so it doesn’t dry out too fast in the sun. We’re going to talk about the things the manuals skip, because that’s where the real work happens.
Table of Contents
Guide Overview
Tools & Supplies
- Trowel for spreading and moving mortar
- Spirit level for ensuring straight and flat courses
- Line pins and string line for maintaining alignment
- Brick hammer for cutting or shaping bricks
- Jointer for finishing mortar joints
- Bricks (quantity based on square footage)
- Mortar mix (bags based on volume)
- Sand (if mixing mortar from scratch)
- Water (for mixing and wetting bricks)
Step-by-Step Instructions
- 1. Before you even think about picking up a trowel, you’d better be looking at your footings. I don’t care how much you’ve spent on the bricks; if those footings aren’t level, deep enough to get below the frost line, and sitting on a solid, compacted base, you might as well be building on a pile of loose sand. Check your lines, check your levels, and for heaven’s sake, make sure that concrete has cured properly before you start stacking.
- 2. Get your mortar mix right and stop trying to cheat the consistency. You aren’t making soup; you’re making a structural bond. If you’re using a standard 4:1 mix, make sure it’s got enough “body” to hold the weight of the course without slumping. If it’s too wet, it’ll squeeze out of the joints like toothpaste and leave you with a messy, weak wall that’ll crumble the first time the temperature shifts.
- 3. Lay your first course with more care than you think is necessary. This is the most important part of the whole job because every single brick above it relies on this one being dead straight. Use your line pins and a string line, but don’t just trust the string—check it with a spirit level every few bricks. If your first course is even a fraction off, that error is going to grow like a weed as you go up.
- 4. When you start building up, watch your “perpends”—that’s the vertical joints. You need to make sure they aren’t stacking directly on top of each other; you want that staggered bond so the load travels through the wall properly. If you see your joints lining up vertically, stop immediately and fix it, or you’re just building a stack of loose rocks instead of a wall.
- 5. Keep a sharp eye on your weather, especially if you’re working in the heat or a stiff breeze. If the sun is beating down, it’ll suck the moisture out of your mortar before it can actually chemically bond with the brick. I’ve seen many a lad ruin a good job by letting the mortar “dry” instead of letting it “cure.” If it’s too hot, get some shade over it or be prepared to dampen the bricks so they don’t steal the water from your mix.
- 6. Once you’ve got your height reached, don’t just walk away and leave it to chance. You need to go through and strike your joints while the mortar is still “green”—not too hard, not too soft. A clean, well-struck joint isn’t just about making the wall look pretty for the customer; it’s about sealing the face of the wall so water can’t get in and freeze behind the brickwork.
Masonry Construction Basics Respecting the Ground and the Mix
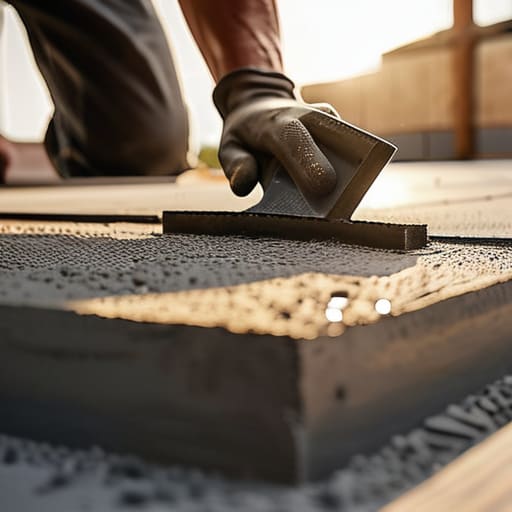
Before you even think about reaching for your trowel, you need to understand that masonry construction basics start long before the first brick is bedded. I’ve seen lads spend a fortune on high-end bricklaying tools and equipment, only to build a wall that leans like the Tower of Pisa because they ignored the footing. If your foundation isn’t level and solid, all the skill in the world won’t save you. You can’t just slap bricks onto a patch of soft earth and hope for the best; you have to respect the ground or the ground will eventually reclaim your work.
Then there’s the mix. I’ve lost count of how many times I’ve seen a youngster mess up the mortar mix ratios because they wanted to save time or make the paste “slacker” for easier spreading. A weak mix is a death sentence for a wall’s longevity. You need that right balance to ensure the bond holds through the freeze and thaw cycles. If you treat the mortar like it’s just glue rather than a structural component, you’re just building a pile of expensive rubble that’s waiting to happen.
Laying Bricks Step by Step the Hour Before the Pour
Before you even think about picking up a trowel, you need to stop and look at what you’ve actually prepared. I’ve seen lads turn up with a full load of bricks and a ready mix, only to realize halfway through the morning that their footing is uneven or their sand is too wet. You can’t fix a bad base once the mortar starts setting. Check your lines, ensure your corners are dead true, and make sure your bricklaying tools and equipment are cleaned and ready to go. If your line pins are bent or your level is wonky, don’t bother starting; you’ll spend the rest of the day fighting your own mistakes instead of building a wall.
Once you’re actually ready to start laying bricks step by step, don’t go rushing the mix. I don’t care what the bag says—you need to feel the consistency. If it’s too runny, it’ll slop out of the joints and ruin your face; if it’s too stiff, you’ll be fighting it every time you try to bed a brick. Consistency is everything. Take the time to gauge your mortar mix ratios properly before the first course goes down. If you get the bed right and the suction is managed, the rest of the wall will practically build itself.
Five Things They Don't Teach You in the Manual
- Stop obsessing over the brick and start looking at the mortar. If your mix is too dry, you’ll be fighting it every time you try to bed a brick; if it’s too wet because someone thought they were being helpful, you’ll end up with a slumped mess that won’t hold a joint.
- Watch the weather like a hawk, not a hobbyist. I’ve seen lads try to lay a beautiful course in the midday sun only to watch it crack by tea time because they let the heat suck the moisture out of the mortar before it could even set.
- Your line is only as good as your corners. You can have the best laser level in the world, but if your corner bricks aren’t plumb and your footing isn’t dead level, that line is nothing more than a suggestion, and your wall will be crooked by the third course.
- Don’t be stingy with the bed. I’ve seen too many young lads trying to “save” mortar by spreading it too thin to make a bag last longer. A thin bed is a recipe for a hollow joint, and a hollow joint is where the water gets in and does its damage.
- Clean your tools as you go, or don’t bother showing up. Dried mortar on a trowel is like sandpaper on your work; it ruins the finish, slows you down, and makes you look like an amateur. If you can’t manage a bucket of water and a sponge, you shouldn’t be on my site.
The Long View on a Straight Wall
At the end of the day, if you’ve followed what I’ve said, you aren’t just slapping bricks on top of each other and hoping for the best. You’ve respected the sub-base, you’ve understood that the mortar is a living thing that needs the right moisture and temperature, and you haven’t taken the easy way out by rushing the curing. Most blokes will try to tell you that a good eye and a steady hand are all you need, but they’re wrong. You can have the best hands in the county, but if your foundations are soft or your mix is watered down to save your back, that wall is a ticking time bomb. Bricklaying isn’t about the finish; it’s about the integrity of everything underneath the visible work.
There’s a certain pride in looking at a finished structure and knowing it’ll still be standing straight long after you’ve hung up your tools. It’s not about the quick paycheck or getting the job done before the rain hits; it’s about the quiet satisfaction of doing it right the first time. When you stop looking for shortcuts and start respecting the physics of the build, you stop being just a labourer and you start being a tradesman. Build it solid, build it slow, and build it to last—because the ground doesn’t lie, and neither does the crack that shows up five years later.
Frequently Asked Questions
If my sub-base is already settled and showing some minor movement, can I just lay a thicker mortar bed to compensate, or am I asking for trouble?
You’re asking for trouble, plain and simple. If that sub-base is moving, it’s telling you something, and you don’t fix a structural problem with a thicker bed of mortar. Mortar is for bonding, not for acting as a structural shim. You can pile on the mix all you like, but as soon as the weight hits, that movement will telegraph right up through the course. Fix the ground first, or you’ll be back here fixing cracks later.
How do I know if the mix I’ve been delivered is actually right for the weather, or if some lad on site has already ruined it with too much water?
Look, if it’s sliding out of the chute like soup, it’s already dead. You want a mix that holds its shape, not one that flows like a drink. If the sun’s beating down, you need a stiffer mix to stop it flash-setting, but if some lad’s added a hoseful to make it “easier” to spread, he’s just built you a future crack. If it looks shiny and runny, send it back.
When it comes to expansion joints, are you telling me I need to be planning those before I even pick up the first brick?
Listen, if you’re waiting until the wall is halfway up to think about joints, you’ve already lost. You don’t just “add” them later; you build them in. Every material moves—it breathes, it expands in the heat, and it shrinks when the frost hits. If you haven’t mapped out where those breaks are going to be before you even mix your first batch of mortar, you aren’t building a wall, you’re just building a future crack.



