I’ve lost count of how many times I’ve stood on a driveway six months after a job, watching a homeowner point at a hairline fracture while they swear they followed every “expert” guide online. Most people think learning how to plan a paving project is about picking the right stone pattern or deciding between granite and sandstone, but they’ve got it backwards. You can spend a fortune on the fanciest slabs in the country, but if you haven’t accounted for the drainage or the compaction of the MOT Type 1 underneath, you aren’t building a patio—you’re just laying a future headache.
I’m not here to talk to you about aesthetics or color palettes; I’ve seen enough beautiful finishes sink into the mud to know better. In this guide, I’m going to show you the gritty reality of what actually matters: the sub-base, the levels, and the weather. I’ll walk you through the sequence of a proper job so you don’t end up throwing money into a hole in the ground. If you want to do it right the first time, stop looking at the surface and start looking at what’s underneath it.
Table of Contents
Guide Overview
Tools & Supplies
- Tape measure for area dimensions
- String line and stakes for layout
- Marking paint for boundary outlines
- Laser level or spirit level for slope planning
- Paver stones (total square footage + 10% extra)
- Sub-base material (crushed stone/gravel)
- Bedding sand (fine-grain)
- Polymeric sand (for joint filling)
Step-by-Step Instructions
- 1. First thing you do—and I mean before you even look at a catalogue of fancy stone—is assess your ground. I’ve seen lads spend five grand on Italian porcelain only to watch it heave two years later because they laid it on top of soft garden soil. You need to dig down and see what you’re actually dealing with. If it’s clay, you’re going to have a headache; if it’s sand, you’re in better shape, but you still need to know the depth of the topsoil so you can get it out of the way properly.
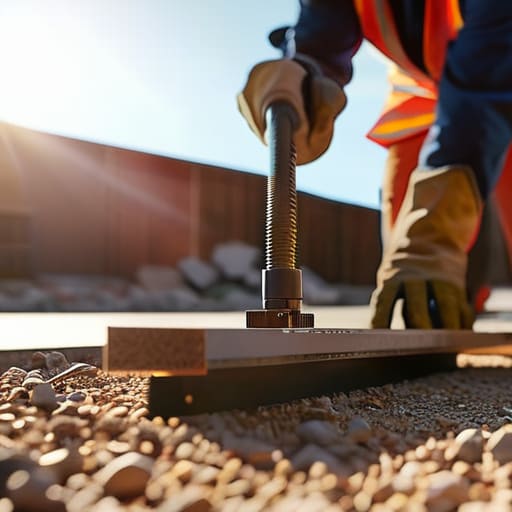
- 2. Next, you need to plan your sub-base like your life depends on it. This is where most people get lazy. You aren’t just throwing some gravel down and calling it a day. You need a compacted, structural layer of MOT Type 1—or whatever your local spec calls for—that’s thick enough to actually support the weight without shifting. If you don’t compact that sub-base in layers with a heavy vibrating plate, you might as well be building on a sponge.
- 3. Now, get your measurements dead right and calculate your drainage. Water is the enemy of every paving project I’ve ever seen fail. If you don’t plan a subtle fall—usually about a 1 in 60 or 1 in 80 slope—the water is just going to sit there, soak into your bedding layer, and eventually cause the whole lot to sink or crack. Don’t just hope it runs off; design the slope into your plan from the very first shovel hit.
- 4. Sort out your materials, but don’t just buy the prettiest stuff. You need to match your bedding material to your surface. If you’re doing a heavy-duty driveway, you need a much more robust mix than if you’re just doing a little garden path for a patio. I’ve seen people try to use a thin layer of sand for a heavy slab, and it’s a disaster waiting to happen. Make sure you have enough sharp sand and cement to create a consistent, firm bed that won’t wash away.
- 5. Before the first stone even touches the ground, you need to organize your site logistics. This sounds like something for a site manager, but it’s for you too. Where is the heavy stuff going to sit? How are you getting the excess dirt out? If you don’t have a clear plan for waste removal, you’ll end up with a mountain of muck in the middle of your garden that’ll make the whole job twice as hard.
- 6. Finally, set your edge restraints and levels. A patio without a solid edge is just a pile of stones waiting to spread out like a pancake. Whether you’re using concrete kerbs or a hidden timber frame, that edge has to be unshakeable. Once those edges are set and your levels are checked with a long spirit level, only then are you actually ready to start laying. Anything else is just guesswork.
Ground Excavation Process Why the Dirt Dictates the Destiny
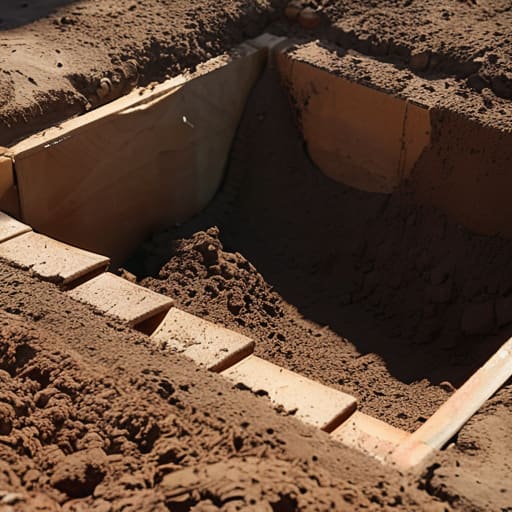
Now, listen. You can spend all day looking at brochures and obsessing over paving material selection, but if you don’t respect the hole you’ve dug, none of that fancy stone will save you. The ground excavation process isn’t just about moving dirt from A to B to make a flat space; it’s about finding out what you’re actually standing on. I’ve seen lads dig out a perfect rectangular pit, only to realize two feet down they’ve hit a patch of soft, organic peat or loose silt. If you don’t dig deep enough to clear out that rubbish, your whole project is sitting on a sponge. You cannot build a solid foundation on a lie.
Once you’ve cleared the muck, you need to be ruthless about the profile of the subgrade. I don’t care how good your subbase preparation steps are; if the bottom of that excavation is uneven or holds water like a bathtub, you’re asking for trouble. You need to compact that raw earth until it’s solid, and you need to do it before a single grain of aggregate touches the ground. If the dirt is soft, the subbase will eventually shift, and when it shifts, your beautiful paving will crack. The dirt dictates the destiny of the slab, period.
Subbase Preparation Steps Building the Foundation That Actually Lasts
Now that you’ve finished the ground excavation process and you’re looking at a clean hole, don’t go rushing to the supplier to order your stone just yet. Most lads make the mistake of thinking any crushed rock will do, but if you want this to stay level for twenty years instead of two, you need to get your subbase preparation steps right. I’m talking about layers, not just dumping a heap of MOT Type 1 in the trench and calling it a day. You need to lay it in compactable lifts—usually no more than 75mm to 100mm at a time—and you better be using a vibrating plate compactor. If you don’t compact it until it rings, you aren’t building a foundation; you’re just making a very expensive sponge.
While you’re at it, keep an eye on your levels. I’ve seen too many jobs where the contractor spent all their time on the fancy paving material selection but forgot to check the fall. If your subbase isn’t graded to shed water away from the house, all the expensive stone in the world won’t stop your patio from becoming a swimming pool. Get the drainage right in the base, because once that stone is packed down, it’s a hell of a lot harder to fix.
Five Things You’ll Regret Skipping Once the Truck is Idling
- Check the weather forecast, not just for rain, but for heat. If you’re planning a big pour on a day when the sun is baking the ground, that concrete is going to set too fast and crack before you’ve even finished your tea. You can’t fight the sun, so don’t schedule against it.
- Stop obsessing over the colour of the stone and start looking at your access. I’ve seen lads spend weeks picking out the perfect paving slabs only to realise the delivery truck can’t get within fifty yards of the site. If you can’t get the heavy stuff to the work area, your labour costs will double before you’ve even broken ground.
- Don’t treat drainage as an afterthought. If you don’t plan the fall—the slight slope that tells the water where to go—you aren’t building a patio, you’re building a swimming pool. Water is the enemy of everything we build; if you don’t give it a path out, it’ll find its way under your sub-base and ruin your life.
- Calculate your materials for the real world, not the textbook. If the math says you need ten bags of sand, buy twelve. You’ll lose some to the wind, some to the ground, and some to the inevitable mistake made by a tired lad at 4:00 PM. Running short halfway through a pour is how you end up with cold joints that look like scars.
- Plan your joints before you even think about the first stone. Whether it’s expansion joints in concrete or the spacing in paving, the joints are what allow the ground to move without breaking your hard work. If you ignore the joints, the ground will eventually move, and it won’t be polite about it.
Don't Cheat the Process
At the end of the day, planning a paving project isn’t about picking the right stone or the fanciest pattern from a brochure; it’s about the grit and the gravel you can’t see once the job is done. If you’ve done it right, you’ve spent more time worrying about your excavation depth, the compaction of your sub-base, and the quality of your drainage than you have looking at the finish. You’ve understood that a slab is only as good as the ground it sits on, and that skipping a single layer of MOT Type 1 is just an invitation for a hairline crack to show up in twelve months’ time. If you’ve followed these steps, you aren’t just laying a surface; you are building a foundation that won’t shift when the first heavy rain hits.
It’s easy to get impatient when the weather turns or when the digging starts taking longer than the quote suggested, but you have to respect the sequence. There are no shortcuts in groundwork that don’t eventually demand payment in repairs. If you take the time to do the prep work properly, you’ll sleep better knowing that your work is built to last rather than just built to look good for the handover. Do it once, do it right, and don’t let anyone talk you into adding water to the mix just to save a bit of sweat.
Frequently Asked Questions
I've got a decent sub-base down, but how do I know if I've actually compacted it enough or if I'm just making a mess of it?
If you’re just driving the plate over the top and calling it a day, you’re asking for trouble. Don’t trust your eyes; trust the bounce. Take a heavy sledgehammer or a crowbar and give the sub-base a proper whack. If it feels springy or hollow, you’ve failed. It needs to feel like solid rock. If you can still see the tracks from your compactor once you’re done, you haven’t gone deep enough.
When exactly should I be looking at the weather forecast to decide if the pour is a go or if I need to send the truck away?
You should be staring at that forecast forty-eight hours out, but the real decision happens the moment you wake up. If there’s a heavy downpour or a frost warning within six hours of your scheduled pour, you cancel. I don’t care if the truck is already idling. Rain ruins the mix ratio, and frost kills the hydration. If the weather’s turning, you send the truck away. It’s cheaper to lose a booking than to replace a failed slab.
How do I figure out the right thickness for the slab so I'm not over-engineering it, but also not building something that'll snap under a heavy vehicle?
Listen, you don’t guess this. If it’s just for a garden path or a shed, four inches is plenty. But the moment you mention a vehicle, you’re in a different league. For a driveway where a car or a small van is actually going to sit, you’re looking at six inches minimum, and that’s only if your sub-base is rock solid. Don’t try to save a few quid on depth; a thin slab under a heavy axle will snap like a biscuit every single time.



