I remember standing on a site in ’98, watching a lad try to stack expensive limestone blocks on what was essentially nothing more than loose, uncompacted topsoil. He was so focused on the look of the wall that he hadn’t even thought about the pressure of the earth behind it. Two seasons later, I was called back to see a pile of rubble and a garden that looked like it had been hit by a landslide. Most people think learning how to build a retaining wall is about picking the right stone or getting a level straight, but they’ve got it backwards. If you don’t get the sub-base and drainage sorted before the first block even touches the ground, you aren’t building a wall—you’re just building a future disaster.
I’m not here to sell you on fancy garden aesthetics or give you some polished, textbook version of a construction manual. I’m going to tell you exactly how to do it right, from the first shovel of hardcore to the final weep hole. We’re going to talk about the stuff the DIY shops leave out: the critical importance of compaction, how to stop hydrostatic pressure from pushing your work over, and why your drainage plan is more important than the wall itself.
Table of Contents
Guide Overview
Tools & Supplies
- Shovel for digging the trench
- Level to ensure even rows
- Tamper for compacting soil
- Rubber mallet for adjusting blocks
- Retaining wall blocks (quantity based on wall area)
- Paver base or crushed stone for foundation
- Drainage gravel for behind the wall
- Landscape fabric to prevent soil migration
Step-by-Step Instructions
- 1. Before you even think about picking up a single block or ordering a mix, you need to dig the trench. Most people think they can just sit a wall on top of the grass and hope for the best, but that’s a recipe for a disaster. You need to dig down deep enough to account for a proper footing and a solid sub-base. If your ground is soft or clay-heavy, you’ll be digging deeper than you think to find something that won’t shift when the first heavy rain hits.
- 2. Once you’ve got your trench, stop looking at the dirt and start looking at your compaction. You can’t just throw some rubble in there and call it a day; you need to lay down several inches of MOT Type 1 and use a proper vibrating plate compactor. If you don’t compact that sub-base until it’s rock hard, the weight of the wall will eventually cause it to settle unevenly, and you’ll be looking at cracks before the first summer is out.
- 3. Now we get to the footing, which is the most important part of the whole job. You’re going to pour a concrete base that is wider than the wall itself to distribute the load. Make sure your mix is right—don’t let some lad on site start adding water to the drum just to make it easier to spread. You want a stiff, strong mix that can actually take the weight of the masonry sitting on top of it.
- 4. Once that footing is set, it’s time to start the actual wall, but you have to keep your levels dead straight. I’ve seen more walls than I care to count that look like a staircase because the bloke building it couldn’t be bothered with a spirit level every single course. Use a string line to keep your courses straight, and if you’re building a heavy stone wall, make sure you’re building it with a slight “batter”—meaning it leans back into the hill it’s holding up.
- 5. If you’re building a wall that’s holding back more than a few inches of soil, you cannot skip the drainage. This is where most amateurs fail. You need to install a perforated drainage pipe (a French drain) behind the wall, wrapped in geotextile fabric, and backfill the space behind the wall with clean, free-draining gravel. If you just pack dirt up against the back of that wall, the hydrostatic pressure will build up during a storm and eventually push your wall right over.
- 6. Finally, you need to think about the joints. Whether you’re using mortar for masonry or setting stones, the joints need to be consistent and fully filled. If you leave gaps or “honeycombs” in your concrete or mortar, water will get in, freeze, and expand, and that’s when the face of your wall starts to pop off. Treat your joints with respect, and they’ll hold the ground where it belongs for the next fifty years.
The Truth About Trench Excavation for Walls and Sub Base Integrity
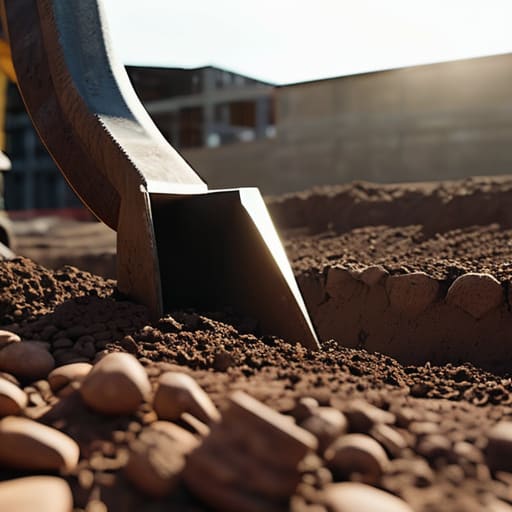
Listen, I’ve seen more walls buckle because of a shallow trench than I have because of bad stone. Everyone wants to talk about the fancy facing stones or the height of the wall, but if your trench excavation for walls is sloppy, you’re just building a future headache. You can’t just scrape a shallow line into the dirt and call it a day. You need to get down to firm, undisturbed ground. If you’re digging in soft clay or organic muck, you aren’t building a wall; you’re building a raft that’s going to float and tilt the moment the next heavy rain hits.
Once you’ve actually got the right depth, don’t go rushing the retaining wall base preparation. I’ve seen lads try to skip the compaction steps just to get the truck ordered early, and it never ends well. You need a solid, compacted foundation of MOT Type 1 or similar, layered up properly. If you don’t compact that sub-base until it’s rock solid, all the expensive masonry in the world won’t stop that wall from sinking into the earth. The ground is the boss here; treat it with respect or it’ll punish you.
Mastering Retaining Wall Base Preparation and Gravel Drainage Layer Install
Now, once you’ve got your trench dug out to the right depth, don’t just start throwing stones in. Most lads think they can skip the heavy lifting here, but proper retaining wall base preparation is what keeps that wall from bowing under the weight of the soil. You need a solid, compacted layer of MOT Type 1 underneath everything. If you just dump your decorative gravel straight onto soft earth, you’re basically building a wall on a sponge. I’ve seen enough cracked footings to know that if the base isn’t rock-solid and level, the rest of your materials list doesn’t matter one bit.
Once that base is set, you need to talk about water. Water is the enemy of every wall I’ve ever inspected. You need a proper gravel drainage layer installation behind the wall to give that trapped moisture somewhere to go. Don’t just throw in some random pebbles; use clean, angular stone that won’t settle or clog up. If you don’t provide a clear path for the water to exit through a weep hole or a perforated pipe, the hydrostatic pressure will build up behind that wall like a ticking time bomb. It’s not about the stones you see; it’s about the drainage no one looks at.
Five Ways to Ensure Your Wall Doesn't Become a Pile of Rubble
- Stop treating the weep holes like an afterthought. If you don’t get your drainage pipe and your gravel backfill sorted correctly behind that wall, the hydrostatic pressure will build up behind the masonry until the whole thing just gives up and pushes outward.
- Watch the mix like a hawk. I’ve seen too many lads on site asking the driver for an extra splash of water to make the concrete “workable” so they can spread it faster. You do that, you’re just inviting shrinkage cracks and a weak structure that’ll crumble in five years.
- Get your reinforcement right the first time. If you’re building a wall that’s actually holding back any real weight, you can’t just hope the mortar holds it. You need your steel in the right place, tied in properly, and deep enough in the footing to actually do its job.
- Don’t skimp on the compaction. I don’t care if you’re using a hand rammer or a little plate compactor; if that sub-base isn’t packed down solid in layers, the weight of the wall will settle it unevenly, and you’ll be looking at a diagonal crack before the first frost.
- Respect the curing time. You can’t rush concrete. If you’re working in the heat or a heavy wind, you’ve got to keep it moist and protected. If the water evaporates out of the mix too fast, you’ve lost your strength, and no amount of fancy finishing will fix a botched cure.
Don't Come Crying to Me When It Leans
Look, if you’ve followed what I’ve said about the trench, the compaction, and that drainage layer, you’re already ahead of ninety percent of the cowboys I see out on site. You can buy the most expensive stone facing or the fanciest decorative blocks in the catalogue, but if you’ve skimped on the sub-base or forgotten to pipe your weep holes, you’re just building a future disaster. A retaining wall isn’t about what people see when they walk past; it’s about the unseen work buried in the dirt. Keep your gravel clean, keep your compaction tight, and for heaven’s sake, don’t let anyone talk you into adding extra water to the mix just to make it “slump” easier.
At the end of the day, building something that lasts isn’t about being flashy; it’s about having the discipline to do the boring bits right. There is a massive amount of satisfaction in finishing a pour, walking away, and knowing that ten years from now, that wall is still going to be exactly where you put it. It won’t lean, it won’t crack, and it won’t be your problem anymore. Do the groundwork properly the first time, and you’ll never have to spend your weekend fixing someone else’s laziness. Now, get your gear ready and get to work.
Frequently Asked Questions
I’ve got a bit of a slope on the site; how deep do I actually need to dig my footing to stop the whole thing from sliding down the hill?
You’re asking the right question, but don’t expect a single number. If you’re on a slope, you aren’t just building a wall; you’re fighting gravity. You can’t just dig a shallow trench and hope for the best. You need to get down to firm, undisturbed ground, and you’ll likely need a stepped footing to follow the contour of the hill. If that footing isn’t deep enough to resist the lateral pressure, that whole mess is sliding.
If I’m using a standard mix, how much water am I allowed to add to the truck to make it easier to spread without ruining the strength?
Listen, I’ve seen more cracks than I care to count because someone thought they were being clever with a hose. If you’re asking me how much you can add, the answer is: as little as humanly possible. If you’re adding water to make it “easier to spread,” you’re not making it easier; you’re making it weaker. A standard mix is designed for a reason. If it’s too stiff, get a better vibrator or a bigger crew. Once you start watering down the slump, you’re just throwing money and strength down the drain.
How do I know if I've compacted the sub-base enough, or am I just guessing with the plate compactor?
If you’re guessing, you’ve already lost. You don’t just “feel” it; you look for the bounce. If you run that plate compactor over a section and the ground still feels springy or moves under the machine’s weight, it’s not done. I always used a heavy steel rod—drive it into the sub-base. If it sinks easy, you’re wasting your time. It should feel like driving a nail into hardwood. If it’s soft, dig it out and start again.