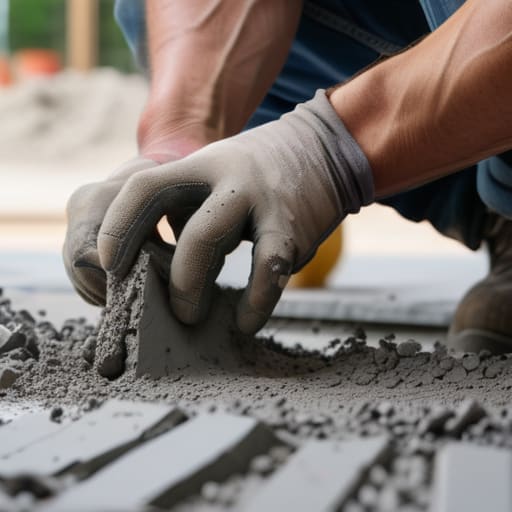
I’ve lost count of how many times I’ve stood on a driveway six months after a pour, watching a homeowner point at a jagged, ugly crack and ask me why the concrete failed. They think they bought bad mix or that the weather turned on them, but the truth is usually much simpler: they didn’t understand how to cut control joints properly. Most people think those lines are just for decoration, a bit of pattern to make the slab look tidy, but they’re actually the only thing standing between a smooth finish and a structural mess. If you don’t give that concrete a place to move, it’s going to find its own way out, and it won’t be pretty.
I’m not here to give you some textbook lecture or a list of fancy tools you don’t need. I’m going to show you the real way to do it—the way that keeps the cracks where they belong. We’ll talk about the exact timing, the depth you actually need to hit, and why waiting even an hour too long is a recipe for disaster. If you want to stop chasing cracks and start doing it right the first time, listen up.
Table of Contents
Guide Overview
Tools & Supplies
- Angle grinder with diamond blade or concrete saw for deep cuts
- Chalk line or string line for straight marking
- Hammer and masonry chisel for shallow relief cuts
- Water spray bottle for dust suppression
- Masking tape or painter's tape for clean edges
Step-by-Step Instructions
- 1. First thing you need to do is stop thinking about the saw and start thinking about your layout. You don’t just wander around a slab with a blade; you need a plan before the concrete even starts to stiffen. Use a chalk line to mark out your grid, and for heaven’s sake, make sure those lines are square. If your layout is off by even an inch, you’re going to end up with a slab that looks like a jigsaw puzzle gone wrong, and no amount of patching will hide that.
- 2. Now, you’ve got to decide if you’re sawing or tooling. If you’re using a wayward hand with a groover, you’d better be doing it while the concrete is still plastic enough to move, but not so wet that the tool drags the edges down and creates a mess. Personally, I’ve always preferred a diamond blade on a walk-behind saw, but you can’t wait until the next morning to do that. If the surface has already set, you’re not cutting a joint—you’re just fracturing the surface.
- 3. When you get that saw moving, you need to be precise about your depth. A common mistake I see—and it breaks my heart every time—is people cutting too shallow. You need to get in there at least one-quarter of the thickness of the slab. If you’ve got a four-inch slab and you only go in half an inch, that crack is going to find its own way through the middle of your panel instead of following your line.
- 4. Watch your speed and your water. If you’re using a wet saw, keep the flow steady to keep the dust down and the blade cool, but don’t let the water pool up and wash out the cement paste from the top of your joint. You want a clean, sharp edge in that cut. A ragged, messy joint is just an invitation for water to get underneath and start attacking your sub-base.
- 5. Don’t go chasing the clock like a madman. You need to time your cuts based on the set of the concrete and the temperature. If it’s a hot, windy day, that surface is going to shrink and pull faster than you can move. I’ve seen men lose entire sections of a driveway because they were too slow to get the saw out. You have to be ready to strike the moment the surface is hard enough to hold a line but soft enough to take a clean cut.
- 6. Once the cuts are in, clean them out. Don’t just leave a pile of slurry and grit sitting in the groove. Use compressed air or a bit of water and a brush to make sure those joints are clear and deep. If you’re planning on sealing them later with a joint filler, they won’t stick to a dirty crack, and you’ll be back here in two years asking me why the sealant has popped out.
Timing for Saw Cutting Concrete Why Waiting Too Long Is Fatal
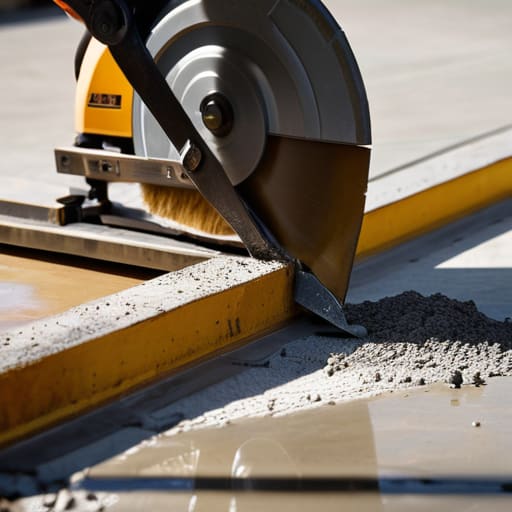
You can have the best diamond blade saw cutting equipment on the market, but if you miss your window, you’re just performing an autopsy. I’ve seen it a thousand times: a crew waits until the slab looks “solid enough” to start the saw, only to find the concrete has already decided where it wants to split. Once that internal tension builds up, you aren’t controlling the crack anymore—you’re just chasing it. If you aren’t watching the weather and the mix, you’ll find yourself preventing random cracking in concrete by the time you actually pull the trigger, and by then, it’s too late.
The golden rule I lived by for forty years is the concrete saw cutting depth ratio. You need to get down at least one-fourth of the slab’s thickness. If you’re pouring a four-inch slab, that saw better be hitting a full inch deep. If you’re shallow, the slab will just find a way to tear itself apart right next to your neat little line. It’s not about being pretty; it’s about giving that slab a predetermined path to follow before the heat and the shrinkage force its hand.
The Diamond Blade Saw Cutting Secret to Preventing Random Cracking in Concr
Now, listen to me: it doesn’t matter how well you’ve laid your lines if you’re using a blunt or cheap blade. I’ve seen lads try to save a few quid on a rental, only to end up with a ragged, feathered edge that looks like it was chewed by a dog. If you want to get serious about preventing random cracking in concrete, you need to understand that diamond blade saw cutting isn’t just about making a line; it’s about creating a clean, deep plane of weakness that the slab can follow. If that blade is worn or the wrong spec for the aggregate, it won’t bite—it’ll just skate across the surface, leaving a shallow scratch that does absolutely nothing when the slab starts to move.
You also need to keep a sharp eye on your concrete saw cutting depth ratio. A good rule of thumb I’ve lived by for forty years is that your joint needs to be at least one-quarter of the total slab thickness. If you’ve got a four-inch pour and you only cut a half-inch deep, you haven’t actually controlled anything; you’ve just given the crack a suggestion, and the concrete will ignore you every single time. Don’t be stingy with the depth. If you don’t cut deep enough, you’re just waiting for a diagonal crack to ruin your day.
Five Things I’ve Learned While Watching Slabs Tear Themselves Apart
- Don’t be a hero with the depth. You’re aiming for a quarter of the slab’s thickness—no more, no less. If you go too shallow, the crack will just find its own way around your cut, and if you go too deep, you’ve just cut a structural fault line that’ll snap under the first heavy load.
- Stop obsessing over the aesthetics and start looking at the math. Your joints need to be spaced no more than 24 to 30 times the thickness of the slab. If you’ve got a massive patio and you’re spacing those cuts like they’re decorative features, you’re asking for a spiderweb of random cracks that’ll haunt the homeowner for years.
- Check your weather before you even think about the saw. If it’s a scorcher and the slab is drying fast, you don’t have the luxury of a long lunch. You need to be on that slab the second the surface is hard enough to walk on, or the shrinkage will outrun your blade every single time.
- Watch the edges. I’ve seen too many lads leave a ragged, chipped edge because they were rushing to get the saw out of the way. A clean, sharp joint is what directs the stress; a messy, chipped joint is just a starting point for a fracture to wander off into the rest of the pour.
- Keep the water off the blade if you can help it. I know, everyone wants a smooth finish, but if you’re over-watering the cut to keep the dust down, you’re just softening the edges and messing with the local mix. Use a vacuum attachment or a proper dust suppression system that doesn’t turn your precision cut into a slurry mess.
Don't Leave It to Chance
Look, if you’ve followed what I’ve said here, you know that cutting control joints isn’t just a box to tick at the end of a long day. It’s about respect for the material. You’ve got to get the depth right—usually a quarter of the slab thickness—and you absolutely cannot afford to miss that window of opportunity. Whether you’re using a wayward hand saw or a proper walk-behind, the goal is the same: giving that concrete a predetermined place to go when it inevitably starts to move. If you skip the prep, use a blunt blade, or wait until the slab is already screaming for relief, you aren’t doing groundwork; you’re just managing a disaster that’s already happened.
At the end of the day, a slab that holds up for twenty years instead of two isn’t down to luck or the brand of cement you bought. It’s down to the man standing over it with a saw, knowing exactly when to strike. There’s a certain pride in walking away from a finished pour, looking back at those clean, straight lines, and knowing you did it right. Don’t be the lad who tries to save twenty minutes only to spend the next week explaining a spiderweb of cracks to an angry customer. Do it properly, do it once, and let the work speak for itself.
Frequently Asked Questions
How deep do I actually need to cut into the slab to make sure the crack stays where I want it?
Listen, if you’re just scratching the surface, you’re wasting your time and your blade. You need to get down at least a quarter of the slab’s thickness. If you’ve poured a four-inch slab, I want to see a full inch of depth. Anything less and that crack won’t follow your line; it’ll wander off into the middle of the patio because it didn’t find a weak enough path. Depth is everything.
If I’ve already missed the window and the slab is starting to spiderweb, is there any point in cutting joints now?
Look, if the slab is already spiderwebbing, you aren’t “controlling” cracks anymore—you’re just performing an autopsy. Once that concrete starts tearing itself apart, the damage is done. You can still cut joints to try and guide any future movement, but it’s a bit like putting a bandage on a broken leg. It won’t fix the cracks you’ve already got, but it might stop the whole mess from spreading further.
What’s the difference between using a hand tool for expansion joints and a power saw for control joints, and when am I allowed to use which?
Listen, don’t get them confused or you’ll be repairing cracks by next summer. A control joint is a planned weakness—you use a power saw to slice a clean, deep line into the slab so it knows exactly where to crack. An expansion joint is a physical gap, usually filled with soft material, to let the concrete breathe against a wall or driveway. Use the saw for the slab’s internal stress; use the hand tool for the edges.