I’ve spent forty-three years on sites, and if there’s one thing that makes my blood boil, it’s seeing a homeowner spend a fortune on “matching” bricks only to have the new patch look like a bright orange scab on an old wall. Most people think they can just walk into a merchant, point at a sample, and walk away, but that’s a fool’s errand. They focus entirely on the color of the brick and completely forget that the real secret to learning how to match existing brickwork lies in the mortar and the way the weather has aged the original face. I once saw a lad try to patch a garden wall with brand-new reclaimed stock, and within six months, the difference in texture was so jarring you could see it from the next street over.
In this guide, I’m going to cut through the nonsense and tell you what actually matters before you spend a penny. We aren’t just going to talk about picking a shade; I’m going to show you how to get your sand ratios and lime content exactly right so the joints actually blend in. We’ll cover how to read the old mortar, how to account for natural weathering, and why the way you lay the bond is just as important as the brick itself.
Table of Contents
Guide Overview
Tools & Supplies
- Mortar trowel for applying and shaping joints
- Brick hammer or chisel for shaping brick edges
- Soft brush for cleaning dust and debris
- Measuring tape for matching dimensions
- Matching bricks (quantity based on repair area)
- Mortar mix (sand and cement ratio to match existing)
- Brick pigment/dye for color matching
Step-by-Step Instructions
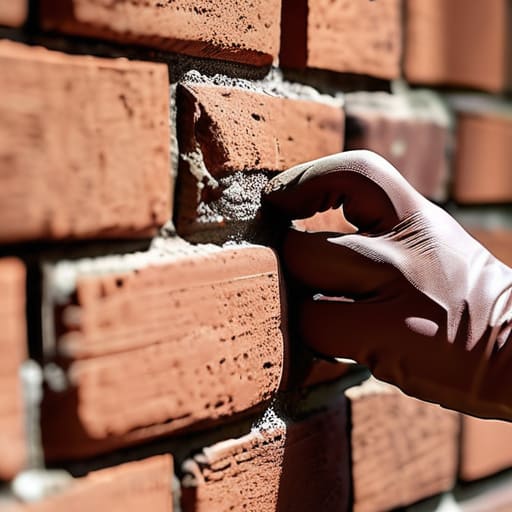
- 1. First thing you do—and I mean before you even think about picking up a trowel—is get down on your hands and knees and look at the mortar joints. Don’t just look at the color; look at the texture and the depth. Is it a flush joint, or is it raked back? If you try to slap a new patch on with a deep, recessed joint against an old, flat one, you’re going to look like an amateur. You need to match the profile of the existing joints or the whole thing will look like a patchwork quilt.
- 2. Next, you need to stop guessing about the sand. I’ve seen lads buy a bag of standard building sand and wonder why their new patch looks bright orange next to the old, weathered grey. You need to find out what kind of sand was used in the original mix. If the old mortar has a bit of grit or a specific grain to it, you’ll need to source a matching aggregate. Take a small piece of the old mortar, crush it up, and show it to your merchant. If you don’t get the sand right, no amount of coloring will save you.
- 3. Now, let’s talk about the lime content. Most modern cement is far too strong and “grey” compared to the softer, more porous lime mortars used in older houses. If you use a high-strength cement mix on old, soft bricks, the cement will actually crush the brick as the building settles. You have to match the strength of the mortar to the strength of the brick. If the brick is old and soft, use a weaker, more flexible mix. It’s better to have a mortar that fails than a brick that does.
- 4. Once you think you’ve got your mix, you have to test it on a scrap bit of brick first. Mix a small batch, apply it, and then leave it alone for at least 24 hours. Don’t just look at it while it’s wet; wet mortar always looks darker and more uniform than it actually is. You need to see how it looks once the moisture has left it and it has started to cure. If it’s too dark, you might need more sand; if it’s too light, you might need a bit of crushed brick dust or a specific pigment.
- 5. When you actually start laying, watch the weather like a hawk. If you’re working in direct, hot sunlight, the water is going to evaporate out of your new mortar before the chemical bond even happens, leaving you with a dusty, crumbly mess. Conversely, if it’s raining, you’ll wash the color right out of the joint. Find a window where the temperature is steady and the sun isn’t beating down on the wall, or you’ll be undoing your work before the sun goes down.
- 6. Finally, you have to master the “aging” process. New mortar is always going to look a bit too “clean” compared to a wall that’s been sitting in the wind and rain for twenty years. Once your patch is set, you can gently brush it with a stiff, dry brush to knock off the sharpness of the edges. Some fellas even use a bit of diluted lime wash or a very fine spray of water to help it settle into the surrounding texture, but don’t overdo it. You’re trying to blend in, not paint a picture.
The Secret Is in the Texture Assessment Not the Color
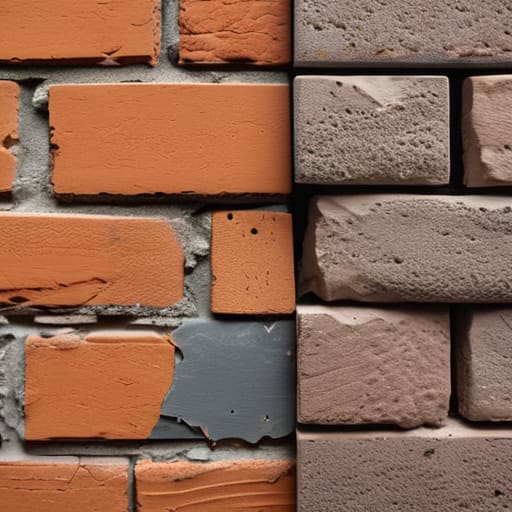
Listen, I’ve seen it a thousand times: some lad spends three weeks hunting down the perfect shade of red, only to slap it onto a wall and have it look like a bright new scab on an old wound. Why? Because he forgot that a brick isn’t just a color; it’s a surface. If your old wall has been battered by forty years of rain and wind, it’s going to have a certain weathered brick appearance that a brand-new, smooth-faced brick from a yard simply cannot mimic. You can match the pigment all day long, but if the new brick is too sharp and the old one is pitted and porous, you’ve already lost the battle.
That’s where a proper brick texture assessment comes in. You need to get your hands on the wall. Is it sand-faced? Is it quite rough, or does it have that smooth, pressed finish from the old days? If you’re looking at reclaimed brick sourcing to get the job done right, don’t just look at a photo. Look at how the light hits the grain. If the texture is off, the shadows will be off, and no amount of clever mortar mixing is going to hide that mistake.
Mastering Brick Mortar Color Matching and Weathered Appearance
Listen, you can spend all day staring at a sample brick in the sunlight, but that’s a rookie mistake. The moment you actually start laying, the light changes, the shadows shift, and suddenly your “perfect” match looks like a neon sign pointing at your mistake. When you’re working on brick mortar color matching, you have to account for the fact that old mortar isn’t just a single shade; it’s a cocktail of sand, lime, and decades of grime. I’ve seen lads try to use a standard off-the-shelf mix and wonder why the patch looks brand new. You need to test your mix on a scrap piece and let it dry completely before you even think about touching the wall.
If you’re dealing with a truly old building, you might find that no modern mix will ever quite hit the mark. That’s when you look into reclaimed brick sourcing or specialized sand blends to get that authentic, gritty feel. You aren’t just trying to match a color; you’re trying to mimic a weathered brick appearance that has survived forty winters. If the mortar is too smooth or too bright, it’ll look like a scab on a wound. Get the grit right, get the lime ratio right, and for heaven’s sake, don’t rush the drying.
Five Things Most Lads Forget When They Start Patching Up Old Walls
- Stop obsessing over the brick color and look at the mortar’s grit; if you use a fine, smooth sand on an old, weathered wall, your new patch will look like a plastic scab.
- Test your mix on a scrap piece and let it dry for a week before you touch the actual wall, because mortar looks one way when it’s wet and another entirely once the moisture leaves it.
- Check the joint depth of the existing work, because if you’re trying to match a recessed weathered joint with a flush, modern finish, you’ve already lost the battle.
- Don’t go buying a pre-mixed bag of cement and calling it a day; you’ll need to play with the sand ratios and maybe a bit of lime to get that old, soft consistency right.
- Watch the weather like a hawk, because if you try to match a lime-based mortar on a day that’s too hot or too windy, it’ll dry out too fast and crack before it’s even had a chance to set properly.
Don't Leave It to Chance
At the end of the day, matching brickwork isn’t about finding a brick that looks “close enough” in the shop window. It’s about the work you do before the trowel even touches the joint. You’ve got to respect the texture, get your sand ratios dialed in, and understand that the moisture in your mortar is going to change the color the moment it sets. If you ignore the way the old mortar has weathered or try to cheat the mix to save a few quid on materials, you’re just building a scar on that wall. Remember, a successful patch is one where the transition is invisible because you took the time to respect the original build.
I’ve seen too many lads rush a job just to get off site, only to have the customer calling me six months later because their “match” looks like a patchwork quilt. It’s frustrating to watch, but it’s avoidable. If you take pride in the details—the grit of the sand, the depth of the joint, and the patience to let the weather dictate your pace—the result will stand the test of time. Do it right the first time, and you won’t just be fixing a wall; you’ll be preserving the integrity of the whole structure. That’s the difference between a handyman and a craftsman.
Frequently Asked Questions
If I match the mortar color perfectly but the new bricks are a different density, will the patch still crack or look weird once the frost hits?
You’ve hit the nail on the head, and it’s exactly what I’ve seen ruin a perfectly matched color. If you put soft, reclaimed bricks next to a dense, modern engineering brick, you’re asking for trouble. The hard ones won’t budge, but the soft ones will soak up moisture like a sponge. When the frost hits, that expansion will snap your mortar joints or spall the brick faces right off. Match the density, or you’re just building a future crack.
How do I know if the original mortar is lime-based or cement-based without a lab test, and why does it matter so much for the repair?
You don’t need a lab; you just need a small chisel and a bit of common sense. Scratch a bit of the old stuff out. If it crumbles like chalk or feels soft, it’s lime. If it’s rock hard and won’t budge, it’s cement. It matters because if you slap hard cement over old, soft lime, the bricks will crack because the mortar is now stronger than the wall itself. You’ve gotta let the building breathe.
Is it better to use a pre-mixed mortar from a bag, or am I better off mixing my own sand and cement to get the grit and texture right?
If you’re looking for a perfect match, stay away from those pre-mixed bags. They’re fine for a quick patch on a garden wall, but they’re too consistent—too “perfect”—to blend with forty-year-old masonry. You need to mix your own. Grab a few different types of sand; you’ll need that grit and varying grain size to get the texture right. Control the mix yourself, or you’ll end up with a seam that screams for attention.