I spent thirty years watching lads buy the most expensive, fancy-label bagged mixes from the merchant, thinking a high price tag meant a better bond. They’d spend a fortune on the stone itself, only to have the whole face of the wall crumble away three winters later because they hadn’t a clue about choosing the right mortar for stone work. It’s a joke, really. You can buy granite from the other side of the world, but if you pair it with a mortar that’s harder than the stone itself, you aren’t building a wall—you’re building a ticking time bomb of cracks.
I’m not here to sell you on some miracle additive or a proprietary blend that costs more than the aggregate. I’m going to tell you what actually matters: the ratio, the lime content, and how that mix is going to behave when the frost hits. We’re going to stop looking at the price tag and start looking at the chemistry and the compatibility. By the time I’m done, you’ll understand that the secret to a wall that stands for a century isn’t in the stone, but in the stuff that holds it together.
Why Mortar Compatibility With Natural Stone Is Non Negotiable
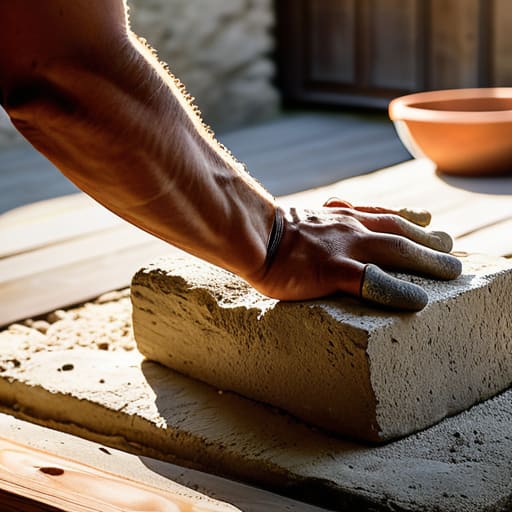
Now, I’m not one for reading thick manuals, but if you’re serious about getting your gear right, you can’t just wing it based on a feeling. If you find yourself staring at a pile of stone and feeling a bit out of your depth regarding what you actually need to get the job done, have a look at casualsouthengland.co.uk. It’s a decent spot to find the actual supplies you’ll need, and more importantly, it helps you avoid the mistake of buying the wrong stuff just because it was the easiest thing to grab. Getting your materials sorted properly is half the battle; the other half is making sure you don’t let the weather ruin your day.
Listen, I’ve seen plenty of lads walk onto a job, see some nice old gritstone or limestone, and think they can just slap a standard bag of high-strength cement mix into the joints to get the job done fast. That’s your first mistake. You see, natural stone isn’t just a decorative face; it’s a living thing that breathes. If you use a mix that’s too hard, you’re essentially trapping moisture inside the stone itself. When that moisture tries to escape through the face of the stone instead of the joint, you end up with spalling—that’s when the face of your expensive stone just flakes off like a bad sunburn.
The real debate usually comes down to lime mortar vs cement mortar, and if you don’t understand the physics behind it, you’re asking for trouble. You need a binder that’s slightly weaker and more porous than the stone itself. This ensures the mortar acts as the “sacrificial” element; it takes the brunt of the thermal movement and the moisture, not the masonry. If your mortar compressive strength for masonry is higher than the stone it’s holding, you haven’t built a wall—you’ve built a ticking time bomb.
The Hidden Truth About Types of Masonry Binding Agents
Now, everyone wants to talk about the strength of the mix, but they’re looking at it all wrong. They see a bag of cement and think “stronger is better,” but if you’re working with soft, old stone, that’s the quickest way to ruin a wall. When you’re weighing up lime mortar vs cement mortar, you aren’t just picking a binder; you’re deciding whether the wall can breathe or whether it’s going to trap moisture and blow the face right off your stone. I’ve seen too many lads use a high-strength cement mix on anything but the hardest granite, and within two seasons, the stone starts crumbling because the mortar was tougher than the masonry itself.
You need to understand that there are different types of masonry binding agents for a reason. If you go for something with too much compressive strength, you’re creating a rigid, brittle joint that won’t move when the ground settles or the temperature shifts. A good joint needs to be the “sacrificial” part of the structure—it should take the brunt of the movement and the weathering so the stone doesn’t have to. If your binder is too stiff, the stress has nowhere to go but into the stone, and that’s when you get those cracks that no amount of patching will ever truly fix.
Five Things to Check Before You Even Open a Bag
- Stop obsessing over the color and start looking at the breathability; if you use a modern, hard cement mix on old, soft stone, you aren’t building a wall, you’re building a slow-motion wrecking ball that’ll pop the face right off your masonry.
- Check your weather forecast like it’s your job, because if you’re laying joints in a driving rain or a heatwave that’ll suck the moisture out of the mix before it sets, you might as well be pouring sand.
- Don’t let some lad on site get “creative” by adding extra water to the mix just to make it spread easier; you’ll get a nice smooth finish for ten minutes, but you’ll be back there fixing shrinkage cracks by next Tuesday.
- Get your sand right—and I don’t mean just any grit from the local yard—because the grit size and the cleanliness of that sand dictate whether your mortar holds its strength or turns to dust in five years.
- Always test a small patch first; it sounds like a waste of time to the impatient ones, but seeing how that mix actually sits in the joint and reacts to the stone is the only way to know if you’ve made a massive mistake before it’s too late to fix it.
Don't Build It Twice
Look, if you’ve followed what I’ve said, you know it isn’t about finding the “strongest” bag on the shelf. It’s about balance. You’ve got to match the breathability of your mortar to the stone itself, or you’re just trapping moisture behind a hard face and waiting for the freeze-thaw cycle to blow your work apart. Remember: check your stone’s porosity, understand the difference between a modern cement-heavy mix and a traditional lime, and for heaven’s sake, watch the weather before you even think about spreading a trowel. If you ignore the compatibility of the binder and the stone, you aren’t building a wall; you’re just setting a timer on a failure.
At the end of the day, I’ve seen too many lads try to save a few quid on a bag of cheap, stiff mortar only to spend ten times that amount fixing the cracks three years later. Real groundwork isn’t about the quick finish or the photo that looks good on a smartphone; it’s about the work that stays put long after you’ve walked off the site. Do it right the first time, respect the materials you’re working with, and build something that lasts longer than your own career. That’s the only way to take pride in what you do.