
I remember standing on a driveway in Surrey three years ago, watching a lad try to level off a set of new concrete steps while the ground beneath them was still soft as sponge. He was so proud of that smooth, grey finish, but I could see it in his eyes—he hadn’t even bothered to check the compaction of the sub-base. I told him then, and I’ll tell you now: if you’re looking for a complete guide to outdoor steps that only talks about how pretty the finish looks, you’re looking in the wrong place. Most people think the “step” part starts when the mixer arrives, but if your foundation is rubbish, those steps are going to shift and crack before you’ve even had a chance to sweep the dust off them.
I’m not here to sell you on fancy trowels or expensive decorative aggregates. What I’m going to give you is the honest, gritty truth about what actually holds weight. We’re going to go through the proper way to prep your ground, how to manage your mix so it doesn’t go brittle, and why the way you cure it matters more than the day you pour. This is the real, no-nonsense sequence you need to follow if you want steps that actually stay put.
Table of Contents
Guide Overview
Tools & Supplies
- Tape measure and pencil for marking dimensions
- Level to ensure even surfaces
- Circular saw or hand saw for cutting lumber
- Power drill for securing fasteners
- Shovel for ground leveling and excavation
- Pressure-treated lumber (steps and stringers)
- Concrete deck blocks or gravel for base
- Galvanized screws or exterior-grade nails
- Landscape fabric to prevent weed growth
Step-by-Step Instructions
- 1. First thing you do—and I mean before you even look at a bag of cement—is dig out the ground. You aren’t just making a hole; you are creating a foundation. If you try to build steps on top of soft topsoil or uncompacted dirt, you might as well be building on sponge. You need to excavate down until you hit something solid, then bring in your MOT Type 1 or whatever sub-base material the spec calls for. Once it’s in, you use a plate compactor and you don’t stop until that sub-base is rock solid. If you can’t walk on it without leaving a footprint, it isn’t ready for the concrete.
- 2. Next, you’ve got to get your formwork in place. This is where most lads get lazy and use flimsy timber that bows the moment the heavy stuff hits it. Use straight, sturdy boards and drive your stakes in deep—deep enough to hold the weight of a full pour. If your forms aren’t level and braced, your steps will look like a staircase in a funhouse mirror, and no amount of grinding will fix that once it’s set.
- 3. Now, you lay your reinforcement. I don’t care how small the steps are; don’t skip the steel. You want a proper mesh or rebar cage in there to handle the tension. But here is the part everyone forgets: you have to use spacers to keep that steel sitting in the middle of the pour. If the steel ends up sitting on the bottom of the formwork, it’s doing absolutely nothing for the strength of the step, and you’ve just wasted your money.
- 4. When the truck arrives, watch the mix like a hawk. If the driver says it’s a bit stiff and asks if you want to add a splash of water to make it “workable,” you tell him no. I’ve seen more cracks in steps than I can count because some lad thought adding water would make it easier to spread. Adding water kills the water-to-cement ratio and weakens the entire structure. You want a mix that’s consistent, not a soup that’s easy to pour.
- 5. Once you’re pouring, you need to consolidate the concrete. Use a poker vibrator or, if you’re working small, a piece of rod to work the air bubbles out of the corners and edges. You want the concrete to hug those forms tight. If you leave air pockets (we call them “honeycombing”), you’re leaving weak points where water can get in, freeze, and eventually pop the concrete apart.
- 6. As soon as you’ve leveled the top and finished the surface, you need to think about the cure. This is the part everyone skips because they want to go to the pub. If the sun is beating down or it’s a windy day, that moisture is going to evaporate too fast and you’ll get surface cracking. Cover them with polythene or use a curing compound to lock that moisture in. You want those steps to hydrate, not just dry out.
- 7. Finally, plan your joints. Even with perfect concrete, it’s going to move. If you’re building a long run of steps, you need to decide where those movement joints are going to live. If you don’t give the concrete a place to expand and contract, it will choose its own path—and that path will be a jagged crack right through the middle of your beautiful new work.
Calculating Stair Rise and Run the Math They Skip
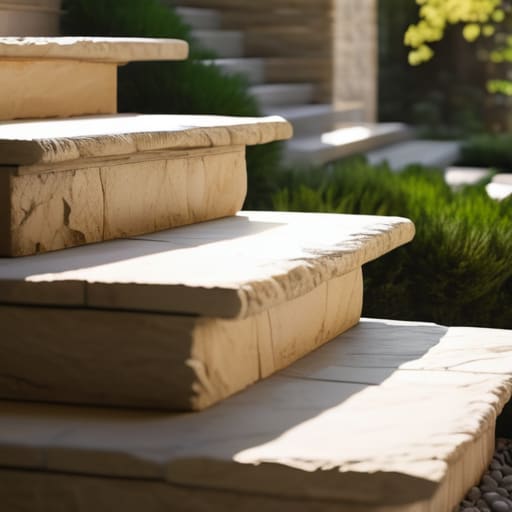
Look, you can buy the most expensive granite slabs on the market, but if your math is off, you’ve just built a trip hazard that’ll cost you a fortune to fix later. People get so caught up in the outdoor step materials comparison—arguing over slate versus sandstone—that they completely forget the geometry. When you’re calculating stair rise and run, you aren’t just playing with numbers; you’re setting the rhythm for how a person walks. If one step is a fraction of an inch higher than the rest, the human brain won’t catch it until someone’s ankle is twisting on the edge.
I’ve seen plenty of lads try to “eye it” on a landscape step installation, thinking they can just shave a bit off the last tread to make it fit. That’s a mistake. You need to measure your total rise first, then divide it so every single step is identical. Aim for a consistent rise—usually between 150mm and 180mm—and make sure your tread depth gives a person a solid footing. If you don’t get the staircase dimensions and safety sorted on paper before the first shovel hits the dirt, you’re just asking for trouble.
Landscape Step Installation It Is All in the Sub Base
Listen, you can spend a fortune on the finest granite or high-end limestone, but if you’re laying those steps on a bed of loose soil or poorly compacted rubble, you’re just building a future headache. I’ve seen beautiful stone treads shift and tilt within a single season because someone thought they could skip the heavy lifting. Proper landscape step installation starts with a trench that’s dug deep enough to accommodate a solid, compacted sub-base of MOT Type 1 or crushed stone. You need to run that plate compactor over it until it’s rock solid; if you can still leave a thumbprint in the ground, it’s not ready for the weight.
Once you’ve got your foundation stabilized, don’t go rushing the bedding layer. Whether you’re using a sand-and-cement mix or a specialized mortar, it needs to be consistent to ensure there are no hollow spots underneath your treads. If you leave a void, the first heavy frost will expand that gap and heave your steps right out of alignment. I always tell people: the strength of your step is determined by what you can’t see once the job is finished. Focus on the ground, and the rest will hold.
Five Ways You’ll Mess Up Your Steps (And How to Stop It)
- Stop obsessing over the finish and check your compaction. I’ve seen lads spend three hours screeding a perfect surface only for the whole thing to tilt six months later because they didn’t use a plate compactor on the sub-base until it felt like solid rock. If the ground moves, the concrete follows.
- Watch the water like a hawk. I know the lads on the pour will want to splash a bit of extra water into the mixer to make it “flow better” or easier to spread, but all they’re doing is washing out the strength. You’re basically turning your expensive concrete into expensive mud. Stick to the specified mix and leave it be.
- Don’t skip the expansion joints just because you’re in a hurry to get home. If you don’t plan where those steps are going to move when the temperature drops, the ground will decide for you—and it’ll be a jagged, ugly crack right through the middle of your tread.
- Mind the weather, not just the forecast. If you’re pouring when it’s baking hot, you’ve got to cure it properly, or it’ll dry too fast and shrink like a dried raisin. If it’s freezing, you’re in trouble before you even start. A little bit of polythene or a spray to keep it damp isn’t “extra work,” it’s doing the job right.
- Get your reinforcement right the first time. Don’t just toss some mesh into the wet stuff and hope it stays put. If that steel isn’t sitting in the middle of the slab, properly supported by spacers, it’s just sitting there doing nothing while the concrete cracks around it. It needs to be part of the structure, not just decoration.
Don't Blame the Concrete When It Fails
At the end of the day, if those steps start shifting or cracking in two years’ time, don’t you dare go blaming the mix or the supplier. You’ll know exactly why it happened: you either botched the math on your rise and run, or you got lazy with the compaction. You can buy the most expensive stone or the highest grade of concrete on the market, but if your sub-base isn’t rock solid and your joints aren’t placed where the ground actually moves, you’re just pouring money into a future headache. It’s the stuff you can’t see—the layers of MOT Type 1, the moisture levels, and the proper curing—that actually determines whether those steps stay level or become a tripping hazard.
Building something that lasts isn’t about making it look pretty for the neighbors while the wet mix is still sitting there; it’s about the discipline of the preparation. I’ve spent forty-three years watching people try to cut corners to save a few hours, and I’ve seen those same shortcuts come back to haunt them every single time. Do the work right the first time, respect the physics of the ground, and build it to stay put. There is a quiet sort of pride in walking up a set of steps ten years later and seeing that they haven’t moved a fraction of an inch.
Frequently Asked Questions
If I'm pouring these steps on a slope, how much extra reinforcement do I need to stop the whole thing from sliding down the hill in five years?
You aren’t just pouring steps; you’re building a retaining structure. If you don’t anchor that mass into the slope, gravity will win every time. Forget just throwing a bit of mesh in the mix. You need heavy-duty rebar, and you need it driven deep into the undisturbed ground behind the steps using starter bars or “pins.” If that reinforcement isn’t tied into the hillside itself, your steps aren’t going anywhere but down.
I've heard people say you can just use a standard mix for everything, but what's the actual difference between a standard pour and something meant for heavy foot traffic?
Look, if you’re just walking to the back door once a day, a standard mix is fine. But if you’ve got kids running, dogs skidding, or a heavy delivery trolley coming up those steps, you need to step up your strength. I’m talking about the aggregate and the cement ratio. A standard mix is thin; it’ll surface-crack under constant vibration and weight. For heavy traffic, you want a denser mix that won’t crumble under the pressure.
Once the concrete is down and leveled, how long am I actually going to be looking at a "wet" site before I can even think about putting any weight on it?
Look, if you’re asking when you can walk on it, you’re already thinking too fast. You can usually walk on it after 24 to 48 hours, but don’t you dare go putting any heavy tools or loads on those steps for at least seven days. Ideally, you wait 28 days before you put real stress on it. If you rush the curing or start loading it up early, you’re just inviting cracks to show up by next season.



