
I’ve lost count of how many times I’ve stood on a job site, watching a lad pour expensive, high-spec concrete into a trench, only to see the whole thing start to list two years later. People go looking for a complete guide to retaining walls thinking they need to learn about the fancy blockwork or the latest decorative veneers, but they’ve got it all backwards. They spend a fortune on the stuff you can see, while completely ignoring the one thing that actually keeps the wall standing: the ground underneath it. If you don’t get the drainage and the sub-base right, you aren’t building a wall; you’re just building a very expensive pile of rubble that’s waiting for the first heavy rain to move it.
I’m not here to sell you on some glossy, theoretical manual that looks good in a magazine but fails in a muddy trench. I’m going to give you the truth, straight from forty-three years of pouring foundations and fixing other people’s mistakes. This is my no-nonsense approach to the job, focusing on the grit, the compaction, and the hydrostatic pressure that actually causes failures. I’ll show you how to do it right the first time, so you aren’t calling me in five years to ask why your garden is sliding into the neighbor’s yard.
Table of Contents
Gravity vs Cantilever Walls Choosing the Right Skeleton
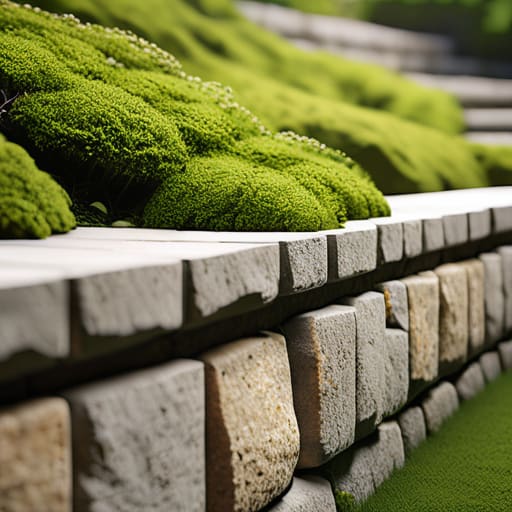
Now, before you start picking out fancy stone or ordering your mix, you need to decide what’s actually doing the heavy lifting. I’ve seen too many lads try to build a massive gravity wall when a cantilever would have done the job better, and vice versa. A gravity wall is straightforward—it uses its own sheer weight to hold back the earth. Think of a thick, heavy block of masonry or a massive concrete pour; it’s simple, but it’s hungry for space and material. If you’ve got the room and the budget for the bulk, it’ll hold, but don’t mistake “heavy” for “smart.”
On the other hand, you’ve got cantilever walls, which are a bit more clever. These rely on the weight of the soil sitting on the “heel” of the footing to keep the whole structure from tipping. It’s a matter of soil pressure management and understanding how that lever works. If you get the geometry wrong, or if you don’t account for retaining wall hydrostatic pressure building up behind it, that cantilever is going to snap or tilt like a broken tooth. It’s more efficient, but it leaves zero room for guesswork.
Soil Pressure Management the Force Nobody Respects
Listen, you can pick the most expensive stone or the thickest concrete slab in the catalog, but it won’t mean a damn thing if you don’t respect the weight of the earth behind it. Most lads look at a slope and see a garden; I see a massive, slow-motion pile of weight constantly trying to push your wall over. This is where soil pressure management becomes the difference between a permanent structure and a heap of rubble in your flowerbed. It’s not just the weight of the dirt, either—it’s the way that dirt behaves when it gets soaked.
If you think you can just throw some clay-heavy soil against a new wall and call it a day, you’re asking for a disaster. When rain hits that soil, it turns into a heavy, liquid mess that exerts massive retaining wall hydrostatic pressure against your face. That’s why I always tell people: if you haven’t invested in proper backfill gravel importance, you’ve already lost the battle. You need that clean, free-draining stone behind the wall to give the water a way out. If the water can’t get through the gravel, it’ll build up until it finds the weakest point in your masonry—and usually, that’s right in the middle of your beautiful new build.
Five Things That’ll Save Your Wall (And Your Reputation)
- Stop obsessing over the facing stones and look at the sub-base; if you haven’t compacted your hardcore until it’s rock-solid, that wall is just a very expensive pile of rubble waiting to shift.
- Drainage isn’t an optional extra you add when you have a bit of budget left over—it’s the lifeblood of the wall, and if you don’t get your weep holes and your geotextile fabric right, hydrostatic pressure will crack your work like a biscuit.
- Watch the weather like a hawk before you call the truck; pouring in a downpour or in the middle of a heatwave without a curing plan is a shortcut to a surface that’ll flake and peel before the month is out.
- Never, and I mean never, let a driver add water to the mix on-site just because they’re complaining about the slump; you’re trading long-term strength for ten minutes of easy spreading, and you’ll be the one getting the phone call when it fails.
- Get your backfill material sorted before you even think about the first course; if you’re filling behind that wall with site muck and clay instead of clean, free-draining aggregate, you’re basically building a dam, not a retaining wall.
The Bottom Line
Look, I’ve seen enough leaning walls and blown-out footings to know that you can’t cheat physics. You’ve gone through the choice between gravity and cantilever, and you hopefully understand that the soil behind that wall isn’t just dirt—it’s a living, moving weight that wants to push your hard work into the next postcode. If you get the skeleton wrong, or if you treat drainage like an afterthought, you aren’t building a wall; you’re just building a future headache. Remember, the most expensive part of a retaining wall isn’t the concrete or the stone you buy today; it’s the cost of fixing a failure because someone decided to skip the sub-base preparation or ignore the hydrostatic pressure.
At the end of the day, a proper retaining wall is something you build once so you can forget it exists. There is a quiet satisfaction in walking past a job you finished years ago, seeing the lines are still straight and the joints haven’t buckled, knowing you did it right from the ground up. Don’t be the bloke who tries to save a few quid on aggregate or drainage fabric only to be calling me in three years to ask why the wall is bowing. Do the heavy lifting now, respect the ground, and you’ll have a structure that stands long after the people who hired you have moved on.
Frequently Asked Questions
How do I know if my soil is actually stable enough to support the weight, or am I just guessing?
If you’re guessing, you’ve already lost. You don’t just look at the dirt; you look at how it behaves. Dig a test pit. If you hit soft, spongy clay or organic muck that squelches under a boot, your wall is going to move, no matter how much rebar you throw at it. If the soil doesn’t hold a clean, vertical edge when you dig, it’s not stable. You need compaction tests, not guesswork.
What’s the real way to handle drainage behind the wall so the hydrostatic pressure doesn't blow the whole thing out in two years?
Listen, if you think a bit of gravel and a weep hole is enough, you’re building a ticking time bomb. You need a dedicated drainage layer—clean, crushed stone—running full height behind that wall, paired with a perforated pipe that actually leads somewhere. And for heaven’s sake, wrap that pipe in geotextile fabric. If you let fines migrate into your stone, you’ve just built a dam, and that hydrostatic pressure will snap your wall like a biscuit.
When do I stop worrying about the type of block I'm using and start worrying about the compaction of the hardcore underneath?
You stop worrying about the block the second you pick one that meets the spec. Once that’s decided, your brain should be entirely on the hardcore. If you’re standing there admiring the clean edges of a new block while your sub-base is still springy under your boots, you’ve already lost. I’ve seen top-tier masonry split wide open because the ground underneath decided to settle. Get the compaction right first, or the blocks don’t matter.



