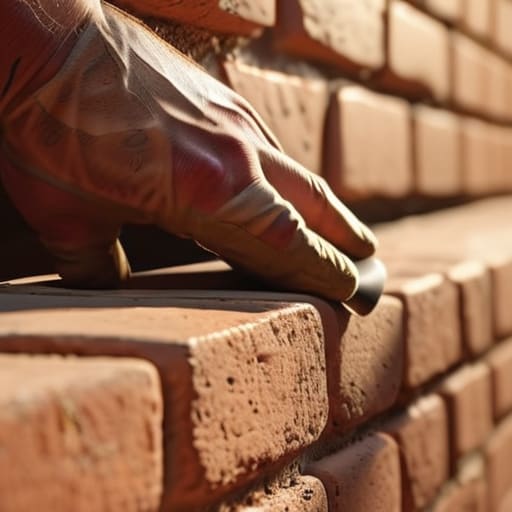
I was standing on a driveway in Surrey last Tuesday, looking at a wall that had been “repointed” just eighteen months ago. The new mortar was already bulging out like a bad blister, ready to pop and fall onto the patio. Most people think a complete guide to repointing is all about picking the right colour of mortar or finding a fancy pointing tool, but they’ve got it backwards. If you haven’t spent the time properly raking out the old, crumbly junk and checking if the bricks themselves are actually stable, you aren’t repairing anything; you’re just painting over a disaster.
I’ve spent forty-three years watching men make the same mistakes, and I’m tired of seeing good masonry ruined by people looking for the easy way out. In this complete guide to repointing, I’m going to strip away the nonsense and tell you how it’s actually done on a proper site. We’ll talk about the grit, the depth of the joint, and why the mix ratio matters more than the brand name on the bag. I’m not here to give you a glossy brochure; I’m here to make sure you do the job once, do it right, and don’t have to touch it again for another fifty years.
Table of Contents
Guide Overview
Tools & Supplies
- Hammer and bolster chisel for removing old mortar
- Stiff wire brush for cleaning joints
- Jointing tool or trowel for shaping mortar
- Small bucket for mixing
- Mortar mix (lime-based or cement-based depending on brick type) 1-2 bags
- Water for mixing and cleaning
- Protective gloves and eye protection 1 pair each
Step-by-Step Instructions
- 1. Before you even think about touching a trowel, you need to get in there and rake out the old stuff. Don’t just skim the surface; you need to go at least twice as deep as the width of the joint. I’ve seen lads try to patch over loose, crumbling mortar, and all they’ve done is create a ticking time bomb that’ll pop out the first time the frost hits. Use a hammer and a bolster or a proper pointing tool, and be careful not to hack at the edges of the bricks themselves. If you damage the brick face while trying to clean the joint, you’ve just turned a simple repair into a much more expensive problem.
- 2. Once the gaps are clear, you have to deal with the dust. This is where most people get lazy, and it’s where they fail. You need to thoroughly clean the joints using a stiff brush or even a bit of compressed air if you’ve got it. If there’s fine grit or loose debris left sitting in that gap, your new mortar won’t actually bond to the masonry; it’ll just be sitting on top of a layer of dust. I always tell my apprentices: if you can’t see the actual edges of the brick clearly, it isn’t clean enough to start pouring.
- 3. Now, pay attention to the moisture. You cannot just shove dry mortar into a bone-dry joint and expect it to stick. You need to dampen the substrate beforehand. Use a spray bottle or a fine mist to soak those joints so they’re damp but not dripping wet. If the brick is thirsty and bone-dry, it’ll suck the moisture right out of your new mix before it has a chance to set properly. That’s how you end up with brittle, sandy mortar that crumbles under your fingernail a week later.
- 4. Mix your mortar to the right consistency, and for heaven’s sake, use the right ratio. If you’re working on an old lime-mortar building, don’t go coming in there with a high-strength cement mix thinking you’re being “tougher.” You’ll end up cracking the bricks because the mortar is harder than the masonry itself. You want a mix that’s “earthy”—it should hold its shape on a trowel without running off, but it shouldn’t be so stiff that you’re fighting it every inch of the way.
- 5. When you start filling the joints, don’t just smear it on. You need to pack it in tight. Work the mortar into the back of the joint using a pointing tool, building it up in layers if the gap is deep. You’re looking for density, not just coverage. If you just slap a thin layer across the front, you’ll have a hollow void behind it that’ll collect water, freeze, and blow the whole lot out by next winter.
- 6. Once the mortar has started to firm up—and I mean “firm,” not “rock hard”—it’s time to finish it. This is where the aesthetics come in, but more importantly, where you seal the deal. Use a stiff brush or a specialized tool to compact the surface and match the profile of the original pointing. You want to make sure the joint is tight and the finish is flush. If you leave it too wet, you’ll smear it all over the brickwork and make a mess; if you wait too long, you won’t get that properly compressed finish that keeps the weather out.
Lime Mortar vs Cement Choosing the Soul of Your Wall
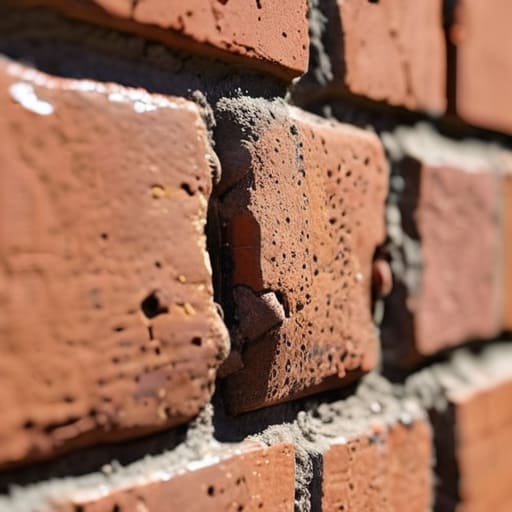
Now, here is where most people get it wrong and end up calling me to look at a crumbling wall three years later. You’ll see lads on sites today reaching for a bag of ready-mix cement because it’s cheap and hard, but if you’re working on anything older than a bungalow, you need to understand lime mortar vs cement. Cement is a bastard; it’s too hard and it doesn’t breathe. When the moisture tries to escape through the brick, it hits that cement plug and has nowhere to go, so it pushes through the brick itself. You’ll end up blowing the faces off your masonry, and once that happens, you aren’t just repointing—you’re replacing the whole wall.
If you want to do it right, you use lime. It’s more temperamental, sure, but it allows the structure to move and breathe. This is the real secret to preventing damp through repointing in older properties. Don’t just look at the surface; you have to match the strength of the mortar to the strength of the brick. If your mortar is harder than your bricks, you’ve already lost the battle before you’ve even picked up your trowel.
Repointing Depth Requirements the Hidden Layer That Saves Masonry
Listen, I’ve seen more “repairs” go wrong because of shallow digging than I have actual bad mortar mixes. People get lazy; they see a crack, they scrape out a tiny bit of grit, and they slap a thin bead of new material on top. That isn’t repointing; that’s just painting over a wound. If you aren’t hitting the proper repointing depth requirements, you’re asking for trouble. You need to get in there at least 15mm to 25mm deep, or at the very least, deep enough to reach a solid, undisturbed bed of old mortar. If you just skim the surface, the new stuff won’t have anything to bite into, and it’ll pop right out the first time the frost hits.
You have to treat the joint like a structural component, not a cosmetic one. When you’re going through the tuckpointing process steps, remember that the goal is to restore the bond, not just hide the gap. If you leave a hollow space behind that new mortar, you’re creating a pocket for water to sit in. That’s how you end up with blown faces and crumbling bricks. Dig deep, clean it out thoroughly, and don’t stop until you’ve reached the good stuff.
Five Ways You’ll Mess Up Your Repointing (And How to Avoid It)
- Stop treating the old mortar like a nuisance to be blasted out. If you’re too aggressive with the grinder or the hammer, you’ll nick the edges of the bricks themselves. Once you damage that face, you’ve lost the battle; the moisture will get in, the frost will hit, and you’ll be looking at spalling masonry that no amount of new mortar can fix.
- Don’t go thinking a dry wall is a clean wall. If you just slap fresh mortar onto a bone-dry substrate, that old brick is going to suck the moisture right out of your new mix before it’s even had a chance to set. You need to dampen those joints down first—not soaking them into a puddle, just enough so the brick isn’t thirsty.
- Watch your weather, for heaven’s sake. I’ve seen lads start a job on a Friday afternoon when the clouds are looking heavy, thinking they can finish by tea time. If that new mortar gets washed out by a downpour or, worse, freezes before it’s cured, you’ve just poured money down the drain. If the forecast looks dodgy, leave it until Monday.
- Check your mix consistency before it hits the joint. I don’t care what the bag says; you need to feel it. If it’s too runny, it’ll shrink and pull away from the edges, leaving you with hairline cracks before the day is out. It should be like stiff peanut butter—it needs to stay where you put it.
- Don’t neglect the “pointing off.” Once you’ve filled the joint, you can’t just leave it looking like a mess. You need to tool it properly while it’s still “green” to compact the mortar and create a weather-tight seal. If you leave it too wet or too dry, you won’t get that tight, professional finish that actually keeps the damp out.
Don't Rush the Finish
Look, if you’ve followed what I’ve said here, you already know that repointing isn’t just about making a wall look pretty for the neighbors. It’s about the grit underneath. You’ve learned that picking the right mortar—whether it’s the breathability of lime or the strength of cement—is the difference between a wall that lasts decades and one that starts shedding skin in two years. You’ve seen why you can’t just skim the surface; if you don’t get that depth right and clear out the old, crumbly rubbish first, you’re just painting over a disaster. Remember, the prep work is the heavy lifting, and the mix is the soul of the job. If you skip the substrate or get lazy with the depth, you’re just setting yourself up for a second job in six months.
At the end of the day, masonry is a slow game. It’s not like the modern world where everything is built to be replaced by next Tuesday. When you’re out there with the pointing tool, you’re participating in something that’s meant to stand long after you’ve hung up your trowel. Do it right, respect the materials, and don’t take shortcuts just because your arms are tired. There is a massive amount of pride to be found in a joint that’s flush, consistent, and built to weather the storms. When you finish that last section and step back, you shouldn’t just see a repaired wall—you should see a job that’s done properly.
Frequently Asked Questions
I've seen people just brush new mortar over the surface; how do I know if I've actually raked out enough of the old, crumbly stuff to get a proper bond?
Listen, if you’re just brushing mortar over the top, you’re not repointing; you’re painting. It’ll flake off before the first frost. You need to rake out at least twice the depth of the joint. Use a hammer and a bolster to test it. If it feels hollow or crumbles under your tool, keep going. You aren’t looking for “clean”; you’re looking for solid, sound masonry. If the substrate isn’t firm, nothing you pour on top will stick.
If I’m working on an old house with soft bricks, is there a risk that using the wrong mix will cause the faces of the bricks to pop off?
You’ve hit the nail on the head. If you go in there with a hard, modern cement mix on soft, old bricks, you’re signing a death warrant for that wall. The mortar needs to be the sacrificial lamb; it should be softer than the brick. If the mortar is too strong, it won’t breathe, the moisture gets trapped, and when it freezes, it’ll blow the faces right off your bricks. Use lime, or don’t bother.
How do I stop the new mortar from drying out too fast and cracking if I'm working in the sun or a bit of a breeze?
Listen, if you’re working in direct sun or a biting breeze, you aren’t just pointing; you’re racing against evaporation. If that moisture leaves too fast, your mortar loses its strength and cracks before it’s even set. Stop the madness: dampen the brickwork first so it doesn’t suck the life out of your mix. Then, once you’ve finished, cover it with damp hessian or polythene. Keep it cool, keep it moist, and let it cure properly.



