
I’ve spent forty-three years watching lads spend a fortune on fancy proprietary systems and high-end mixes, only to watch the whole lot blow out because they treated their shuttering like an afterthought. Everyone wants a complete guide to formwork that talks about expensive materials and high-tech bracing, but they always forget the most basic truth: if your forms aren’t rigid and your ground isn’t solid, you aren’t building a foundation, you’re just making a mess. I once saw a massive slab pour start to bulge halfway through because some joker hadn’t braced the timber properly, and by the time the truck was empty, the damage was already permanent.
I’m not here to sell you on some glossy brochure or a complicated manual that requires a degree to read. What I’m going to give you is the real version—the one I learned by getting mud on my boots and fixing mistakes that should never have happened in the first place. We’re going to talk about the stuff that actually matters: stability, bracing, and why the ground beneath your forms is more important than the wood itself. This is the no-nonsense truth about getting it right the first time.
Table of Contents
Choosing Formwork Material Types That Wont Betray You
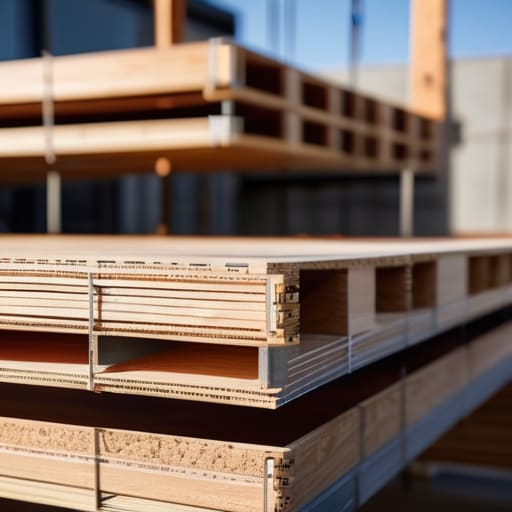
Now, you can’t just pick any old timber and expect it to hold when the wet weight starts pushing. I’ve seen lads try to save a few quid by using thin, splintered boards that look like they’ve been sitting in a damp shed for a decade. That’s a recipe for a blowout. When you’re looking at different formwork material types, you have to think about more than just the cost of the wood. You need to consider how many times you can reuse it before it warps and ruins your finish. If you’re doing something heavy, like a structural footing, you better be looking at steel or high-grade engineered panels.
If you’re sticking with timber, make sure it’s straight and substantial. The real danger isn’t the material itself, but how it handles the concrete pouring pressure management. If your forms aren’t rigid enough to resist that lateral push, they’ll bulge like a balloon, and you’ll be left with a slab that looks like a wavy sea. Don’t get fancy with it; just ensure what you’re using is stout enough to stay true until the set is done.
Mastering Concrete Pouring Pressure Management Under Stress
Listen, I’ve seen more formwork blow out in a single afternoon than most lads see in a career, and it’s rarely because the timber was weak. It’s because someone got impatient with the pump and started dumping load after load into the forms without a second thought. When you’re managing concrete pouring pressure management, you have to respect the weight. Concrete isn’t just a liquid; it’s a heavy, relentless force that searches for the weakest point in your setup. If you pour too fast, that hydrostatic pressure builds up behind your panels faster than your ties can hold them, and before you know it, you’re standing in a sea of grey sludge and splintered wood.
You need to pace the pour and watch your levels like a hawk. It’s about controlling the rate of rise. If you’re using heavy-duty concrete formwork systems, don’t assume they’re invincible just because they’re steel. I always tell my boys: if the forms start to bulge or the bracing starts to groan, you stop the truck immediately. You don’t “just finish this section” and hope for the best. You stop, you brace, and you fix it. Moving too fast is the quickest way to turn a profitable job into a disaster.
Five Things That'll Save Your Pour (And Your Reputation)
- Check your sub-base before you even look at a timber plank. I don’t care how fancy your formwork is; if that ground is soft or hasn’t been compacted properly, your forms are going to sink or tilt the second the weight of the wet mix hits them. A level form on an unlevel base is just a waste of good concrete.
- Tighten your ties and brace your corners like your life depends on it. I’ve seen more “blowouts” caused by a loose brace than by a bad mix. If you see a gap in your formwork, don’t just hope it holds; fix it. Once that wet mass starts pushing out, it won’t stop until it’s on the grass.
- Watch the weather, specifically the heat and the wind. If you’re setting forms in a gale or under a midday sun, you’re asking for trouble. Heat dries the edges too fast and wind pulls the moisture out before the mix has even settled, leading to cracks that no amount of “good concrete” can fix later.
- Stop adding water to the truck just to make the screeding easier. I know, it makes the lads happy because the mix flows like water, but you’re essentially diluting the strength and inviting shrinkage cracks. If the mix is too stiff for your forms, you haven’t got the right slump or the right gear—don’t fix it with a hose.
- Inspect your release agent application. Don’t just spray it on like you’re painting a fence. If it’s too thick, you get blobs; if it’s too thin, it won’t work. You want a clean, even coat so that when you strip those forms, the face of the concrete looks like it was polished, not like it’s been through a fight.
The Final Word Before the Truck Arrives
At the end of the day, a successful pour isn’t about how much you can shove into the forms or how fast you can screed it off. It’s about the discipline you showed an hour before the mixer even pulled into the site. You’ve looked at your materials, you’ve checked that your formwork can handle the lateral pressure without bowing like a cheap garden fence, and you’ve made sure the ground underneath isn’t going to settle the moment things get heavy. If you’ve ignored the sub-base or skimped on the bracing because you were “running behind schedule,” you aren’t building a structure; you’re just setting a timer on a future failure. Don’t let the pressure of a live pour force you into making mistakes you’ll be fixing with a jackhammer in six months’ time.
I’ve spent forty-three years watching men try to outrun the physics of concrete, and let me tell you, the physics always wins. You can buy the most expensive timber or the fanciest steel forms in the country, but they won’t save a job that was rushed or a base that was poorly prepared. Take pride in the invisible work—the bracing, the leveling, and the prep that nobody ever sees once the shuttering comes off. When you stand back and look at a finished slab that’s straight, true, and hasn’t moved an inch, you’ll know it wasn’t luck; it was because you did the hard graft when nobody was watching.
Frequently Asked Questions
How do I know if my sub-base is actually compacted enough to stop the formwork from sinking or shifting under the weight?
You don’t “know” by looking at it; you know by testing it. If you’re just eyeballing a layer of MOT Type 1 and hoping for the best, you’re asking for a blowout. Get a penetrometer or, if you’re on a tight site, use the old-school method: take a heavy sledgehammer to it. If it feels “spongy” or leaves a visible indentation, it’s not ready. If that sub-base moves even a fraction under the weight of the wet mix, your formwork is finished.
When the weather turns, how much do I need to adjust my bracing to stop the forms from blowing out or bowing?
Listen, if the wind picks up or the ground gets sodden, you don’t just “tweak” the bracing—you double it. When it’s gusty, that wind acts like a sail against your forms, pushing them sideways before the concrete even hits. If the rain’s turned your sub-base to mush, your stakes are going to wander. I’ve seen more blowouts from shifting ground than from bad mixes. Tighten your walers, add more kickers, and check your stability every hour.
What are the tell-tale signs that my formwork is going to fail halfway through a pour before it actually happens?
You’ll see it in the movement before you see the blowout. If your stakes are bowing or the timber is creaking under the weight, it’s already too late to pray. Watch the bottom of the forms; if you see even a hairline gap or a trickle of grout escaping, that’s your warning. And if that sub-base is soft and the forms start shifting as the truck starts discharging, stop the pour. If it’s moving then, it’s failing.



