I remember standing on a site in ’94, watching a lad try to use a fancy laser level to fix a layout that was already fundamentally broken because he’d ignored the slope of the ground. He thought the tech would save him, but you can’t use a laser to outrun a bad measurement. People treat a “complete guide to setting out” like it’s some complex mathematical puzzle that requires a degree, but they miss the point entirely. They get caught up in the gadgets and the expensive kit, forgetting that if your lines are off by even a finger’s width before the first shovel hits the dirt, you aren’t just making a mistake—you’re building a disaster.
I’m not here to sell you on some shiny new software or tell you how to read a blueprint like an architect. I’m going to give you the straight truth on how to actually get your lines right, from checking your datum to making sure your pegs aren’t going to vanish the moment the first truck arrives. This is a no-nonsense look at the real-world mechanics of prep work, because I’ve spent forty-three years watching expensive mistakes happen simply because someone rushed the geometry.
Table of Contents
Establishing Control Points Before the Chaos Starts
You can have the best mix design in the world, but if your starting points are drifting, you’re just pouring expensive mistakes. Before the trucks start idling and the lads are itching to get moving, you need to be establishing control points that aren’t going anywhere. I’ve seen too many jobs where someone pins a line to a fence post or a temporary peg that gets kicked by a boot halfway through the morning. Once those points move, your whole building footprint is a lie. You need fixed, permanent references—something solid that won’t budge when the heavy machinery starts rolling in.
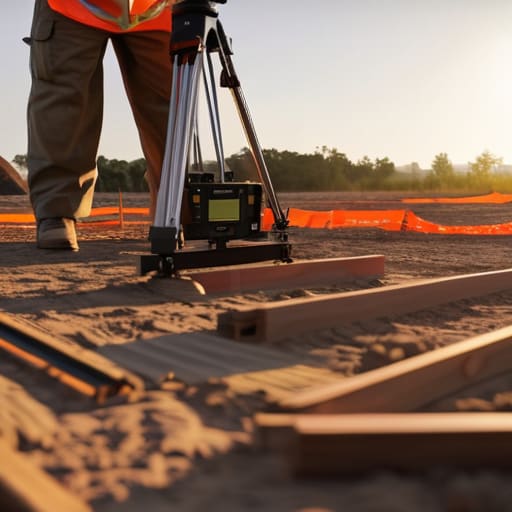
Whether you’re using a laser level or a proper total station setting out rig, the principle is the same: check it twice, then check it again. I don’t care how fancy the surveying equipment for setting out is; if the man behind it hasn’t verified his datum against something unshakeable, he’s just digitising a mistake. You want to be certain of your lines before the first shovel of sub-base hits the ground. If you wait until the concrete is wet to realize your corners are out, you’ve already lost the job.
Why Marking Building Footprints Is More Than Just Lines
You see some lads treat marking building footprints like they’re just drawing a bit of chalk on a pavement. They think if the line is roughly in the right place, they can make up the difference once the forms are in. That’s a dangerous way to think. Those lines aren’t just suggestions; they are the boundary between a job that stays put and a job that ends up in a legal dispute with a neighbor or a structural engineer. If your lines are off by even a few inches, you aren’t just looking at a crooked wall; you’re looking at a foundation that might not sit where the load-bearing calculations intended.
I’ve seen it happen more times than I care to admit. Someone uses cheap string lines and a bit of guesswork instead of proper surveying equipment for setting out, and suddenly the entire footprint is skewed. Once you start digging, you can’t just “fix” a misplaced footing without spending a fortune. You have to treat those marks with respect. If you aren’t certain about your site layout techniques before the first shovel hits the dirt, you’re just setting yourself up for a massive headache.
Five Things That’ll Save Your Skin Before the Trucks Arrive
- Check your pegs twice and your tape measure once. I’ve seen lads rush the string lines, get a corner off by twenty millimetres, and then spend three hours sweating and swearing when the formwork doesn’t sit flush. If your lines aren’t dead straight, the whole slab is a lie from the start.
- Don’t trust a single reference point. You need a secondary check—a second peg or a fixed structure—to verify your measurements. If you rely on one bit of timber that some site hand knocks over with a shovel, your entire footprint is going to wander like a drunk on a Saturday night.
- Get your levels sorted before you even think about the mix. I don’t care how good your concrete is; if your sub-base isn’t levelled and compacted to the right grade, you’ll be fighting the fall of the water for the rest of the day. Setting out the falls is just as important as setting out the edges.
- Watch the weather, not just the blueprint. If you’ve set out a massive pour for a day when the wind is howling or the heat is hitting thirty degrees, you’re asking for trouble. Setting out isn’t just about where the concrete goes, it’s about timing the job so the environment doesn’t ruin your finish.
- Clear the clutter. You can’t set out a precision job if you’re tripping over scrap timber, old rebar, or piles of hardcore. Clean your workspace before you start marking lines; you can’t measure accurately if your feet aren’t on solid, clear ground.
Don't Rush the Lines
At the end of the day, setting out isn’t some academic exercise you do to tick a box for the site manager; it’s the difference between a job that holds and a job that ends up in a pile of rubble and litigation. You’ve got to get your control points locked down, your footprints marked with precision, and your levels checked twice—not once. If you treat the setting out like an afterthought, you’re basically inviting disaster to show up the moment the first mixer arrives. Remember, you can have the most expensive, high-spec mix in the world, but if your lines are wandering or your levels are off, that concrete is just expensive liquid waste waiting to fail.
My advice is simple: slow down. I’ve seen too many young lads, eager to get the machinery moving and the money flowing, skip the hard work of the prep because they think they can “fix it in the pour.” You can’t fix a bad layout with a screed and a prayer. Take the time to walk the site, double-check your pegs, and make sure everything is dead straight before you even think about calling the plant. When you do it right, the pour becomes the easy part—the part where you actually get to see the work take shape. Do it once, do it properly, and you won’t be the one getting a phone call about a crack six months down the line.
Frequently Asked Questions
What's the best way to check my lines if the ground is uneven or the site is a bit of a mess?
If the site’s a mess, stop trying to eyeball it. You can’t trust a string line over uneven ground; it’ll sag or pull, and you’ll end up with a footprint that’s crooked before you’ve even broken ground. Get your profile boards in, and use a laser level or a long spirit level to transfer those heights. You need to establish a datum that doesn’t move when someone trips over a pile of hardcore.
How do I know if my control points are actually solid enough to hold through a heavy pour?
You don’t “know”—you test them. If you’re relying on a bit of spray paint on a loose bit of timber, you’re asking for a headache. I’ve seen lads lose their entire layout because a heavy mixer bumped a dodgy peg. Get your pins driven deep into something that isn’t moving, or better yet, use offset pegs. If you can’t kick it with your boot and have it stay put, it isn’t a control point; it’s a suggestion.
When do I stop marking things out and actually start the prep work for the sub-base?
You stop marking once you’re certain those lines aren’t going to shift when the heavy stuff arrives. If your pegs are wobbly or your string lines are sagging, you aren’t ready. You move to the sub-base the moment your footprint is locked in and your levels are verified. Don’t start digging or spreading MOT until you know exactly where the edge is. If the layout is a guess, your sub-base will be a mess.