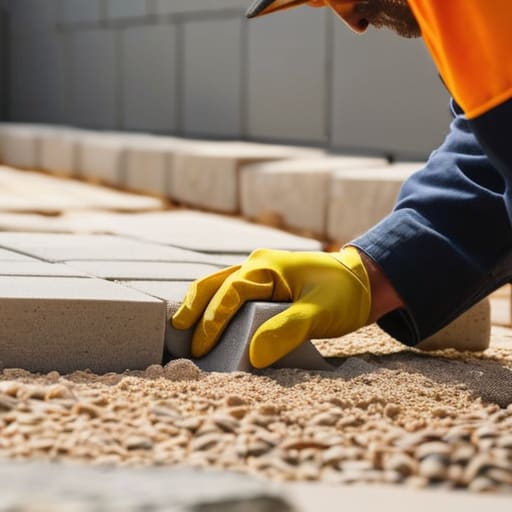
I remember standing on a driveway in Surrey back in ’98, watching a lad try to run a line across twenty meters using nothing but a bit of string and a prayer. He thought he was doing fine until the concrete truck arrived and we realized his “level” had a dip right in the middle that would’ve turned a premium slab into a puddle waiting to happen. Most people think you can just eyeball a run or trust a cheap laser and call it a day, but if you don’t actually know how to lay a course level over distance with proper benchmarks, you aren’t building; you’re just gambling with your reputation.
I’m not here to give you some textbook lecture or a list of fancy gadgets you don’t need. I’m going to show you the proper, old-school way to ensure your levels stay true from the first peg to the last, regardless of how much the ground tries to play tricks on you. We’ll talk about checking your sightlines, managing your transfer points, and why consistency is more important than speed when you’re setting your marks. By the time I’m done, you’ll have the confidence to face a long run without fearing the inevitable callback.
Table of Contents
Guide Overview
Tools & Supplies
- String line and line level (for visual alignment)
- Laser level (for high precision over long distances)
- Measuring tape (to verify distances)
- Stakes or pegs (to hold the line in place)
- Masonry string (one spool)
- Wooden stakes (set of 4-6)
Step-by-Step Instructions
- 1. Before you even touch a tape measure, you need to sort your datum point. I don’t care how much you trust your eyes; if you don’t have a fixed, unmovable reference point—something like a permanent manhole cover or a fixed building corner—you’re just guessing. Pick one spot that won’t budge, and everything you do for the rest of the day flows from that single mark.
- 2. Get your string lines out, but don’t just pull them tight and call it a day. You need to set up your profiles—those wooden stakes driven into the ground—at every single corner and change of direction. If you’re running a long distance, you’ll need intermediate stakes to keep that line from sagging like a wet noodle in the middle. A sagging line is a lie, and a lie in the levels means your slab will be thicker in the middle than at the edges, wasting money and strength.
- 3. Now, you bring in the laser or the optical level. If you’re still trying to do long runs with just a spirit level and a prayer, you’re asking for trouble. Set your tripod up on stable ground—not on fresh spoil or soft mud—and get your reading against that datum point you picked earlier. You need to know exactly where you stand before you attempt to transfer that height to your string lines.
- 4. This is where most lads get sloppy: transferring the height to the string. Use a graduated staff or a marked timber to find the exact height on your profiles. Once you’ve marked it, tie your line off tight. I always tell my boys to check the tension twice; if the wind catches that line or a lad bumps it while he’s walking past, your whole course is shot.
- 5. Don’t just trust the string; you’ve got to verify it with a straight edge or a long spirit level across the span. If you’re working on a long run, use a heavy-duty straight edge to bridge the gap between your markers. If there’s a dip in the line that doesn’t match your reading, you haven’t got a level, you’ve got a future drainage problem.
- 6. Finally, double-check your benchmarks. Go back to that first datum point and run the numbers one more time. If your math is off by even ten millimetres over a long distance, you’ll be fighting the concrete all day trying to hide it. Measure twice, pour once isn’t just a saying; it’s the only way to make sure you aren’t digging out your own work next month.
Establishing a Datum Line Before the Chaos Begins
Listen, I’ve seen more jobs go sideways because of a dodgy reference point than because of bad mix designs. You can have the best crew in the county, but if your starting point is a guess, your whole run is a lie. Before you even think about pulling a tape, you need to be establishing a datum line that isn’t going to budge. I’m talking about a fixed, permanent mark—something like a manhole cover or a structural footing—that stays put while the rest of the site gets trampled. If you base your level on a wooden stake driven into soft ground, you aren’t surveying; you’re just playing a game of chance.
When you’re dealing with a stretch that actually tests your patience, don’t rely on a spirit level and a prayer. If you’re working a large site, get the right surveying equipment for masonry and use it. I’ve always preferred a good old-fashioned dumpy level for its reliability, but if you’re using a laser, you’d better ensure that laser level accuracy over long distances is actually verified by a staff man who knows how to hold it steady. If your benchmark moves even a millimetre, every single course you lay from that point on is just expensive scrap material waiting to happen.
Why Laser Level Accuracy Over Long Distances Is Your Only Lifeline
Now, listen. You can spend all day with a spirit level and a piece of string, but once you get past a few meters, you’re just guessing. I’ve seen lads try to eyeball a long run on a driveway, only to realize halfway through the pour that they’ve built themselves a subtle, expensive-looking slide. That’s why laser level accuracy over long distances isn’t just a luxury for the big firms; it’s your only insurance policy against a total rebuild. If your line is off by even five millimetres at the start, that error is going to grow like a weed by the time you hit the far boundary.
When you’re transferring levels between points across a wide site, you have to treat your equipment like it’s part of the structure itself. I don’t care how expensive your surveying equipment for masonry is; if you haven’t set that tripod on solid, unyielding ground, the vibration from a passing truck or even a heavy footfall will throw your plane right out of whack. Check your calibration twice before you even think about marking your first course. If you can’t trust the beam, you shouldn’t be trusting the brickwork.
Five things that’ll save your level before the first pour
- Stop trusting your eyes on a long run; if you haven’t checked your benchmarks and accounted for the swell in the ground, that level is going to lie to you right when it matters most.
- Check your string lines for sag every single time you step away; a line that looks straight to a man standing five feet away is often bowing in the middle like a wet noodle.
- Don’t be a hero with a cheap tape measure; if you’re pulling a hundred feet of distance, one bad reading or a tape that’s been kinked is enough to ruin the whole run.
- Always double-check your datum against a known fixed point, not just some stake you hammered in ten minutes ago that could be shifting in the muck.
- If you’re using a laser, make sure you aren’t fighting the sun or working through a haze; if you can’t see the receiver clearly, you’re just guessing, and guessing is how you end up with a slab that drains into the house.
Don't Leave Your Level to Chance
At the end of the day, laying a course level over a long run isn’t about how fast you can move the string line; it’s about the discipline you showed before the first bit of material even touched the ground. You’ve got to respect the datum, trust your laser over your own tired eyes, and remember that a single mistake at the start of your line will only get bigger and more expensive by the time you reach the end. If you skip the benchmarks or ignore a slight swell in the sub-base, you aren’t just saving time—you’re essentially signing a contract for a future repair that you’ll be the one stuck fixing.
I’ve spent forty-three years watching men try to “eye it” because they were in a rush, and I’ve seen enough cracked slabs and wonky courses to know exactly where that road leads. There’s a certain pride in standing back at the end of a long day, looking down a perfectly straight, perfectly level line, and knowing it’s right because you did the prep work properly. Don’t aim for “good enough” just to get the truck unloaded and get home. Aim for the kind of accuracy that lets you sleep at night, knowing that the foundation of your work is solid from the very first inch.
Frequently Asked Questions
What do I do if my datum point is on soft ground that’s likely to settle halfway through the job?
If your datum is sitting on muck, you’ve already lost the battle. You don’t just “hope” it stays put; you move it. Find a permanent, hard structure—a house foundation or a concrete kerb—and pin your datum there. If you’re stuck with nothing, drive a steel pin deep into something solid or set a heavy, fixed benchmark. If that reference point sinks an inch, your whole site is a lie, and no amount of leveling will save you.
If I’m working a long run and the laser starts acting up, how can I double-check my levels with just a basic spirit level and a string line?
Look, if that laser starts playing games, don’t just keep guessing. You pull a string line tight—and I mean tight, no sag—between two fixed points. Use your spirit level on a straight piece of timber to check the string’s level at both ends. If the bubble isn’t dead centre at both stations, your line’s lying to you. It’s old-school, but it’ll tell you if your laser’s gone soft before you ruin a whole run.
How much of a margin should I allow for the sub-base variation when I'm setting my levels, or am I just asking for a sloping slab?
If you’re looking for a single number, you’re already halfway to a bad pour. You don’t “allow for variation”; you eliminate it. If your sub-base is uneven, you don’t just hope for the best—you compact it, grade it, and level it until it’s dead flat. If you try to compensate for a wonky base by adjusting your levels, you’ll end up with a slab that’s thick in some spots and cracking in others. Fix the ground first.