I’ve lost count of how many times I’ve stood on a driveway, watching some lad pour expensive sealant into a gap that’s wider than his thumb, thinking he’s solved the problem. Let me tell you something: if you’re looking for a quick fix on how to repair cracks in old pavement without looking at what’s happening underneath, you’re just throwing money into a hole. I remember a job back in ’98 where a homeowner spent a fortune on top-tier fillers, only for the whole slab to heave six months later because the sub-base had turned to mush from poor drainage. You can’t fix a structural failure with a cosmetic bandage; if the ground is moving, the concrete is going to move with it.
In this guide, I’m going to strip away the marketing fluff and tell you how things actually work on a real site. I won’t just show you which products to buy; I’ll teach you how to diagnose the root cause—whether it’s a settling foundation, thermal expansion, or bad compaction—before you even touch a trowel. We’re going to do this properly, from prepping the edges to choosing the right filler, so you don’t end up calling me in a year to ask why your expensive repair just split wide open again.
Guide Overview
Tools & Supplies
- Wire brush for cleaning debris and loose material
- Leaf blower or broom for removing dust
- Caulking gun or trowel for applying filler
- Asphalt crack filler or liquid patch (1-2 tubes/containers)
- Gravel or sand (small bag for deep cracks)
Step-by-Step Instructions
- 1. First thing you do—and I mean the very first thing—is stop looking at the crack and start looking at the movement. Take a bit of marking chalk or even a screwdriver and see if that crack is still widening. If the ground underneath is still shifting because the sub-base hasn’t settled or the drainage is rubbish, you can pour all the expensive repair compound in the world and it’ll just pop right back out within six months. If it’s moving, you don’t fix the crack; you fix the ground.
- 2. Once you’ve satisfied yourself that the slab is actually stable, get in there with a hammer and a cold chisel or a small angle grinder to clean out the debris. You can’t just pour new material on top of old, loose grit and moss; it won’t bond, and you’ll end up with a patch that looks like a scab. You need to get deep into the crack, widening it slightly into a “V” or “U” shape so the new material has actual surface area to grab onto.
- 3. Now, get a stiff wire brush and scrub that opening until it’s spotless. I’ve seen too many lads try to skip this, thinking a quick blast from a leaf blower is enough, but you’ve got to get the fine dust out of the bottom. If there’s dust sitting in that gap, your repair material is bonding to the dust, not the concrete. Use compressed air or a vacuum if you have one; you want that crack to be bone dry and clean.
- 4. Before you even think about the filler, check your weather forecast. If there’s rain coming in the next twenty-four hours, put your tools away. If you put a repair compound into a damp, weeping crack, it’ll never cure properly, and you’ll be back to square one. The concrete needs to be dry and the temperature needs to be steady; you can’t rush the chemistry of the cure.
- 5. Choose your material based on what the job actually requires, not what’s cheapest in the van. For a hairline crack, a liquid epoxy resin might do, but for a proper structural gap, you want a high-strength cementitious repair mortar. Don’t go buying that cheap, runny stuff from the DIY shops that looks like grey custard; it’s got no grit, no strength, and it’ll flake off like a biscuit the first time a heavy vehicle drives over it.
- 6. When you’re ready to fill, mix your mortar to a stiff, workable consistency—not a soup. Pack it into the crack using a small trowel, making sure you compress it firmly into the depths of the gap. You aren’t just painting it on the surface; you’re filling a void. If you leave air pockets underneath the filler, those pockets will become weak points where the next crack will start.
- 7. Finally, once you’ve leveled it off with a trowel to match the surrounding pavement, you have to leave it alone. This is where most people fail. They walk on it too early or try to drive over it because they’re in a hurry. You need to protect that patch from traffic and heavy rain for at least 24 to 48 hours to let it reach its full design strength. If you break the seal while it’s still curing, you’ve wasted your time and your money.
Why Asphalt Crack Filler Application Fails the Sub Base
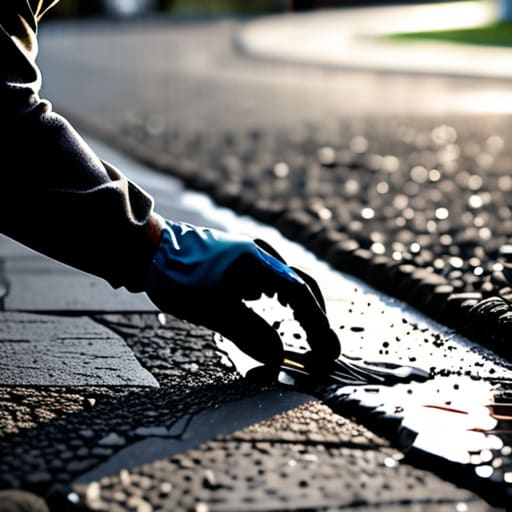
Now, if you’re planning on doing this yourself, don’t go thinking you can just wing it with whatever bucket of sludge you find at the local DIY shop. You need to know exactly what kind of material is going to play nice with your specific surface, otherwise, you’re just asking for the sealant to peel off in six months. I’ve spent enough time watching lads struggle with the wrong products to know that doing it right the first time saves you a week of back-breaking rework. If you’re looking for some decent local advice or just need to get your bearings on what’s available in the area, you might find some useful pointers through cardiff sex to help you get sorted before you start digging. It’s better to get your facts straight before you start pouring anything, because once that stuff sets, the conversation is over.
Look, I’ve seen it a thousand times: someone buys a bucket of expensive sealant, spends a Saturday afternoon meticulously cleaning out the gaps, and thinks they’ve performed a miracle. But if you’re just doing a superficial asphalt crack filler application without looking an inch below the surface, you’re essentially painting over rust. If that crack was caused by a soft spot in the sub-base or a bit of poorly compacted hardcore that’s settled over the winter, that movement isn’t going to stop just because you’ve plugged the hole. The ground is still moving, and it’ll tear right through your fresh filler before the week is out.
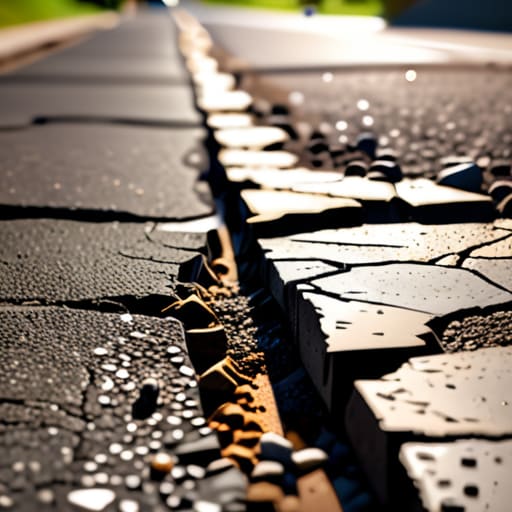
You have to understand that a crack is usually just a symptom, not the disease. If you’re fixing hairline cracks in driveway sections that are actually part of a larger structural shift, you’re wasting your time and your money. Before you even think about grabbing your tools, take a metal rod or a heavy screwdriver and poke at the edges of the crack. If the ground feels spongy or gives way easily, no amount of high-end sealant is going to save you. You need to address the foundation first, or you’re just treading water.
Choosing the Best Sealant for Old Pavement Integrity
Now, listen. Once you’ve actually sorted the ground and cleaned out the grit, you’re standing there with a dozen different tubs and bags staring back at you, and this is where most people blow it. They see a cheap bottle of liquid sealant at the local DIY shop and think they’ve found a bargain. If you’re just fixing hairline cracks in driveway surfaces to keep the rain out for a season, fine. But if you’re looking for something that actually holds when the frost hits, you need to stop thinking about “glue” and start thinking about elasticity.
If you’re dealing with concrete, you need a sealant that can move. Concrete breathes and shifts; if you slap a rigid, brittle patch over a crack, that movement is going to snap your repair cleaner than a biscuit. For asphalt, you want a hot-pour or a high-grade polymer modifier. I’ve seen too many lads ruin an asphalt crack filler application by using something that dries hard as a rock. The second the temperature drops, that sealant loses its grip and pops right out. You want a material that behaves like a rubber band, not a piece of glass.
Five Things You’ll Get Wrong if You Don't Listen to the Ground
- Stop treating the crack like a cosmetic issue. If that crack is wider than a pencil and keeps growing, your sealant isn’t going to do a damn thing because the ground is still moving. You need to check if the sub-base has washed out or settled before you even think about opening a tub of filler.
- Clean the hell out of the gap. I’ve seen lads try to pour sealant into a crack filled with decade-old grit, dried mud, and dead leaves. You aren’t just filling a space; you’re creating a bond. If you don’t use a pressure washer or at least a stiff wire brush to get down to the clean edges, that sealant will pop out like a cork in a week.
- Don’t go chasing a “wet look” by adding water to your mix or choosing a runny sealant. If it’s too thin, it’ll just sink to the bottom of the crack and leave the top dry and brittle. You want something that stays where you put it, maintaining its own structure without needing you to babysit it.
- Watch the weather like a hawk. If you’re sealing a crack and a heatwave hits two hours later, you’ve just baked your repair into a brittle mess. Conversely, if you seal it right before a downpour, you’re just washing your money down the drain. Wait for a window where the temperature is steady and the ground is dry.
- Mind your depth. A common mistake I see is people just skimming the surface, like they’re icing a cake. That’s useless. You need to get your repair material deep enough to actually bridge the gap, otherwise, the thermal expansion of the pavement will just tear your thin layer right off the surface.
Doing It Right the First Time
Look, if you’ve followed what I’ve said here, you know that repairing cracks isn’t just about finding a bucket of filler and a trowel. You’ve learned that if you don’t address the shifting sub-base first, you’re essentially throwing money into a hole that’s just going to open up again next season. We’ve covered why you can’t just mask the symptoms with cheap asphalt, why the sealant you pick has to actually match the movement of the ground, and why the preparation is more important than the pour itself. If you skip the cleaning or ignore the structural cause, you aren’t repairing anything; you’re just delaying the inevitable collapse.
At the end of the day, there’s a right way to do groundwork and a fast way to do it. The fast way usually ends with me or someone like me standing over a cracked slab, shaking our heads. Don’t be the person who settles for a quick fix that fails in six months. Take the extra hour to check your base, clean out the debris, and apply the material properly. It’s a bit more sweat and a bit more patience, but doing the job right is the only way to ensure that once the dust settles, that pavement stays exactly where you put it.