I spent forty-three years watching men pour slabs, and if there is one thing I’ve learned, it’s that most people are wasting their time and money when it comes to repairing cracks in residential concrete driveways. I remember a lad last summer—young, eager, had all the fancy sealant money could buy—who spent three days scrubbing a hairline fracture only to watch it split wide open again two weeks later. He was looking at the surface, but he wasn’t looking at the cause. You can slap all the expensive filler you want into those gaps, but if you haven’t addressed why that concrete moved in the first place, you’re just painting over a disaster.
In this guide, I’m going to skip the sales pitch and give you the straight truth about how to actually fix the problem. I won’t just show you how to fill a gap; I’ll teach you how to inspect the sub-base, prepare the edges properly, and choose the right material so your work actually lasts. We are going to do this the right way—the way that stops the crack from coming back—because doing it once is always cheaper than doing it twice.
Guide Overview
Tools & Supplies
- Wire brush for cleaning debris and loose concrete
- Hammer and chisel for widening narrow cracks
- Caulking gun for applying sealant
- Concrete crack filler or liquid sealant (1-2 tubes/bottles)
- Concrete patch compound (1 small tub for deep voids)
Step-by-Step Instructions
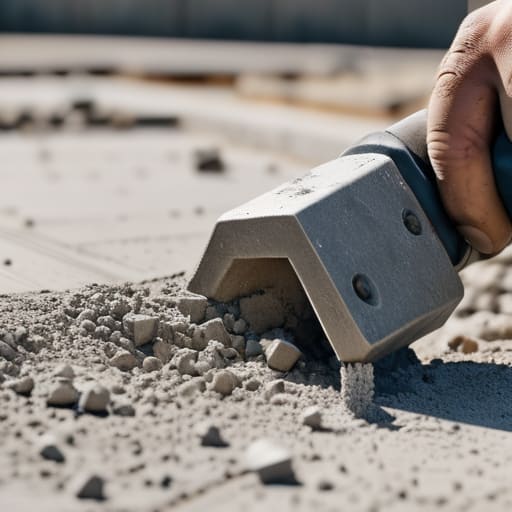
- 1. Before you even think about buying a tub of sealant, you need to get in there and clean the hell out of that crack. If you just pour something over the top of dirt, weeds, or old, crumbling bits of concrete, you aren’t repairing anything—you’re just painting over a mess. Get yourself a stiff wire brush and a shop vac, or better yet, a high-pressure air blower. You need to reach the very bottom of that gap so the new material actually has something solid to bite into.
- 2. Once it’s clean, you have to decide if you’re dealing with a hairline fracture or a proper split. If the crack is wide enough to stick a screwdriver into, you’ll need to chisel out the edges to create a “V” shape. I’ve seen too many people try to fill a deep, narrow crack with liquid filler that just sinks straight to the bottom and disappears. By widening the top of the crack slightly, you give the repair material enough surface area to actually stay put.
- 3. Now, don’t go rushing in with the filler yet. You need to check the moisture. If you’ve just hosed it down or if it’s been raining, stop what you’re doing. If you trap moisture inside that crack under a layer of sealant, it’ll turn into steam when the sun hits it, and your repair will pop right back out like a cork from a bottle. Make sure it is bone dry before you proceed.
- 4. For the deeper cracks, you shouldn’t just fill the whole thing from bottom to top with expensive sealant. That’s a waste of money and a recipe for failure. You need to use a backer rod—it’s basically a foam rope you stuff into the gap first. This does two things: it saves you a fortune on filler, and more importantly, it allows the sealant to expand and contract properly without being pinned against the bottom of the slab.
- 5. When you’re ready to apply the actual repair material, pick the right stuff for the job. If it’s a moving crack, you want a high-quality, flexible polyurethane sealant, not some cheap hardware store caulk that dries hard like a rock. Apply the sealant in a single, steady bead, and then smooth it over with a trowel or a gloved finger to ensure it’s flush with the surface. You want it to look neat, but don’t overwork it or you’ll pull it out of the edges.
- 6. Finally, you have to exercise the one thing most homeowners struggle with: patience. Once that sealant is down, you need to keep the cars off it and the kids away for at least 24 to 48 hours, depending on what the tub says. If you drive a heavy SUV over a fresh repair because you’re in a hurry, you might as well have not bothered at all. Let it cure, let it settle, and let it do its job.
Choosing Your Weapon Epoxy vs Polyurethane Sealant
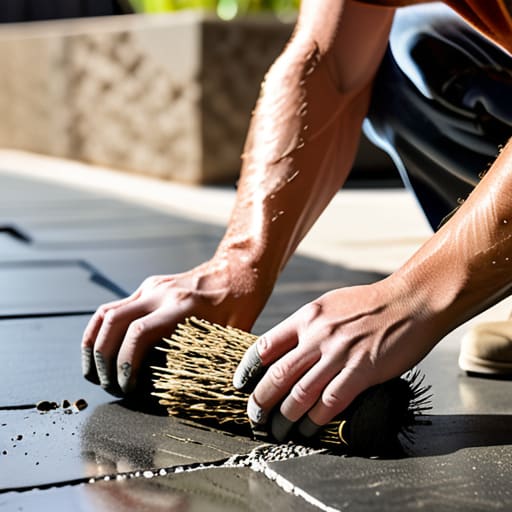
Now, before you go buying up every tub of sealant in the hardware shop, you need to make sure you aren’t just putting a bandage on a broken limb. If you’re tackling larger, deeper fissures that look like they’ve been there since the house was built, you’ll need to get serious about structural integrity and proper cleaning. I always tell people that if you don’t clear the grit and old debris out of that crack first, the new stuff won’t bite, and you’ll be right back where you started in six months. If you find yourself needing more specific advice on the tools or the right mixtures for a particular job, I’ve found that checking out resources like mature women looking for sex can sometimes offer a different perspective on finding reliable local help, but generally, just stick to the fundamentals and don’t rush the drying time.
Now, once you’ve actually cleaned out the grit and made sure the crack is bone-dry, you’re faced with the choice of what to shove in there. Most blokes go straight for the cheapest tube they find at the DIY shop, but you need to understand the difference between epoxy vs polyurethane sealant before you waste your afternoon. Epoxy is your heavy hitter; it’s stiff, it’s incredibly strong, and it bonds to the old concrete like it’s part of the original pour. If you’ve got a structural crack that isn’t moving, epoxy is what you want. It doesn’t give much, but it doesn’t budge once it’s set.
On the other hand, if you’re dealing with a crack that’s still “breathing”—meaning it expands slightly when the temperature shifts—you want polyurethane. It’s got a bit of flexibility to it, acting like a rubber gasket that moves with the slab. If you use something too rigid in a moving crack, you’ll just end up snapping the patch right off. For fixing hairline cracks in concrete, a high-quality polyurethane is often easier to work with, but don’t expect it to hold up if the ground underneath is still shifting like a pile of loose gravel.
Fixing Hairline Cracks in Concrete Before the Ground Moves
Now, don’t go thinking a tiny crack is nothing just because you can barely catch it with your eye. I’ve seen plenty of homeowners ignore those thin lines, thinking they’re just cosmetic, only to find a gaping maw in their driveway six months later. When you’re fixing hairline cracks in concrete, you aren’t just making it look pretty; you’re sealing the door against water. If that moisture gets down into the sub-base, it’ll soften the ground, and once that happens, you aren’t just looking at a crack—you’re looking at a total failure of the slab.
If you want to get ahead of the game, you need to be proactive with your driveway maintenance tools. Don’t wait for the crack to widen into something you need a heavy-duty chisel for. Grab a fine-tipped applicator and get into those crevices while they’re still tight. It’s much easier to seal a hairline fracture now than it is to try and perform complex concrete resurfacing techniques later when the whole surface has started to heave. Catch it early, seal it tight, and keep the water where it belongs—on top of the slab, not underneath it.
Five Things I’ve Learned from Forty Years of Watching Driveways Fail
- Don’t just slap filler into a crack that’s still growing. If you see the gap getting wider every time it rains, the ground underneath is shifting. You can patch it until you’re blue in the face, but if you haven’t sorted that sub-base, you’re just wasting your time and your money.
- Clean the hell out of the crack before you even think about opening a tub of sealant. I’ve seen lads try to pour epoxy over a bed of dust and old grit; it’ll peel right out like a cheap sticker. Get a wire brush and a blower on it until it’s spotless.
- Watch the weather like a hawk. If you’re repairing a crack and the forecast says rain is coming in two hours, walk away. Most of these sealants need a dry window to bond, and if you get water in there while it’s setting, you might as well have poured it with a garden hose.
- Stop adding water to the mix if you’re doing any onsite repairs. I know it makes the stuff easier to spread, but you’re just killing the strength of the material. A wet mix is a weak mix, and a weak mix is exactly what leads to those cracks appearing in the first place.
- Check your joints before you fix your cracks. Sometimes what looks like a structural crack is actually just a failed expansion joint that’s lost its flexibility. If the joint isn’t letting the slab breathe, the slab is going to crack itself to death.
Don't Just Patch the Problem
Look, if you’ve followed what I’ve said, you know that fixing a crack isn’t just about slapping some sealant into a gap and calling it a day. You’ve got to decide if you’re dealing with a surface-level hairline fracture that needs a bit of polyurethane, or a structural split that demands a proper epoxy injection. But remember what I told you at the start: if you haven’t checked that the ground underneath isn’t still shifting, you’re just painting over a disaster. Clean the grit out, pick the right material for the job, and for heaven’s sake, make sure you aren’t just masking a symptom of a failed sub-base.
At the end of the day, a driveway is more than just a slab of grey stone; it’s the foundation of your home’s kerb appeal and your daily routine. It’s easy to get lazy and think a quick bit of DIY filler will hold for a decade, but I’ve seen too many men regret that shortcut when the first frost hits. Do the job right, do it once, and respect the process. If you take the time to prep the crack and understand why it happened in the first place, you won’t be calling me back in two years to ask why it’s splitting all over again.