I’ve spent forty-three years watching people waste money on the wrong fixes, and if I see one more homeowner trying to figure out how to repair cracks in old pavement by just slapping a bit of filler into the gap, I might actually lose my temper. You can pour all the expensive sealant you want into that crack, but if the ground underneath has shifted because the sub-base was thin or poorly compacted, that new patch will be popping out like a loose tooth before the next heavy rain. Most people think they have a surface problem, but in my experience, it’s almost always a foundation failure hiding in plain sight.
I’m not here to sell you some miracle chemical or a fancy DIY kit that’ll crack by Christmas. In this guide, I’m going to show you how to look beneath the surface to see if a repair is even worth your time. We’ll go through the proper way to clean, prep, and actually bond a repair so it lasts, rather than just masking the symptoms. I’ll tell you exactly when to stop patching and when it’s time to rip it all up and start again properly.
Guide Overview
Tools & Supplies
- Wire brush for cleaning debris and loose particles
- Shop vacuum or leaf blower for removing dust
- Putty knife or trowel for spreading filler
- Asphalt crack filler or liquid patch (1-2 tubes/containers)
- Gravel or sand (small amount for deep cracks)
Step-by-Step Instructions
- 1. First thing you do is stop looking at the crack and start looking at the ground. Get a heavy crowbar or a hammer and tap around the edges of that fissure. If it sounds hollow, or if the ground feels like it’s shifting under your feet, you aren’t looking at a surface crack; you’re looking at a void. You need to dig out the loose bits and see if the sub-base has washed away or settled. If you just fill a crack that’s sitting on top of a sinkhole, you’re just wasting your money and your time.
- 2. Once you’ve confirmed the ground isn’t moving like a sponge, you need to get in there and clean it out properly. I don’t care how much you want to get on with it, but you cannot just pour sealer over dirt, moss, or old, crumbling concrete. Use a stiff wire brush and a high-pressure air blower or a vacuum to get every single bit of loose debris out of that gap. If there is dust left in there, your repair material won’t bond, and it’ll pop out the first time a heavy truck drives over it.
- 3. Now, if the crack is wide—and I mean wider than a finger—you can’t just fill it to the top. You need to install a backer rod. This is a foam rope you stuff into the crack first. It serves two purposes: it stops you from using a gallon of expensive sealant to fill a hole that doesn’t need it, and more importantly, it gives the sealant room to move. Concrete expands and contracts with the seasons; if you fill a deep crack solid from bottom to top, the pressure will just snap the edges of your pavement right off.
- 4. Choose your sealant wisely. Don’t go buying the cheap, watery stuff from the discount bin at the local hardware shop. You want a high-quality, polyurethane-based sealant that stays flexible once it cures. If it hardens like a rock, it’s useless. You need something that can stretch and squash as the temperature changes. Apply it in stages, making sure you don’t leave any air pockets trapped underneath.
- 5. When you’re applying the sealant, don’t just glob it on and hope for the best. You need to tool it. Use a spatula or a specialized smoothing tool to press the material firmly into the edges of the crack. You want a slightly concave finish, not a big hump sitting on top. This ensures the sealant is tightly gripped by the sides of the concrete. If it’s sitting proud like a mountain, it’ll catch debris and look like an eyesore within a week.
- 6. Finally, you have to be patient and let it cure. This is where most DIYers and even some half-baked contractors mess up. They see a smooth finish and think they’re done, so they drive a car over it two hours later. Leave it alone. Check the manufacturer’s instructions, but generally, you want to keep all foot and vehicle traffic off that area until it has fully set. If you disturb it while it’s curing, you’ve just undone every bit of hard work you just put in.
Why Asphalt Crack Filler Application Fails Without Sub Base Integrity
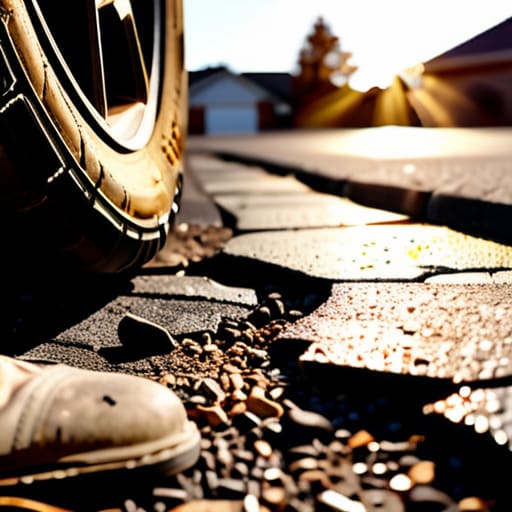
Look, I’ve spent more time than I care to admit watching lads try to fix a problem they don’t actually understand, and it’s a crying shame to see good money wasted on the wrong materials. If you’re still feeling a bit lost about whether your ground is actually stable enough to bother with a repair, or if you just want to hear what other people are dealing with on their own sites, it’s worth having a bit of a look at the Casualmanchester chat. It’s a decent place to get some straight talk from people who aren’t just trying to sell you a bucket of sealant, and sometimes a bit of shared experience is the only thing that stops you from making a costly mistake before you even open the bag.
I’ve seen it a thousand times: a homeowner spends a Saturday afternoon with a bucket of liquid filler, thinking they’ve mastered fixing driveway cracks DIY, only to have that same crack reappear three months later. It’s frustrating to watch, but it’s predictable. If you’re just pouring sealant into a void without looking at what’s underneath, you aren’t repairing anything; you’re just putting a bandage on a broken leg. Most people treat an asphalt crack like a cosmetic issue, but if the ground has shifted or the sub-base has washed away, that crack is a symptom of a deeper movement.
When you’re looking at asphalt crack filler application, you have to understand that the filler is only as good as the stability of the edge it’s sticking to. If the base material is soft or poorly compacted, the pavement will continue to flex and heave with the seasons. No amount of high-end sealant is going to stop a slab from moving if the foundation is a mess. If you don’t address the structural integrity first, you’re just wasting your money and your time.
Choosing Concrete Sealant for Driveways Over Quick Diy Fixes
Now, listen. I see people every week at the local DIY shop buying those little squeeze tubes of “instant fix” sealant, thinking they’ve solved the problem. They haven’t. If you’re looking at fixing driveway cracks DIY style, you’d better understand that a sealant isn’t a structural repair; it’s just a bandage. If you just smear a cheap, brittle bit of bitumen over a wide gap, the first frost or the first heavy delivery van will snap it like a biscuit. You need a high-quality concrete sealant for driveways that actually has some elasticity to it—something that can move with the slab rather than fighting against it.
Most of these off-the-shelf products are designed for cosmetic touch-ups, not for real work. If the crack is wider than a pencil, you shouldn’t be looking for a liquid filler; you should be looking for a backer rod to fill the depth first. If you don’t fill that void, you’re just wasting money on expensive sealant that’ll end up sitting in a useless lump at the bottom of the crack. Don’t mistake a tidy surface for a solid one. If the sealant doesn’t bond properly because you didn’t clean the grit out of the crack first, you’re just setting yourself up for a second job in six months.
Five Things You’re Doing Wrong Before You Even Touch the Crack
- Stop treating the crack like a wound and start treating it like a symptom. If you see a crack, don’t just reach for the filler; look at the ground around it. If the pavement is sinking or tilting, no amount of expensive sealant in the world is going to hold that line. You’re just masking a movement problem that’s going to eat your repair for breakfast.
- Clean it properly or don’t bother at all. I’ve seen lads spend a fortune on high-grade polymer fillers only to watch them peel out two weeks later because they didn’t clear out the grit and the old, crumbling bits. If there’s dust, oil, or loose aggregate in that gap, your new material isn’t bonding—it’s just sitting on top of a pile of rubbish. Get a pressure washer or a stiff wire brush and get it spotless.
- Watch the weather like a hawk. You wouldn’t pour a slab in a downpour, so don’t try to seal a crack when the ground is damp or the temperature is swinging wildly. If you trap moisture inside that crack under a layer of sealant, you’re basically inviting the frost to do the heavy lifting for you. One freeze and that moisture expands, pops your repair right out, and leaves you right back where you started.
- Don’t be stingy with the depth. A common mistake is just skimming the surface to make it look pretty for the neighbors. A proper repair needs depth. You need to get your material down into the heart of the break. If you’re just “painting” the crack with filler, you aren’t repairing anything; you’re just putting a bandage on a broken leg.
- Respect the width. If that crack is wider than a finger, stop looking at DIY bottles of sealant and start thinking about a proper structural fix. Some cracks are too big for a simple liquid filler to bridge reliably. If the gap is massive, you need a backer rod to give the sealant something to sit against, otherwise, it’ll just sink into the void and leave you with a hollow, useless mess.
Don't Just Mask the Problem
Look, if you’ve followed what I’ve said here, you know that fixing a crack isn’t just about finding a bucket of sealant at the local hardware store and slathering it on. You’ve got to look at the whole picture: cleaning out the debris, checking if the sub-base has actually settled, and choosing a filler that isn’t just going to peel off the first time the frost hits. If you skip the prep or ignore the ground underneath, you aren’t repairing anything—you’re just putting a bandage on a broken leg. You can spend a fortune on the fanciest asphalt or concrete compounds in the catalog, but if you haven’t addressed the structural reason that crack opened up in the first place, you’re just throwing money down a drain.
At the end of the day, groundwork isn’t about making things look pretty for the neighbors; it’s about doing the job so you don’t have to do it again in six months. There is a certain kind of pride in a pour or a repair that stands the test of time, even if nobody notices the hard work you put into the layers they can’t see. Stop looking for the quick fix and start looking for the right way. Do the prep, respect the material, and get the foundation solid. That is the only way to ensure that when you walk past that pavement in ten years, you aren’t seeing a spiderweb of cracks, but a job done properly.