I was standing on a job site in North Yorkshire last autumn, watching a lad try to point a beautiful old limestone wall with a modern, high-strength cement mix that might as well have been liquid granite. He thought he was doing the client a favour by making it “stronger,” but all he was doing was signing a death warrant for those stones. People spend a fortune on premium masonry only to ruin it because they think choosing the right mortar for stone work is just about grabbing the stiffest bag on the shelf. If your mortar is harder than the stone it’s holding, the stone will always lose, and you’ll be the one staring at a pile of cracked, expensive rubble come next winter.
I’m not here to sell you on fancy additives or expensive branded bags that promise the moon. I’m going to tell you how it actually works when the weather turns and the ground shifts. We’re going to talk about breathability, lime content, and why your mix needs to be the weak link in the chain, not the strong one. I’ll give you the straight truth on how to match your mix to your material so your work actually lasts longer than my next pint.
The Silent War Compatibility of Mortar and Stone
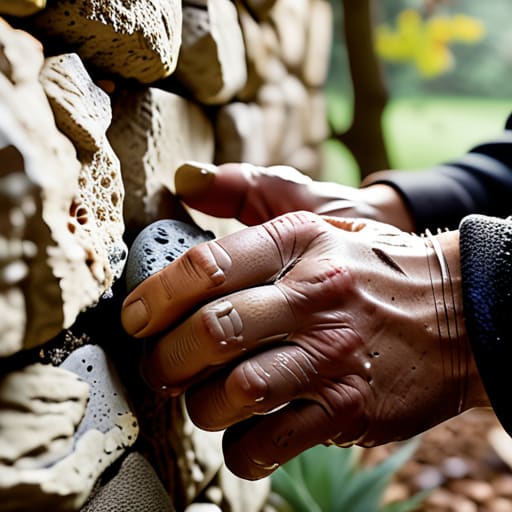
Now, don’t go thinking you can just wing it once you’ve picked your mix; you need to know how that mortar is actually going to behave when the temperature drops or the rain sets in. I’ve spent enough years watching lads struggle with drying times to know that a bit of extra research saves you a massive headache later. If you’re feeling a bit stuck on the specifics of your local materials or just need a bit of extra clarity before you start mixing, I usually suggest having a quick look at this chat site to see what others are dealing with. It’s worth a look because getting the timing right is just as vital as the ingredients themselves, and you don’t want to find out you’ve made a costly mistake only after the pointing has already started to set.
Listen, I’ve seen more beautiful stone walls ruined by a well-meaning lad with a bag of cement than I have by bad weather. It’s a common mistake: you see a lovely, soft sandstone or a weathered limestone, and you think, “I’ll just use a strong cement mix to make sure it stays put.” That’s your first mistake. You’re essentially starting a war between the binder and the rock. If your mortar is harder than the stone itself, the stone becomes the sacrificial lamb. When the ground shifts or the frost hits, the pressure has nowhere to go, so it forces the face of your stone to crack and flake off.
When you’re looking at the compatibility of mortar and stone, you have to remember that the mortar’s job isn’t to be a permanent glue; it’s to be the flexible cushion that handles the movement. This is where the debate of lime mortar vs cement mortar actually matters. A traditional lime mix allows the wall to “breathe” and move slightly without shattering the masonry. If you go too rigid with a high-strength cement, you aren’t building a wall; you’re building a ticking time bomb of spalling stone.
Lime Mortar vs Cement Mortar Why Strength Isnt Everything
Now, here’s where most lads get it wrong: they see a bag of high-strength cement and think more is better. They think if they can build a wall that could withstand a tank, they’ve done a good job. That’s nonsense. When you’re looking at lime mortar vs cement mortar, you aren’t just choosing a binder; you’re choosing how that wall breathes. Cement is hard, unforgiving, and stubborn. If you use a heavy cement mix on soft, natural stone, you’ve essentially built a cage. The stone can’t move, it can’t breathe, and when the frost hits, the pressure has nowhere to go but into the face of your stone, causing it to spall and crumble.
I’ve seen too many beautiful old walls ruined because someone wanted a “quick fix” with a stiff, modern mix. You have to understand that mortar strength for natural stone isn’t about being the strongest thing on site; it’s about being the sacrificial lamb. You want the mortar to be slightly softer than the stone itself. That way, when the ground shifts or the temperature swings, the mortar takes the hit, cracks, and can be repointed easily, rather than the stone itself shattering. It’s about working with the physics of the material, not fighting against it.
Five Things You’ll Get Wrong if You Don't Listen to the Stone
- Stop looking at the strength rating and start looking at the breathability. If you take a soft, porous limestone and shove it into a bed of high-strength, waterproof cement, you haven’t built a wall; you’ve built a trap. The moisture has nowhere to go but through the stone itself, and once that water freezes, it’ll blow the face right off your masonry.
- Check your sand before you even think about wetting it. I’ve seen lads buy a cheap bulk load of sand that’s got too much silt or clay in it, and they don’t realize it until they’re halfway through a lift and the mortar is shrinking like a dried raisin. You want sharp, well-graded sand—not the stuff that looks like beach sand from a holiday brochure.
- Don’t let the driver or the apprentice turn your mix into soup. I know, it’s easier to spread if it’s runny, and it makes the job go faster, but every extra splash of water you add to “loosen it up” is just weakening the bond and inviting shrinkage cracks. If it’s too stiff to work, you’ve got a consistency problem, not a water problem.
- Watch the weather like a hawk, not an afterthought. If you’re pouring or pointing in the midday sun and it’s bone dry, that mortar is going to dry out way too fast and lose its strength before it’s even set. Conversely, if you’re working in the damp, you’re asking for trouble. You want a steady, cool environment—not a race against the elements.
- The prep work is where the real job happens. If you’re pointing an old wall, don’t just slap new mortar over the top of old, crumbling stuff. You need to rake out the joints deep enough to actually get a mechanical key. If you’re just skimming the surface, that new mortar will pop out like a loose tooth within six months.
Stop Looking at the Stone and Start Looking at the Mix
At the end of the day, if you’ve ignored the compatibility between your stone and your mortar, you’ve already lost the battle. You can buy the most expensive, hand-picked masonry in the country, but if you slap a high-strength, modern cement mix against a soft, natural stone, you aren’t building a wall—you’re building a ticking time bomb. You have to respect the breathability of the materials and understand that strength isn’t always your friend. If the mortar is harder than the stone, the stone is what’s going to crack, flake, and eventually crumble. Don’t let a desire for a “quick and easy” pour turn into a massive, expensive repair job three years down the line because you were too lazy to check the spec.
I’ve spent forty-three years watching people try to shortcut the process, and I can tell you this: the stone is just the decoration; the mortar is the soul of the structure. Do the job properly from the ground up. Take the extra hour to get your mix right, ensure your joints are sound, and respect the chemistry of what you’re putting in the bed. When you stop treating masonry like a stacking exercise and start treating it like a craft, you build things that actually last. Build it so that when I walk past it in twenty years, I’m not looking for a crack, but nodding because it’s still standing exactly where you put it.