
I’ve spent forty-three years watching people spend a fortune on fancy facing bricks and decorative stone, only to see that same wall lean like a drunkard by the second autumn. Most people think a complete guide to garden walls should be all about picking the right colour or the prettiest pattern, but they’ve got it backwards. I remember a job back in ’98 where a lad tried to save a few quid by skipping the proper footing, thinking the weight of the bricks would just “settle” into the soil. Three months later, I was called back to look at a crack that looked like it had been hit by a sledgehammer. It wasn’t the bricks that failed; it was the unseen mess underneath them.
If you’re tired of seeing “expert” advice that ignores the reality of mud, frost, and shifting ground, you’re in the right place. In this complete guide to garden walls, I’m not going to waste your time with Pinterest aesthetics or fancy terminology that doesn’t mean a thing once the rain starts falling. I’m going to show you how to get the sub-base right, how to manage your mortar so it doesn’t turn to dust, and why the foundation is the only part of the job that actually matters.
Table of Contents
Guide Overview
Tools & Supplies
- Shovel and spade for digging trenches
- Spirit level to ensure vertical and horizontal accuracy
- Rubber mallet for setting blocks/stones
- Wheelbarrow for transporting heavy materials
- Tape measure for precise layout
- Retaining wall blocks or bricks (quantity based on linear footage)
- All-purpose sand for leveling the base
- Crushed stone or gravel for drainage layer
- Landscape fabric to prevent soil migration
- Drainage pipe for water management
Step-by-Step Instructions
- 1. First thing you do—and if you skip this, don’t bother calling me when it leans—is get your feet under the ground. You aren’t just building a wall; you’re building a foundation. Dig your trench out deeper than you think you need to, usually at least 300mm to 450mm depending on what you’re building with, and make sure the bottom is dead level and compacted. If you try to build a wall on soft, loose soil, you might as well be building it on a sponge; it’ll move, and when it moves, the bricks will follow.
- 2. Once you’ve got your trench, you need to lay your sub-base. I’m talking about a solid layer of MOT Type 1, not some cheap rubbish or garden soil. Spread it out in layers and use a plate compactor to get it rock hard. You want to see that sub-base behaving like a single, solid unit. If you just dump a pile of stone in the hole and start pouring, you’re just asking for settlement cracks six months down the line.
- 3. Now we get to the concrete. Pour your footing into that compacted trench, but listen to me: do not let some lad on site start adding water to the mix just because it’s “too stiff” to work with. That’s the fastest way to ruin the strength of the whole base. Level it off with a straight edge, and once it’s set, you’ve got yourself a proper structural platform. It won’t look pretty, and nobody’s going to take a photo of it, but that’s where the real work happens.
- 4. When the footing is ready, it’s time to get the first course of bricks or blocks down. This is where most people get sloppy. You need to use a proper mortar mix—usually a 4:1 sand to cement ratio—and you’ve got to ensure your corners are perfectly plumb. If your corners are out by even a fraction, that error is going to travel all the way up the wall, and by the time you reach the top, you’ll be looking at a leaning mess that’s impossible to fix.
- 5. As you go up, keep a constant eye on your levels and your lines. Use a string line to keep your courses straight, and don’t be afraid to take the time to tap a brick into place until it’s exactly where it needs to be. A wall is only as good as its weakest joint, so make sure your mortar is consistent. If the weather turns cold, get some polythene over it; you don’t want the frost getting into your fresh mortar and turning it into dust before it’s even had a chance to cure.
- 6. If you’re building a wall longer than a few meters, you’ve got to think about movement. You can’t just build one long, continuous line of masonry and expect it to stay put. You need to incorporate movement joints at regular intervals. These gaps allow the wall to expand and contract with the temperature changes. If you ignore this, the wall will eventually crack itself apart just trying to breathe, and no amount of pointing will save it.
- 7. Finally, once the wall is up, don’t just walk away. You need to finish the top, whether that’s with coping stones or a weathered brick course. This isn’t just for looks; it’s to keep the rain from soaking into the core of the wall. If you let water sit on top of your masonry, it’ll find its way into the joints, freeze, and blow the face off your wall come winter. Do it right the first time, and you won’t be calling me to fix it later.
Ignoring the Ground Retaining Wall Construction Steps That Matter
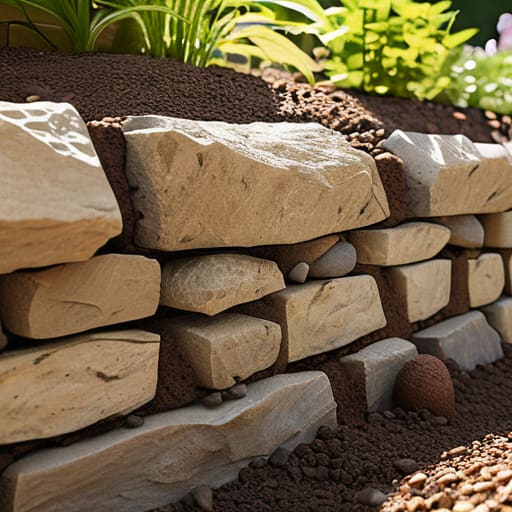
You can spend a fortune on fancy facing bricks or hand-picked stone, but if you’re building a retaining wall, all that’s just window dressing. Most people get caught up in the debate of brick vs stone garden walls because they want to know what looks best in a photo. I don’t care about the photo; I care about what’s happening six inches below the surface. If you’re building against a slope, you aren’t just stacking blocks; you are fighting the weight of the earth. If that soil gets saturated and you haven’t accounted for it, that wall isn’t going anywhere but downhill.
The most overlooked part of proper retaining wall construction steps is what happens behind the masonry. You need to think about hydrostatic pressure—that’s the water weight building up behind your wall like a slow-motion explosion. If you don’t install decent wall drainage solutions, like a proper gravel backfill and a perforated pipe, the water will find the weakest point. And let me tell you, the weakest point is usually the very joint you thought was solid. Don’t skip the drainage, or you’ll be tearing that wall down in three years.
Brick vs Stone Garden Walls Choosing Your Burden Correctly
Now, once you’ve actually sorted your sub-base—and I mean actually sorted it, not just raked some topsoil flat—you’ve got to decide what you’re actually putting on top of it. People get caught up in the aesthetics of brick vs stone garden walls, but they forget that every material carries a different kind of weight and a different set of headaches. Bricks are predictable. You know how they behave, you know how the mortar wants to sit, and they’re easy to keep level. But stone? Stone is a different beast entirely. It’s beautiful, sure, but if you aren’t prepared for the sheer physical labour and the variation in thickness, you’re going to end up with a wall that looks like it’s melting halfway through.
My advice is to look at the job before you buy the materials. If you’re building something high, you need to be mindful of garden wall height regulations and the massive amount of mass you’re putting on that footing. A stone wall is heavy—heavier than brick—which means your foundation has to be even more unforgiving. If you choose stone, don’t expect to breeze through it with standard mortar and masonry techniques; you’ll be spending more time shaping and fitting than you would with a neat stack of clay bricks. Pick the material that matches your ability to do the work, not just what looks good in a brochure.
Five Things They Won't Tell You Until the Wall Starts Leaning
- Stop obsessing over the mortar colour and look at your drainage. If you’re building a retaining wall and you haven’t planned for weep holes or a proper gravel backfill, you aren’t building a wall—you’re building a dam. Eventually, the water pressure will win, and your wall will go tumbling down.
- Don’t let a driver talk you into adding water to the mix to make it “workable.” I’ve seen it a thousand times: some lad wants to spread the concrete faster, so he splashes a bucket in, thinks he’s being clever, and then wonders why the finished slab is brittle and full of shrinkage cracks. You want a workable mix, you order a different slump; you don’t ruin the strength by watering it down on site.
- Watch the weather like a hawk. If you’re pouring in the heat of summer, you’d better have a plan to keep that concrete damp and shaded, or it’ll cure too fast and crack like a dried riverbed. Conversely, if you’re pouring in a frost, that water in the mix is going to expand and tear your work apart from the inside before it’s even set.
- Get your expansion joints right the first time. A wall isn’t a solid, unmoving object; it’s going to move, expand, and contract with the seasons. If you don’t give it a place to go by placing joints at the correct intervals, the wall will decide where the cracks go for you, and it won’t be pretty.
- Check your footings twice. I don’t care how expensive your facing bricks are; if your concrete footing isn’t deep enough or hasn’t been poured onto a properly compacted sub-base, you’re just setting a timer on a disaster. A wall is only as good as the ground it’s sitting on, and once it starts to sink unevenly, there’s no fixing it without tearing the whole lot down.
Don't Waste Your Time on a Doomed Build
Look, if you’ve followed what I’ve said here, you already know that a garden wall isn’t just about picking out some fancy facing bricks or a nice bit of limestone to show off to the neighbours. It’s a sequence. If you skip the proper compaction of your sub-base, or if you get lazy with your drainage because you think “it’ll be fine,” you’re just building a future headache. You’ve got to respect the materials, choose the right masonry for the load you’re putting on it, and for heaven’s sake, don’t go adding water to your mix just to make it spread easier. If you get the foundation and the footing right, the rest of the job is just following the plan.
At the end of the day, a wall should be something you can walk past twenty years from now and still feel proud of, not something you’re constantly pointing at because of a growing crack. There is a massive amount of satisfaction in doing a job properly—the kind of job where you don’t have to go back and fix it six months later. Stop looking for the easy way out and start focusing on the unseen work. Build it once, build it right, and let the ground hold your weight.
Frequently Asked Questions
How deep does my footing actually need to be before the frost starts cracking my mortar?
Look, if you’re asking me about mortar, you’ve already missed the point. Mortar doesn’t crack because of the frost; the frost cracks the wall because your footing is sitting in the active freeze-thaw zone. You need to get that concrete down below the frost line—and I’m not talking about a shallow trench. Dig deep enough so the base is sitting in stable, undisturbed ground that isn’t going to heave when the temperature drops.
If I’m building on a slope, how much extra work am I looking at for the sub-base and drainage?
You’re looking at double the work, and if you try to shortcut it, you’re just building a future landslide. On a slope, you aren’t just laying a base; you’re building a terrace. You’ll need much deeper excavations for stepped footings to prevent the wall from sliding downhill. More importantly, you need a serious drainage plan—we’re talking heavy-duty hardcore and a proper French drain behind the wall. If that water has nowhere to go, it’ll push your wall right over.
When exactly should I be looking for expansion joints, and how many can't I skip if I want this to last ten years?
You should be looking for expansion joints before you even think about laying the first course. If you wait until the wall is up to figure it out, you’ve already lost. For a standard garden wall, don’t even dream of skipping a joint every two to three metres. If you try to build a long, continuous run without them, the thermal movement will find the weakest point—and it’ll be a crack right through your masonry.



