I spent forty-three years watching men pour money down the drain because they thought a crack was just a surface problem. I’ve stood on sites where a homeowner was ready to rip out an entire driveway, convinced they needed a brand-new slab, when all they really needed was to understand why the ground beneath it had given up the ghost. Most people come looking for a complete guide to concrete repair thinking they just need a bit of filler and a trowel, but if you don’t address the root cause—be it a botched sub-base, botched joints, or a mix that was watered down on a hot afternoon—you’re just painting over a corpse.
I’m not here to sell you fancy resins or tell you that a quick patch will last a decade. In this guide, I’m going to strip away the nonsense and show you how to actually fix things so they stay fixed. We’re going to look at how to diagnose the real failure, how to prep the area properly, and why the stuff you do before you even touch the crack is more important than the repair itself. I’ll give you the straight truth on what works, what’s a waste of time, and how to avoid the mistakes that I spent four decades seeing play out on site.
Table of Contents
Guide Overview
Tools & Supplies
- Hammer and chisel to remove loose debris
- Wire brush to clean the surface
- Trowel or putty knife for smoothing
- Pressure washer or garden hose for cleaning
- Concrete patch compound (1-2 bags/containers depending on size)
- Concrete bonding agent (1 quart)
- Sandpaper or grinding stone for smoothing edges
Step-by-Step Instructions
- 1. First thing you do is stop looking at the crack and start investigating the cause. If you just slap some resin over a crack that’s still moving because the ground underneath is settling, you’re just painting over a disaster. Get a screwdriver or a small hammer and tap around the edges; if it sounds hollow, you’ve got a sub-base issue, and no amount of patching is going to fix a void under the slab.
- 2. Once you’ve confirmed the movement has actually stopped, you need to clean it out properly. I’ve seen lads try to fill a crack that’s still full of grit, old moss, and loose dust, and it’s a waste of good material. Get a stiff wire brush and a compressed air line—or even a shop vac—and get that gap spotless so the repair material actually has something to grab onto.
- 3. If the crack is wide or deep, you can’t just pour liquid filler into it and hope for the best. You need to install a backer rod first. This is a foam rope you jam into the gap to give the repair material a solid foundation and to control how deep the stuff goes. If you don’t use a backer rod, the filler will just sink into the void like a stone in a pond, and you’ll end up wasting money on expensive resins.
- 4. Now you choose your weapon, and this depends entirely on whether you’re fixing a hairline fracture or a proper structural split. For small stuff, a high-quality epoxy resin is fine, but for larger, more exposed areas, you’ll want a polymer-modified repair mortar. Make sure you mix it exactly to the manufacturer’s spec; if you see someone adding a splash of water to the mix just to make it “easier to spread,” walk away immediately.
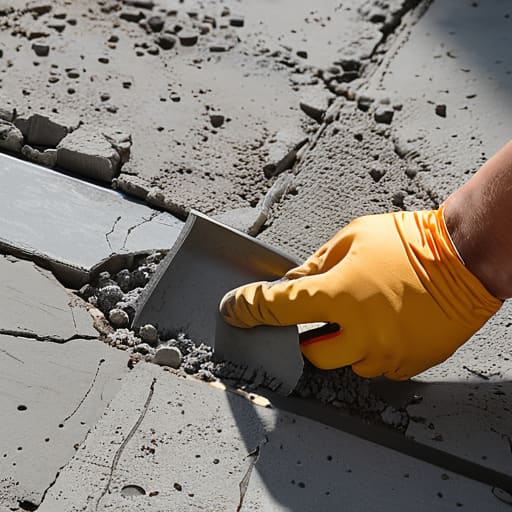
- 5. When you’re applying the material, you have to work it deep into the joint. Don’t just skim it over the top like you’re icing a cake. Use a putty knife or a specialized trowel to press the mortar down into the crack, ensuring there are no air pockets trapped underneath. If you leave an air gap, that’s where the water will get in come winter, freeze, and blow your repair right back out.
- 6. Once the filler is in, you need to finish the surface so it doesn’t look like a scar. Use a steel trowel to smooth it out until it’s flush with the surrounding concrete, but don’t overwork it. If you keep trowelling a wet mix for too long, you’ll bring too much “fines” to the surface and create a weak, dusty layer that will flake off in six months.
- 7. The final, and most ignored, step is controlled curing. You can’t just walk away and leave it to the mercy of the sun and wind. If it’s a hot day, cover your repair with a damp burlap sack or a plastic sheet to keep the moisture in. If the concrete dries out too fast, it shrinks, it cracks, and you’re right back where you started—fixing the same mistake twice.
Structural Concrete Damage Assessment Looking Beneath the Surface
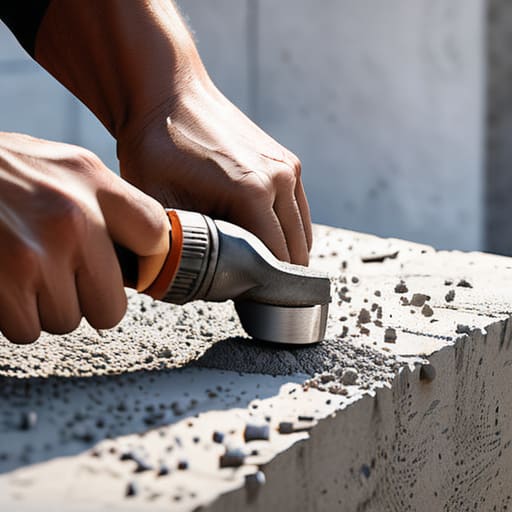
Before you go grabbing a bucket of mortar and trying to mask the problem, you need to perform a proper structural concrete damage assessment. Most lads see a crack and think it’s just a cosmetic nuisance, but you have to look deeper. Take a hammer and give the area a light tap. If it sounds hollow—like you’re knocking on a drum—you’ve got delamination. That means the bond between the concrete and whatever is underneath has already let go. If you just slap some filler on top of a hollow patch, you’re just painting over a rot; the failure will find its way back to the surface before the month is out.
You also need to figure out if that crack is “alive” or “dead.” A dead crack is just a shrinkage issue from when the slab was young. An alive crack is moving because the ground beneath it is shifting or the sub-base has failed. If you’re looking at serious structural movement, simple patching concrete surfaces won’t cut it. You’ll likely need to look into professional epoxy injection methods to actually bind that crack back together. Don’t waste your time and money fixing the skin if the bones are broken.
Epoxy Injection Methods and Patching Concrete Surfaces the Right Way
Now, once you’ve finished your structural concrete damage assessment and you know for a fact the movement has stopped, you can start talking about fixing the actual gap. Most lads see a crack and think they can just smear some mortar over it like they’re icing a cake. That’s a fool’s errand. If it’s a structural crack, you need to be looking at epoxy injection methods to actually knit that material back together. You aren’t just filling a hole; you’re trying to restore the monolithic strength of the slab. You drill your ports, you clean the dust out—and I mean really clean it—and you inject that resin until it pushes out the other side. If you don’t get the pressure right, you’re just leaving air pockets, and those pockets will find a way to crack again come winter.
When it comes to patching concrete surfaces, don’t go grabbing the cheapest bucket of pre-mix from the local DIY shop. If you’re trying to stop the rot, you need a repair mortar that actually bonds to the old substrate. A lot of people try to skip the preparation, but if you don’t chip back to sound concrete and get a clean, profiled edge, your patch will pop off in six months. Proper preparation is the difference between a permanent fix and a wasted afternoon.
Five Things You’re Likely Skipping While You’re Busy Patching Cracks
- Stop ignoring the sub-base; if you patch a crack on a slab that’s sitting on soft, uncompacted dirt, you’re just putting a bandage on a broken leg—that crack will be back before the patch is even fully cured.
- Clean the hell out of the wound; I’ve seen lads try to shove epoxy into a crack that’s still full of dust and loose grit, and it’s a waste of good material because nothing is going to bond to dirt.
- Watch the weather like a hawk; if you’re repairing a surface and the sun is beating down or the wind is drying it out too fast, you’re going to get shrinkage cracks in your new repair before you’ve even walked away from it.
- Don’t go chasing the “easy” mix; if you’re adding water to a repair mortar just to make it spread easier, you’re ruining the strength-to-water ratio and inviting the whole thing to flake off in six months.
- Respect the joints; if you see a crack that’s actually a failed expansion joint, don’t try to “fix” it with filler—you need to address why the joint wasn’t deep enough or why the material used didn’t allow for the movement.
The Hard Truth About Making it Last
At the end of the day, repairing concrete isn’t about slapping some grey paste over a crack and calling it a day. If you’ve followed what I’ve said, you know that you can’t fix a structural failure without first addressing the root cause. Whether you’re injecting epoxy into a deep fissure or patching a surface that’s been chewed up by frost, you have to respect the sequence. You check the sub-base, you prep the edges of the break, and you ensure the environment is right for the cure. If you skip the prep work or try to hide a sinking foundation with a fancy finish, you aren’t repairing anything—you’re just delaying the inevitable until the next heavy rain or frost cycle comes along to tear it all apart again.
I’ve spent forty-three years watching people try to take shortcuts, and I’ve seen those shortcuts crumble every single time. It’s easy to get impatient when the weather is turning or the client is breathing down your neck, but concrete doesn’t care about your schedule; it only cares about the physics of the pour and the stability of the ground. Do the job right, do it slow, and respect the material. If you focus on the things most people ignore—the sub-base, the curing, and the joints—you won’t just be fixing a slab; you’ll be building something that actually stays put.
Frequently Asked Questions
If I’ve already patched the surface cracks but the slab still feels bouncy or uneven, does that mean the sub-base has completely washed out?
Not necessarily “completely” washed out, but you’ve definitely got a void problem. If you’ve patched the top and it’s still bouncing, you’re essentially walking on a hollow shell. The concrete is fine, but it’s lost its footing. You’ve likely got a pocket of soft soil or a washout underneath that’s lost its compaction. Patching the surface is just putting a bandage on a broken leg; you need to address what’s supporting that slab before it snaps.
How do I know if a crack is just a cosmetic surface fault or if it’s a structural failure that means I need to rip the whole thing out and start again?
Look, if it’s a hairline crack that follows the surface like a scratch, you can likely patch it and move on. But if that crack is wider than a tenner, or if it’s running deep through the whole slab, you’ve got a problem. Watch the movement. If you see daylight through it or if the slab is actually sinking or tilting, stop messing about with epoxy. That’s not a cosmetic fault; that’s the ground giving up.
Is it worth trying to save an old pour if I know the original contractor added too much water to the mix on the day it was laid?
Look, if you know for a fact they were “souping it up” with the hose to make it easier to spread, you’re already fighting a losing battle. Adding water kills the water-cement ratio; it creates a honeycomb structure of microscopic voids that’ll never be right. If it’s just a cosmetic surface issue, maybe you can patch it. But if the whole slab is weak and porous? Save your money. Rip it out and start again.



